


ESSENTIAL TOOLS REQUIRED ON THE JOB
I must have made it pretty darned clear over the years that when working on your Mini on anything that requires it off the ground, it is imperative you place it on axle stands to avoid the hazard of the jack loosing pressure or the Mini falling off it due to being unbalanced.
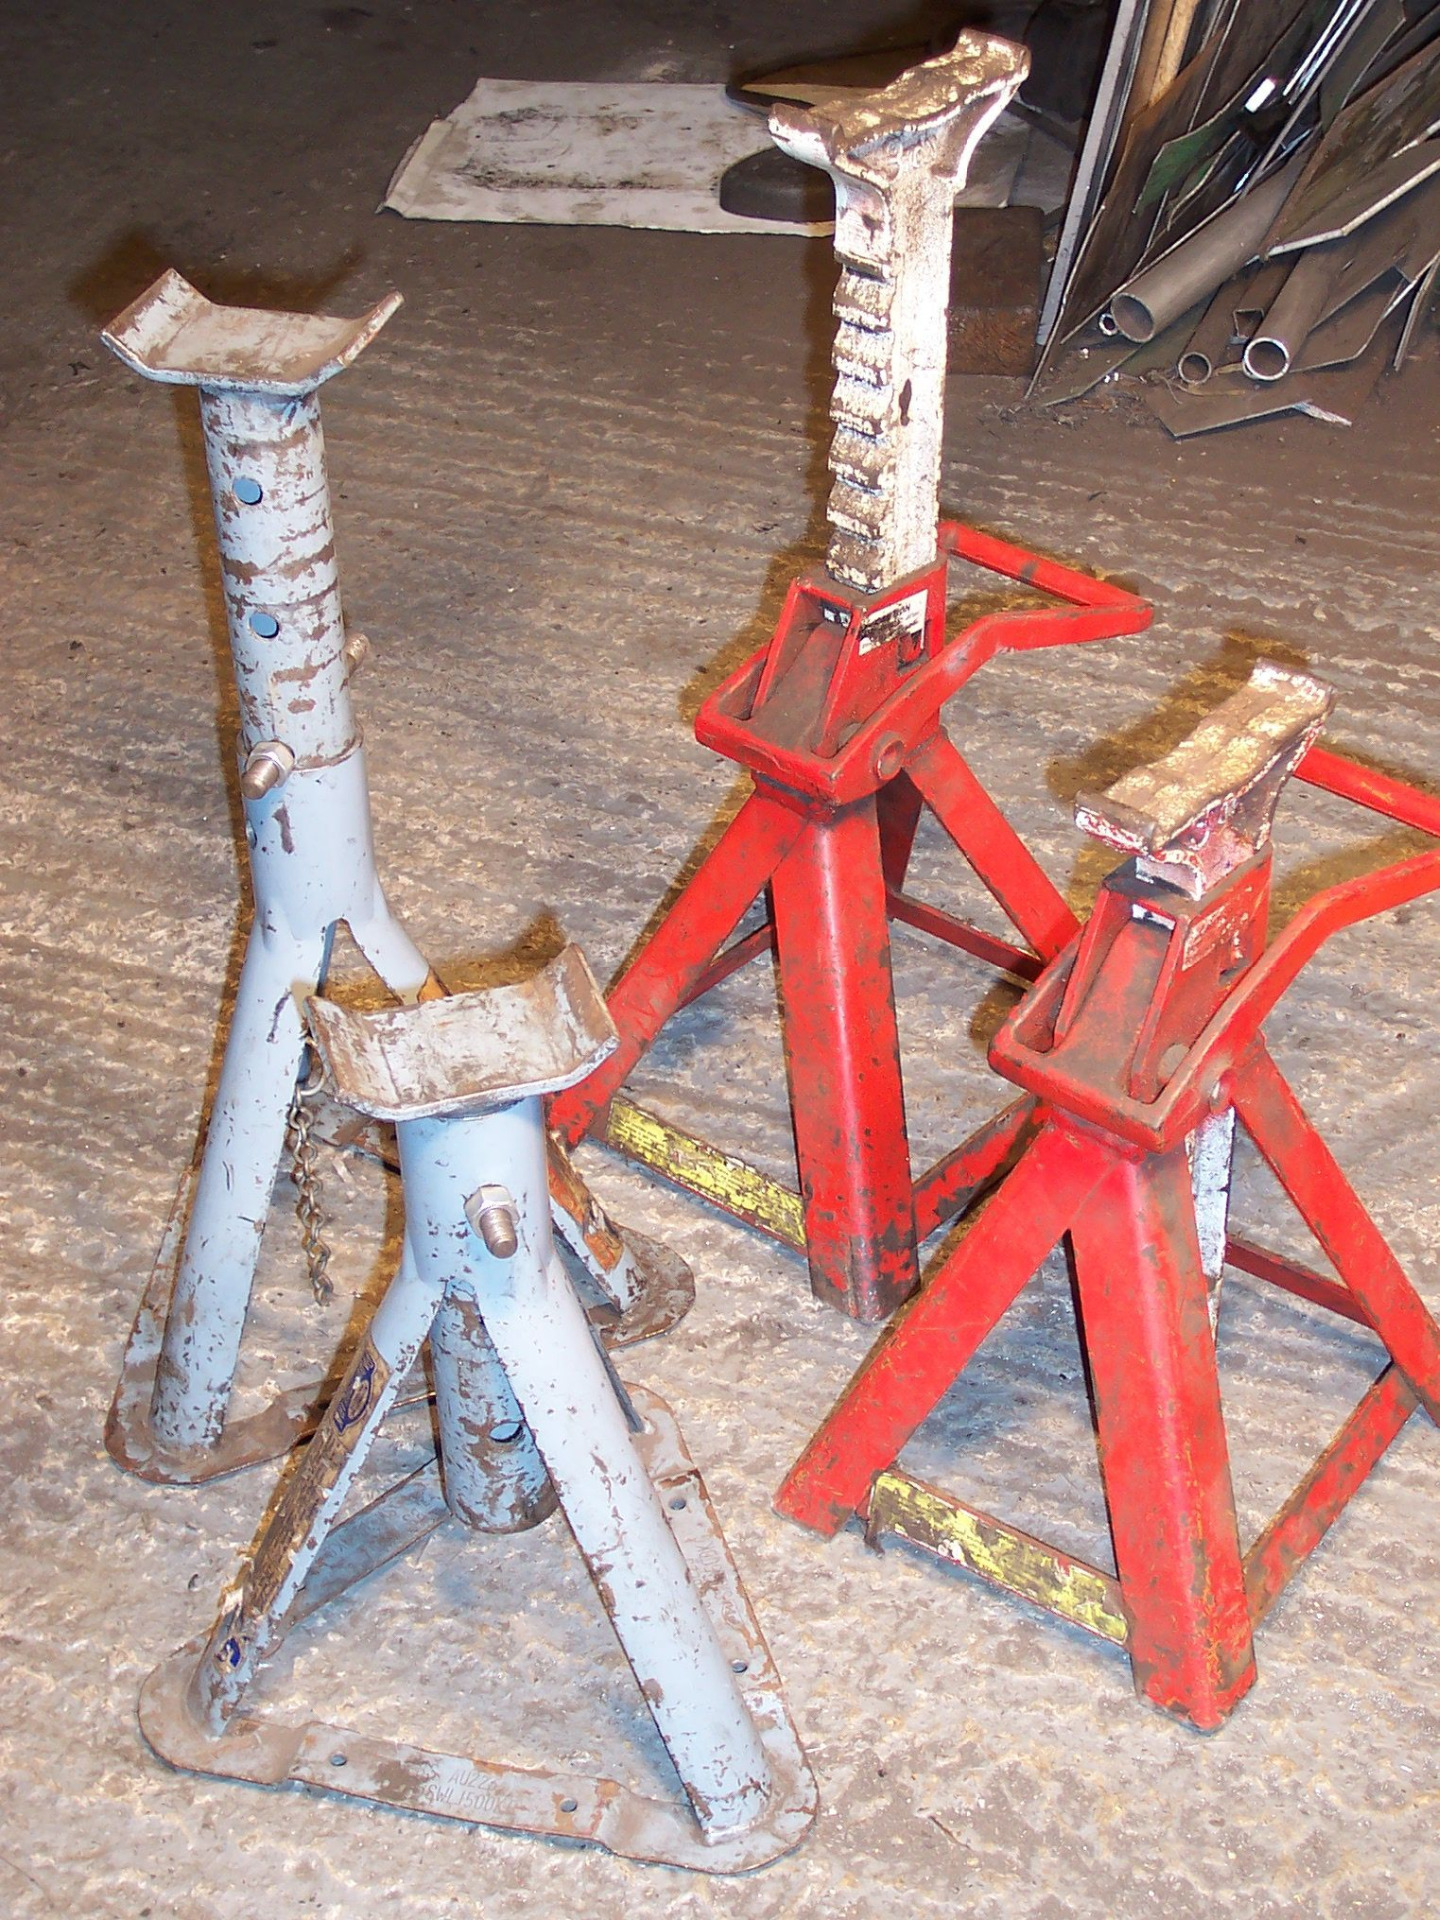
I have thus far omitted axle stands from the 'Essential Tools' item – which is mad considering their importance for many maintenance/repair jobs. So – without further a-do I bring you axle stands as an essential tool! There is an absolute plethora of axle stand makes/designs on the market and at what seems ludicrously low levels of cost. However, I strongly advise you buy the best you can.
The stands in the pic are those I use personally. The red/white ones on the right are from Snap-On and are very heavily constructed and rated at 2 tons. Over the top for the Mini perhaps at around a ton, but they are extremely sturdy. The grey ones on the left are some much cheaper ones bought eons ago from an automotive spares shop. I bought them because I liked the design and the sturdy construction, especially with the 'plinth' plate underneath the legs.
This prevents them from sinking in to soft surfaces.
Make sure you buy stands of a similar design – with some form of bracing between the legs to prevent them from spreading/collapsing at an inopportune moment, the lower down the bracing the better. And of course rated at at least 1 ton each to ensure a safe working weight.
Height adjustment needs to be strong as well – the Snap-on ones use a ratchet type with heavy duty forged yokes, the others pins through the yoke/stand. The originals went walkies along time ago so I substituted them with short head studs. More than up to the job.
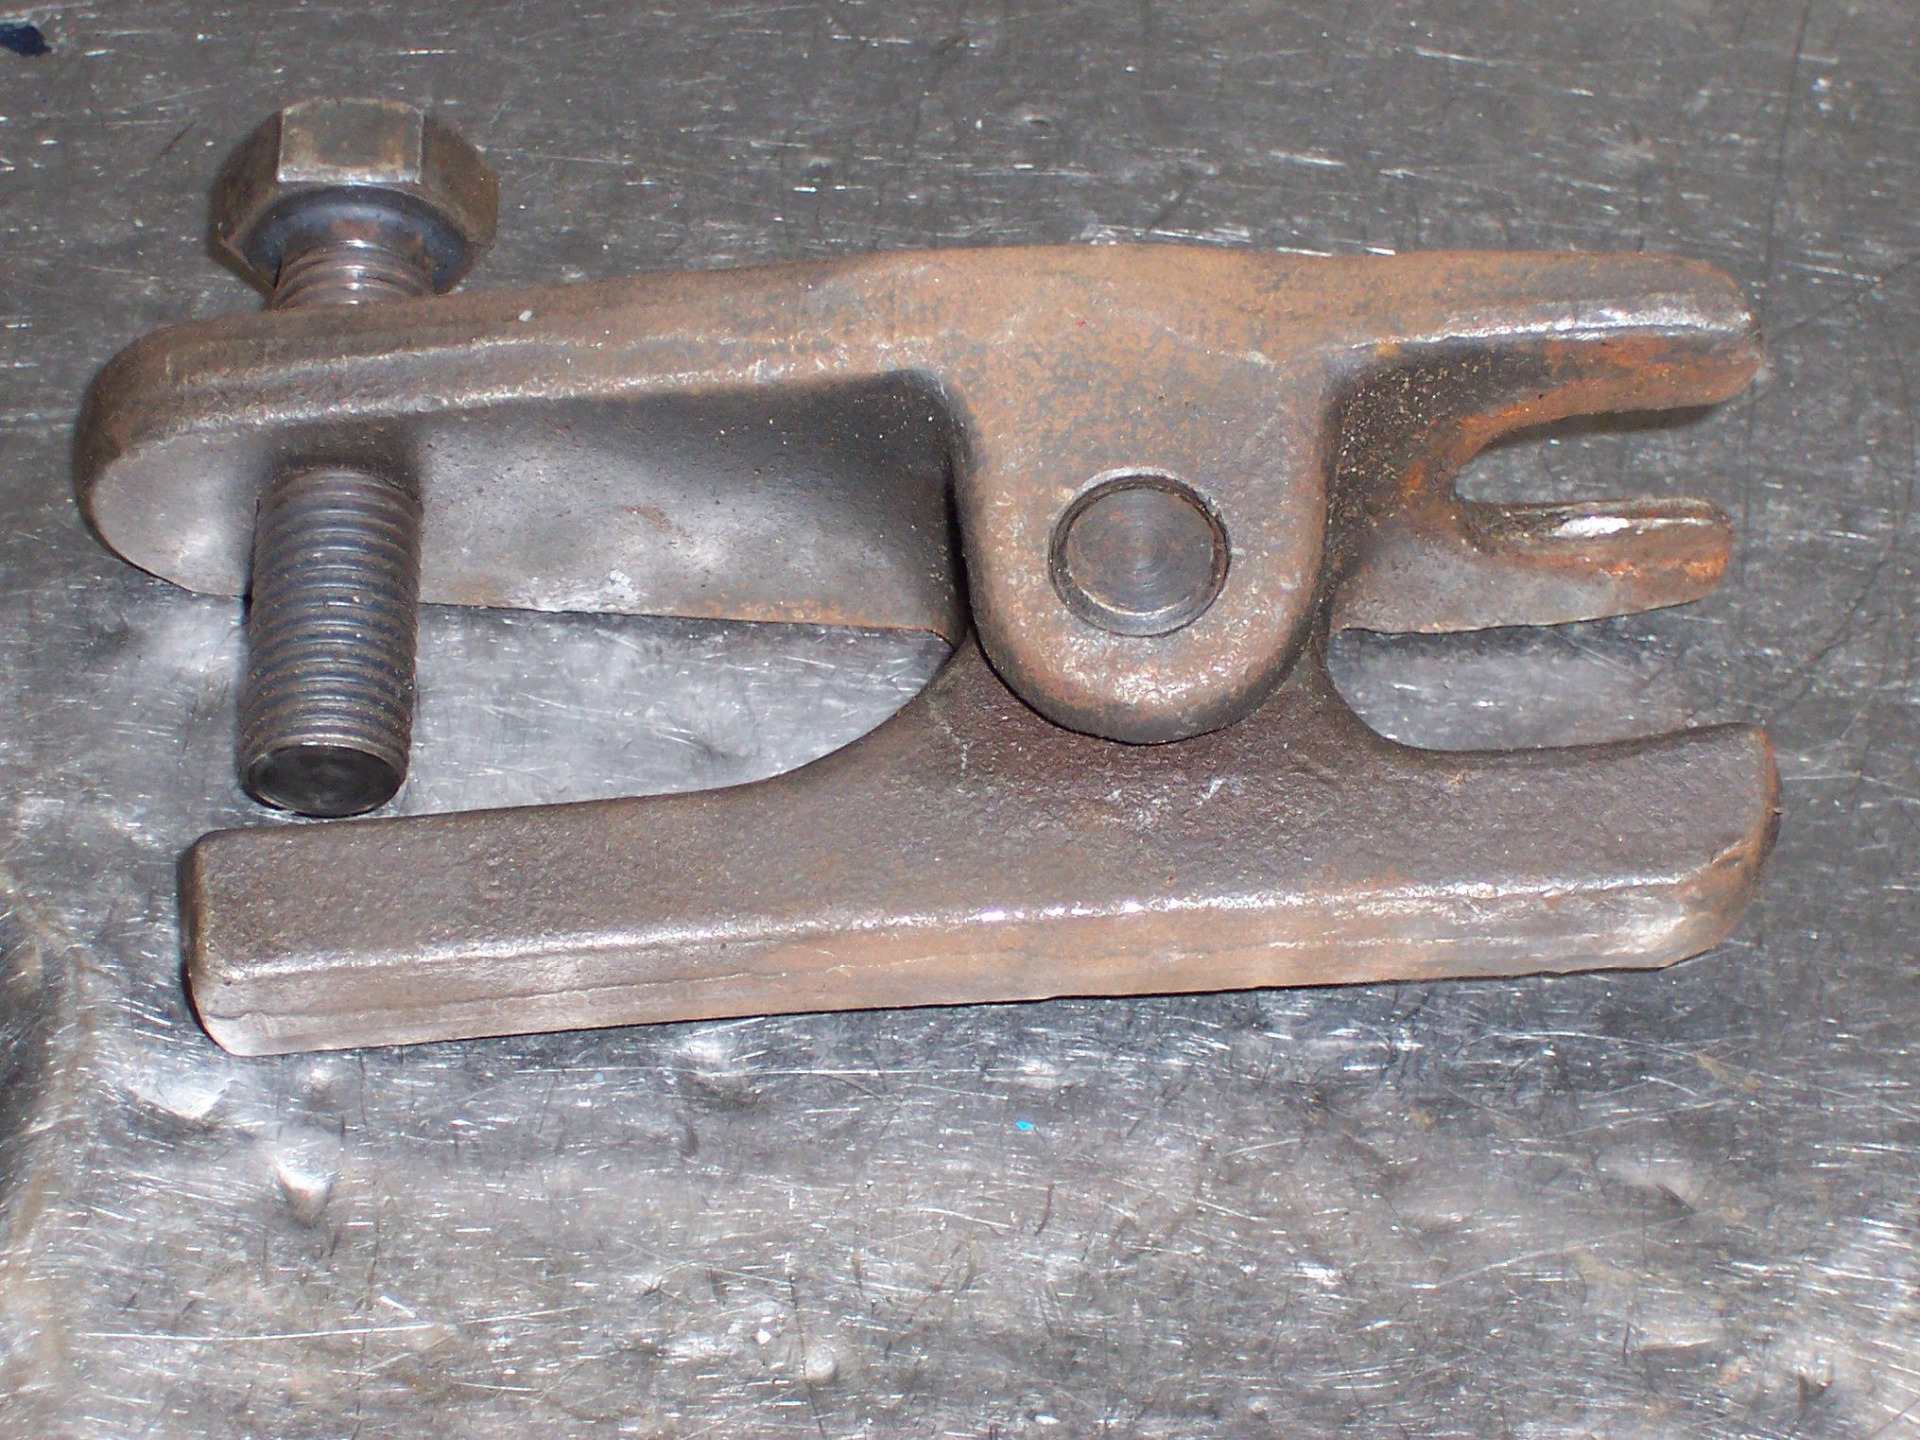
The Mini's front suspension sees a very hard life with the combined forces of steering, drive and braking put through the front wheels.
Add to that the short suspension arms and very stiff springs and something like 60% of the car's weight at the front and it's little wonder the ball joints/swivel pins that mount the hub to the suspension arms wear quicker than most. Regular servicing is an absolute must for longevity – this can be as little as a regular greasing (all too often over looked by many) to re-shimming or replacement. This scissor-type ball joint splitter is a must for all DIY Mini owners. It is very strong and can split the joints without damaging the dust covers so has a big advantage over the 'fork' type you have to pound on with a big hammer. Available from most Mini parts specialists.
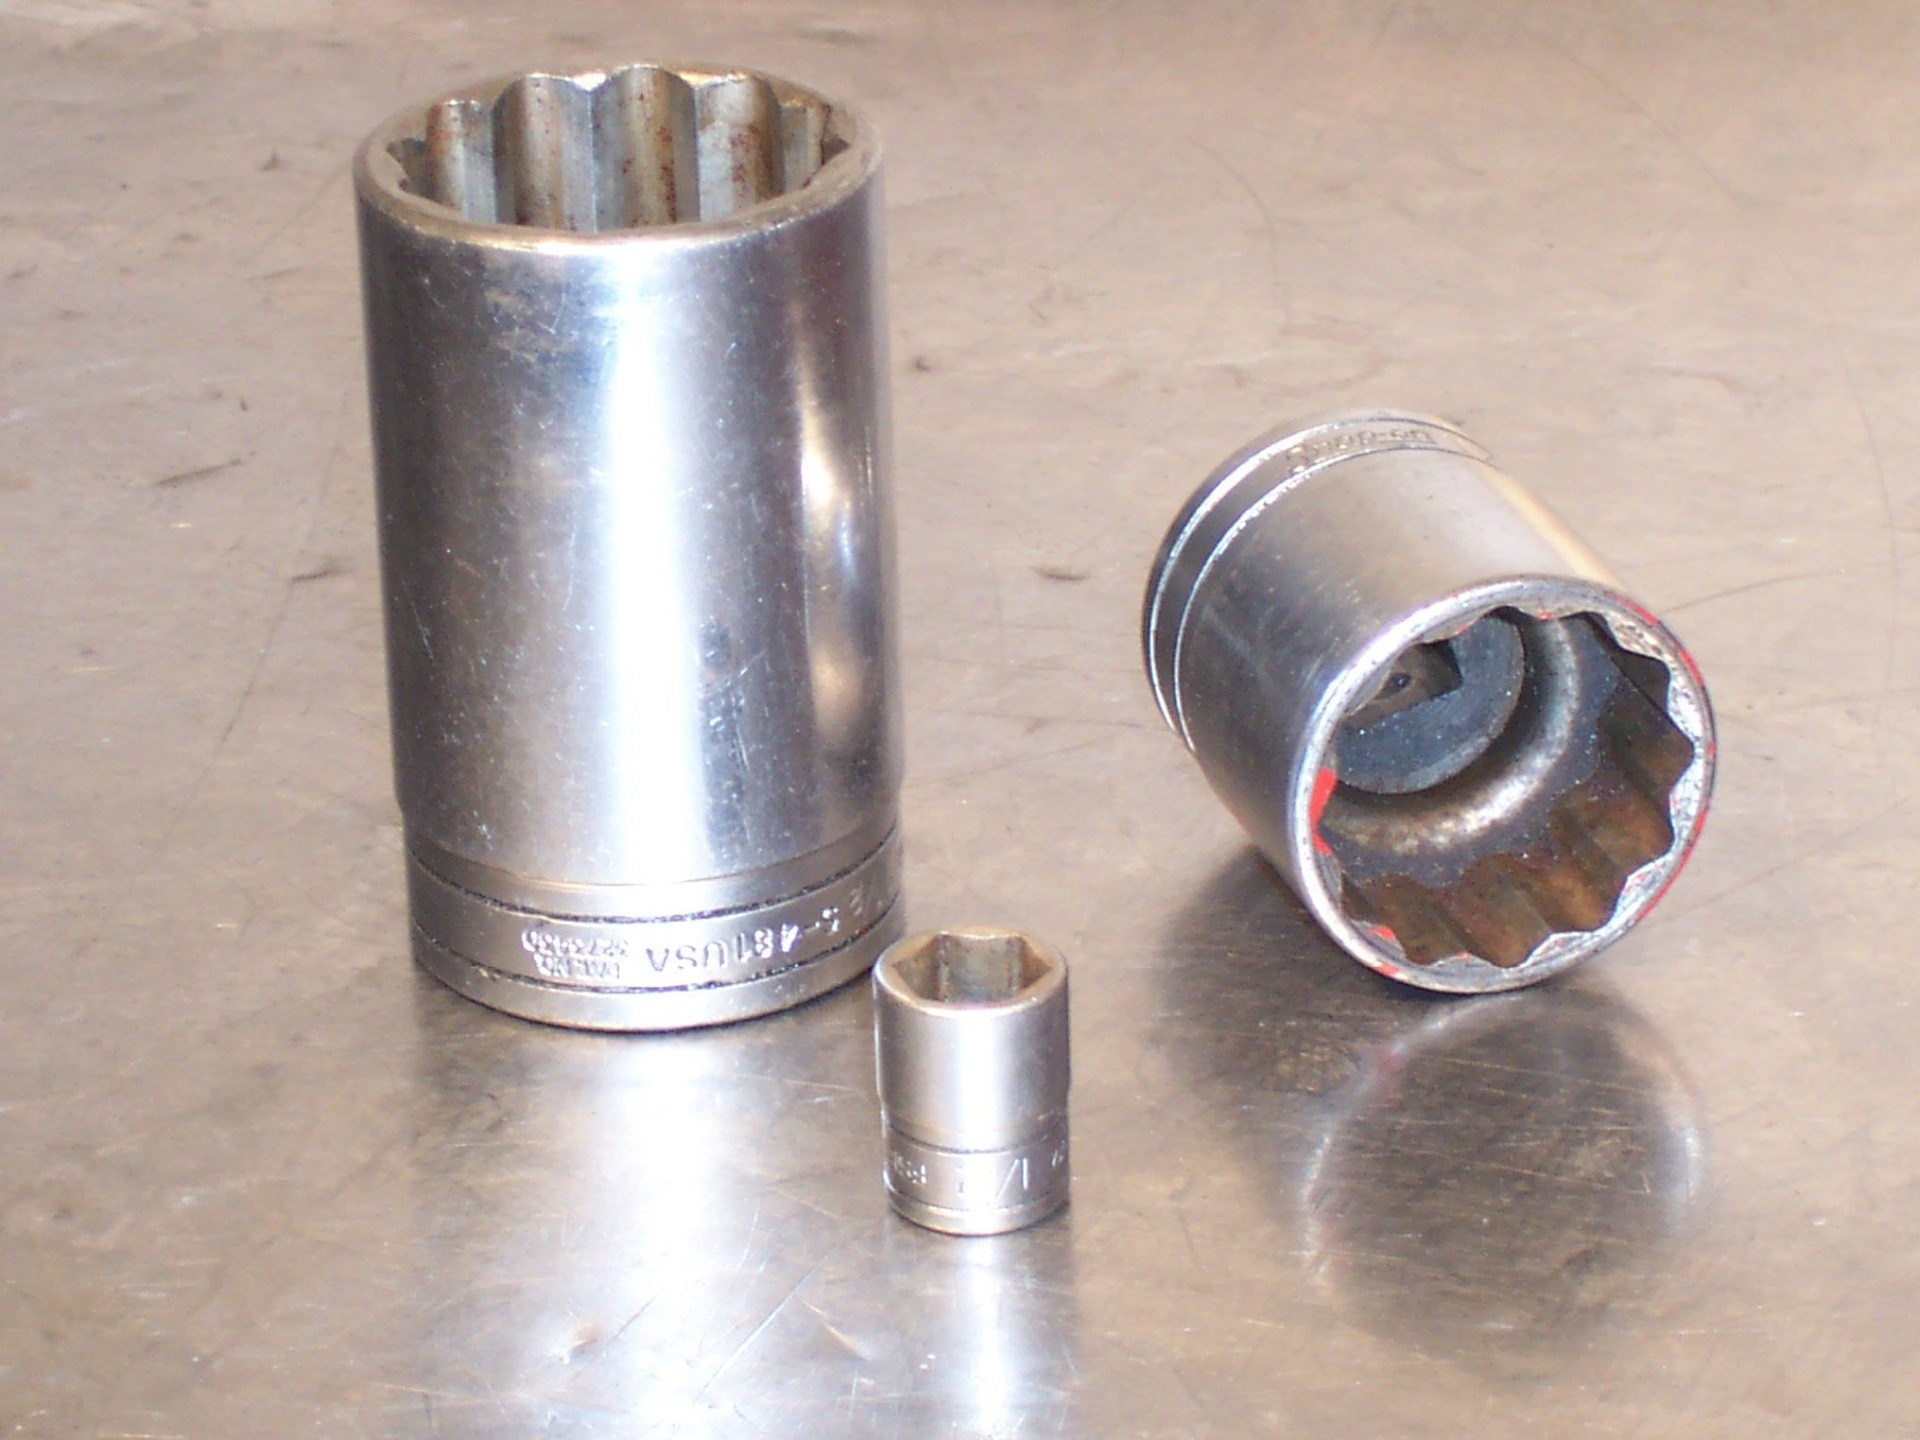
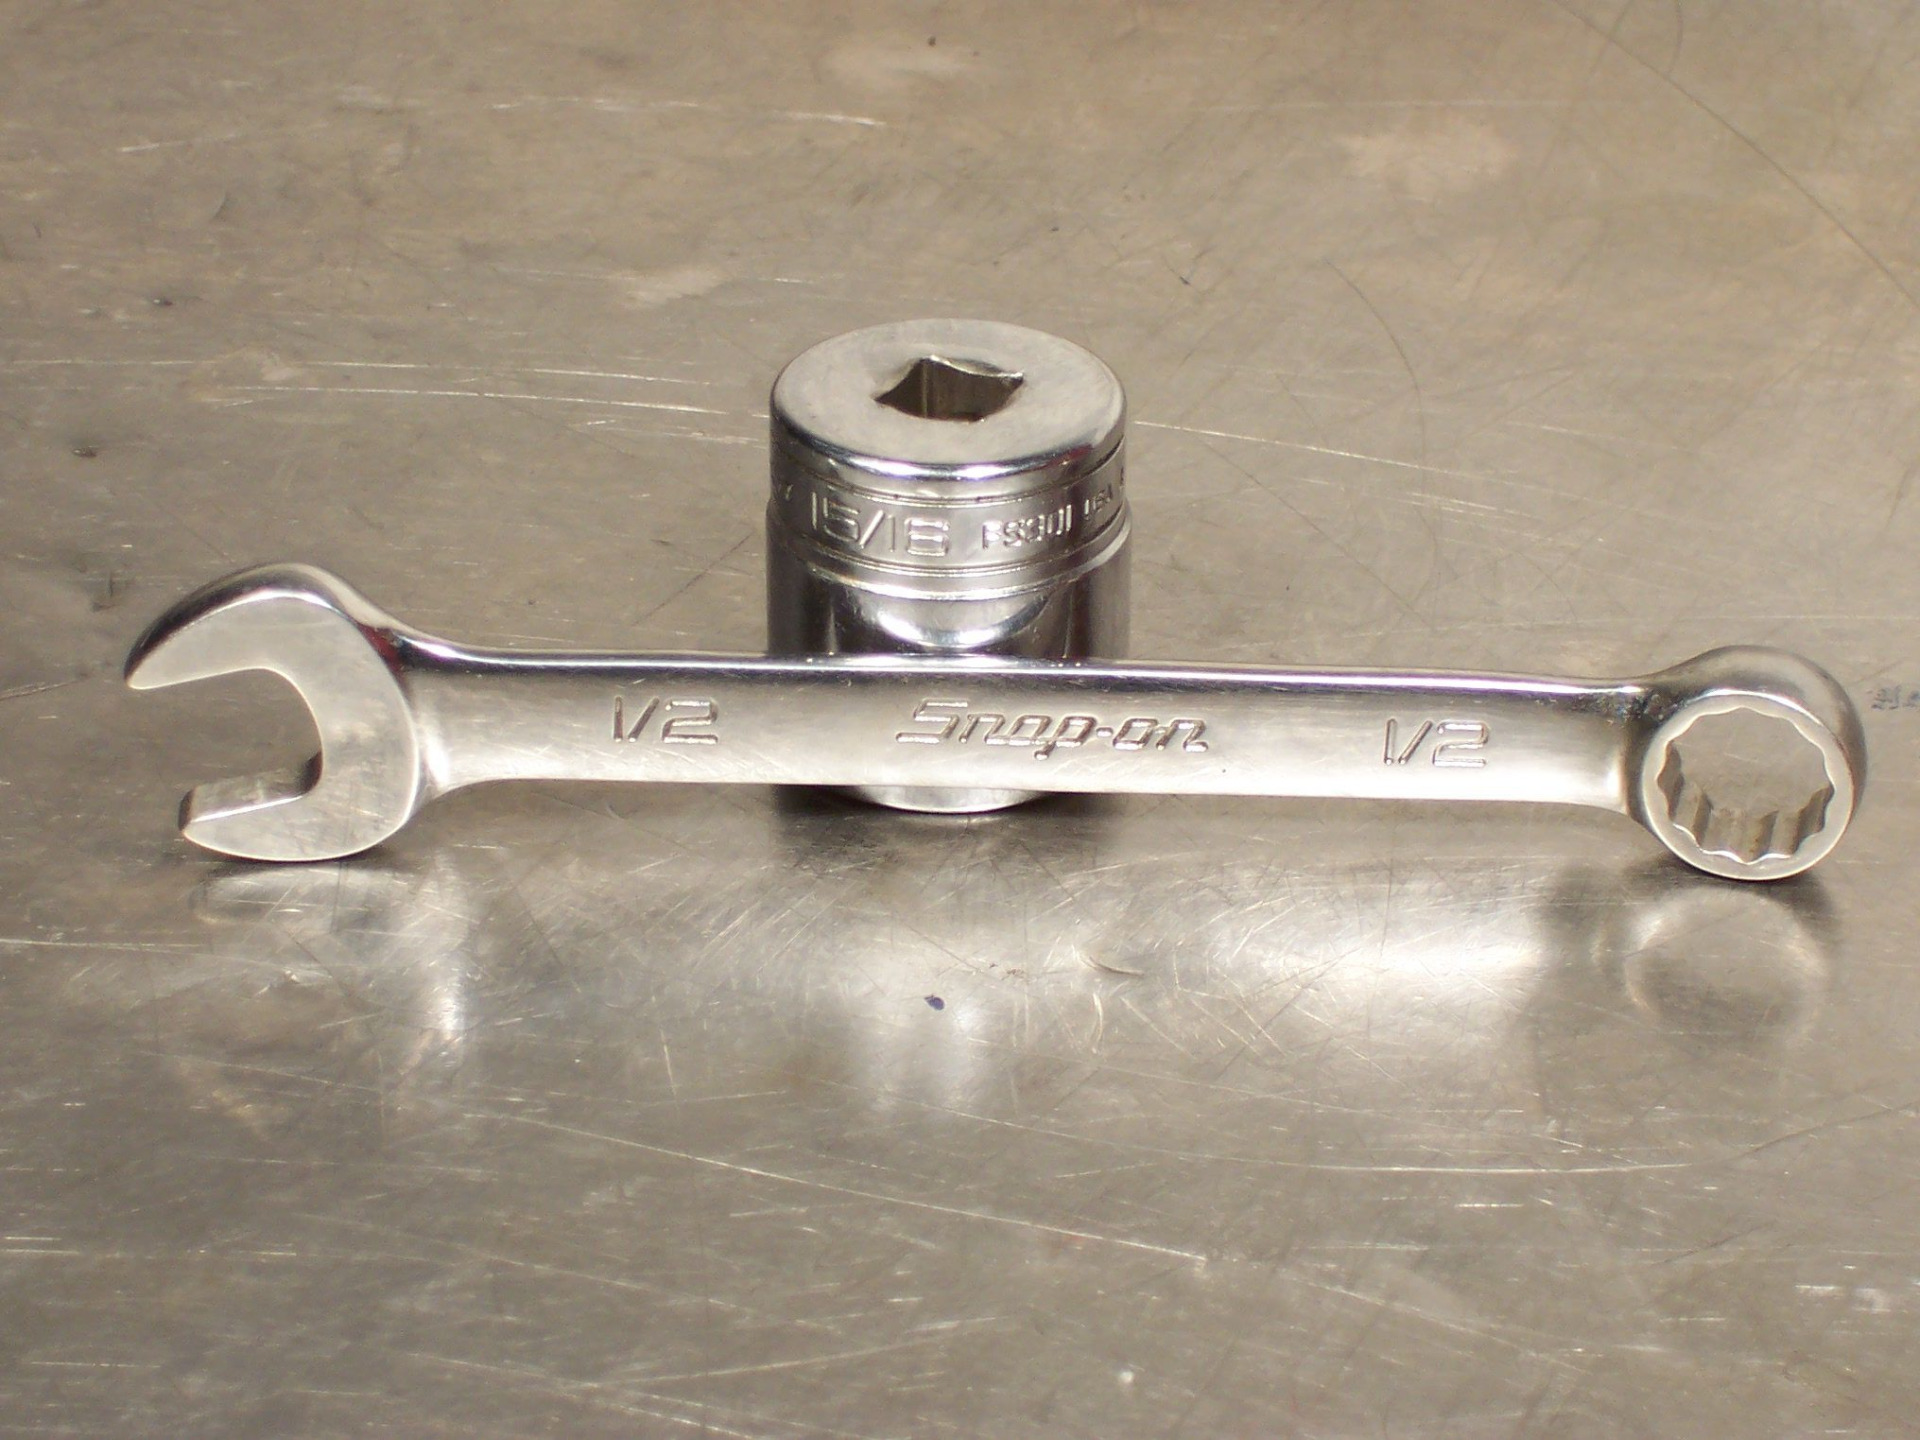
Big sockets – Deep 1-1/2-inch AF and 1-5/16-inch AF, both ½-inch square drive.
Whilst representing a fair investment for seemingly limited use, they are essential for the Mini owner/enthusiast planning on maintaining their own car as far as possible. The small socket in the foreground is there for size comparison – it's a standard ½-inch AF 3/8 drive item. Their uses are -
Deep 1-1/2-inch AF:
Swivel pin/ball-joints on the front suspension – without this socket consistent tightening of the pin retaining cups is impossible, making the job a long and irritating process when setting the shimmed height for correct pin retaining pressure/movement.
Flywheel retaining bolt on older-style 3-piece, pre-Verto flywheel assemblies.
Gearbox mainshaft/pinion retaining nut.
1-5/16-inch AF:
Front subframe tower to bulkhead retaining bolts on post 1976/single bolt fixing bodyshells.
Front disc/drive flange retaining and CV nuts up until the use of the later Metric sized ones on all disc brake cars except the 997/998 Cooper type.
Front crank pulley retaining bolt.
Cam drive gear to camshaft retaining nut.
There are several large fixings that require spanner/socket sizes generally not found in the dime-a-dozen spanner and sockets sets that proliferate the market these days. And they're generally metric to boot.
Suitable sockets to do a couple of the larger jobs may not seem worth the investment for the number of times they would get used by any particular Mini owner. And whilst I would very strongly recommend using sockets and torque wrenches where possible, spanners are often a far cheaper alternative where they can be used.
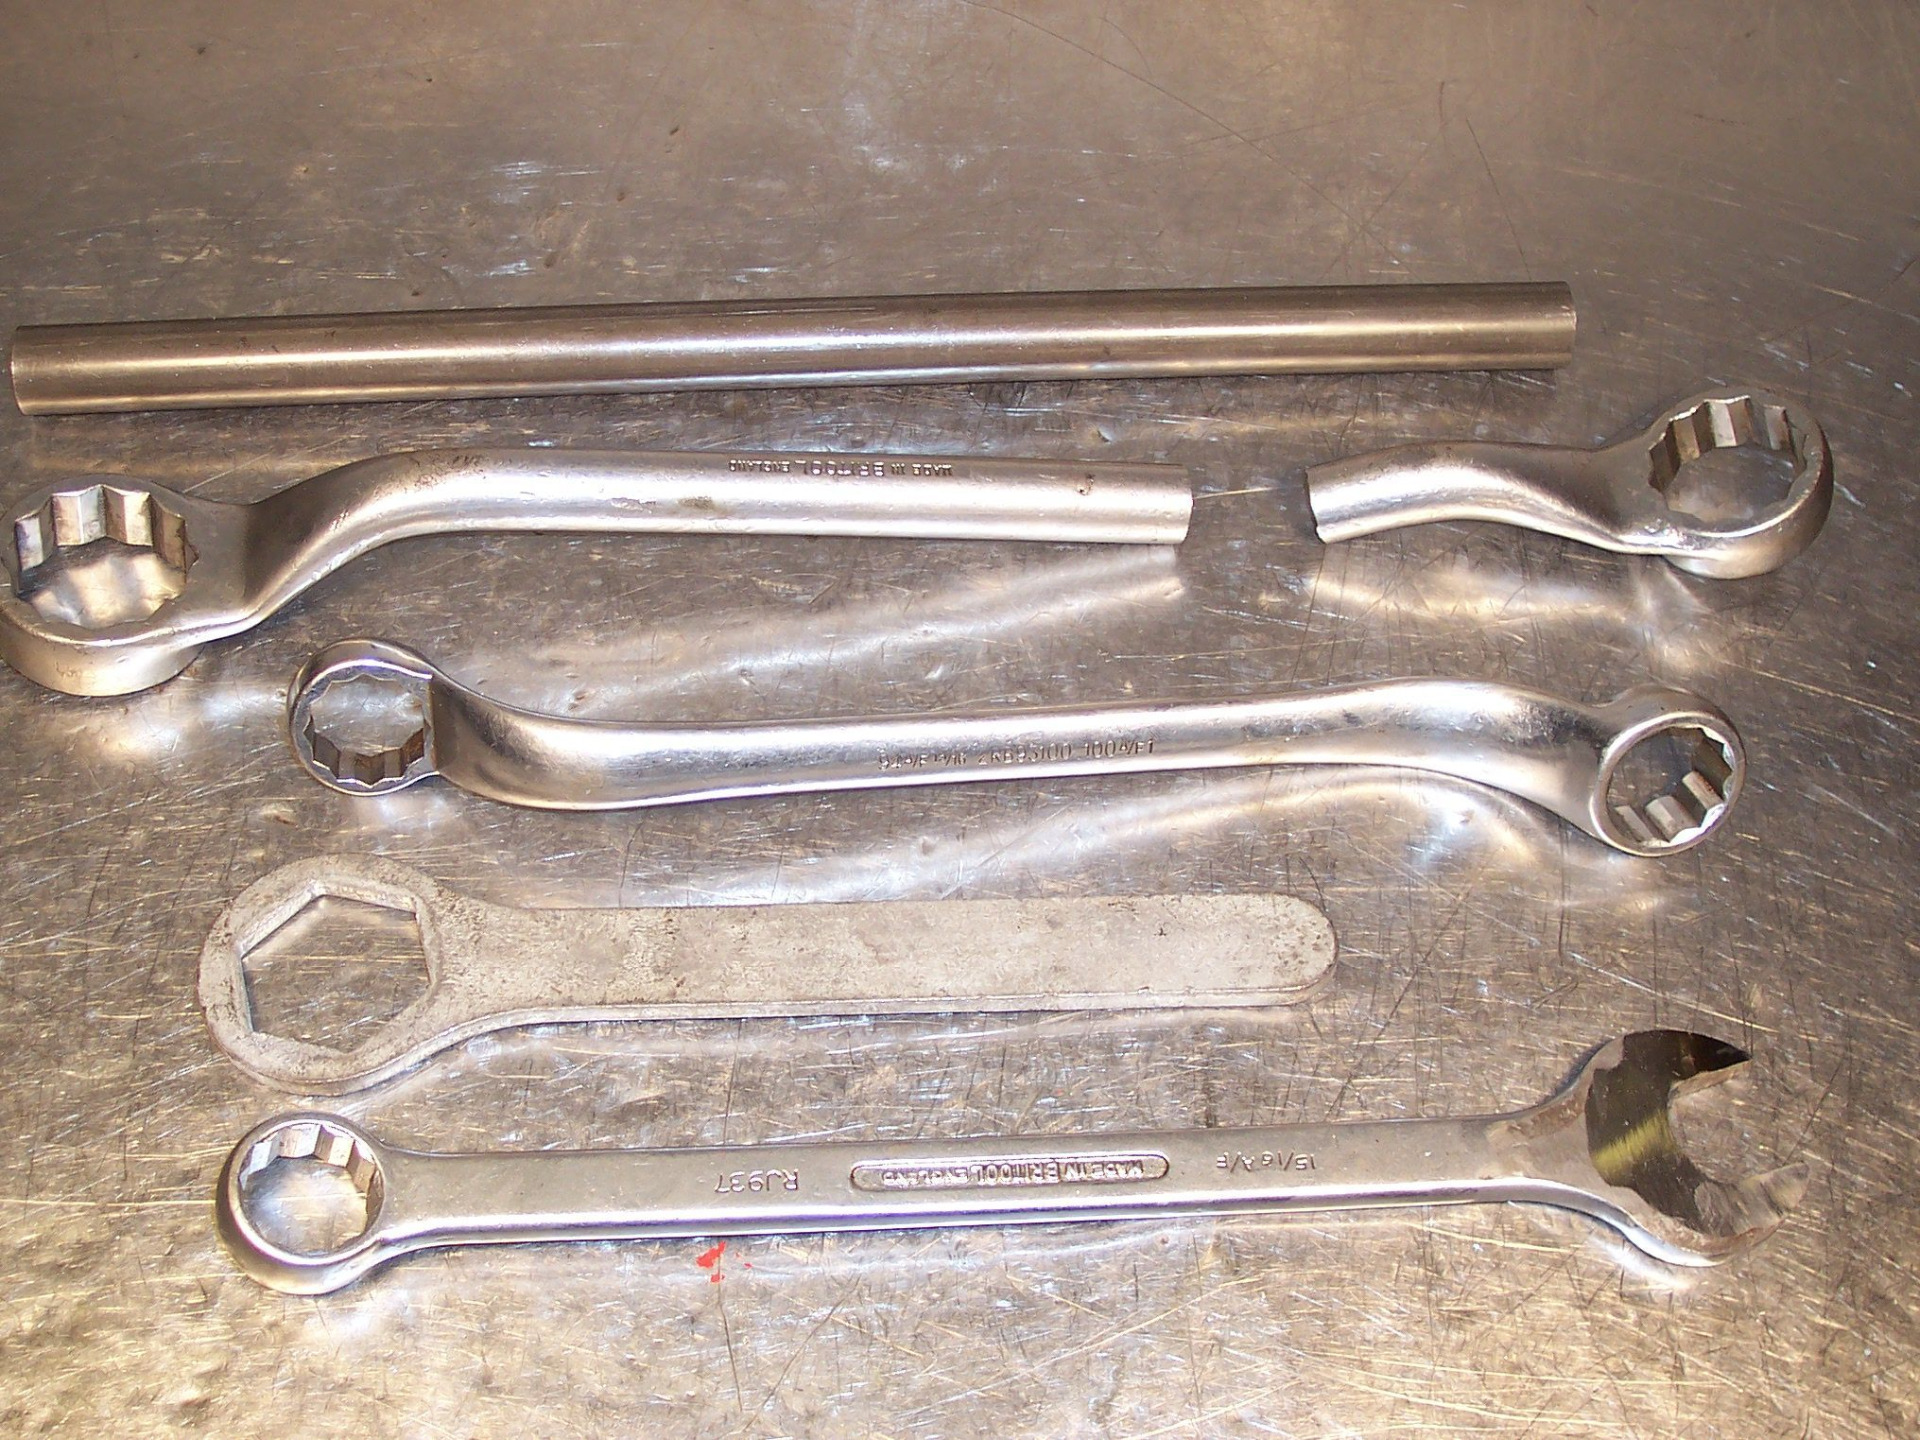
Generally if a big nut/bolt is used, it will need doing up pretty damned tight. Even considering the workshop manual torque settings will give you some idea of how much you need to swing on the tool to get the fixing in question tight enough. To this end, a few spanner sizes that are useful are as shown here. From the top:
A piece of tube makes a handy extension for greater leverage, particularly useful for undoing fixings – always harder than doing them up. Especially if a thread locking compound has been used. Do not use copper pipe, or thin wall steel tube. This is CDS T45 – stuff they make race car chassis with.
Double ended, offset head ring spanner – 1-5/16-inch AF one end and 1-1/2-inch AF the other. 1-5/16-inch is the crank damper/pulley nut and cam drive gear retaining nut. 1-1/2-inch is pre-Verto flywheel retaining bolt and pinion retaining nut in gearbox and ball-joint cups. This one used to be whole, I cut it in half to be more universally useful, aided by the tube above it.
This is a budget 1-1/2-inch AF flat spanner sold generally for doing Mini Ball joints and the pre-Verto flywheel retaining bolt. You definitely need an extension to make it useful. Awkward because of it's very flat section, a piece of suitable flatten bar will do it.
A 15/16-inch AF combination ring and open ended spanner. This one has also had the open end ground down to make it slimmer – necessary to be able to lock up the clutch plunger over-throw stop nuts.
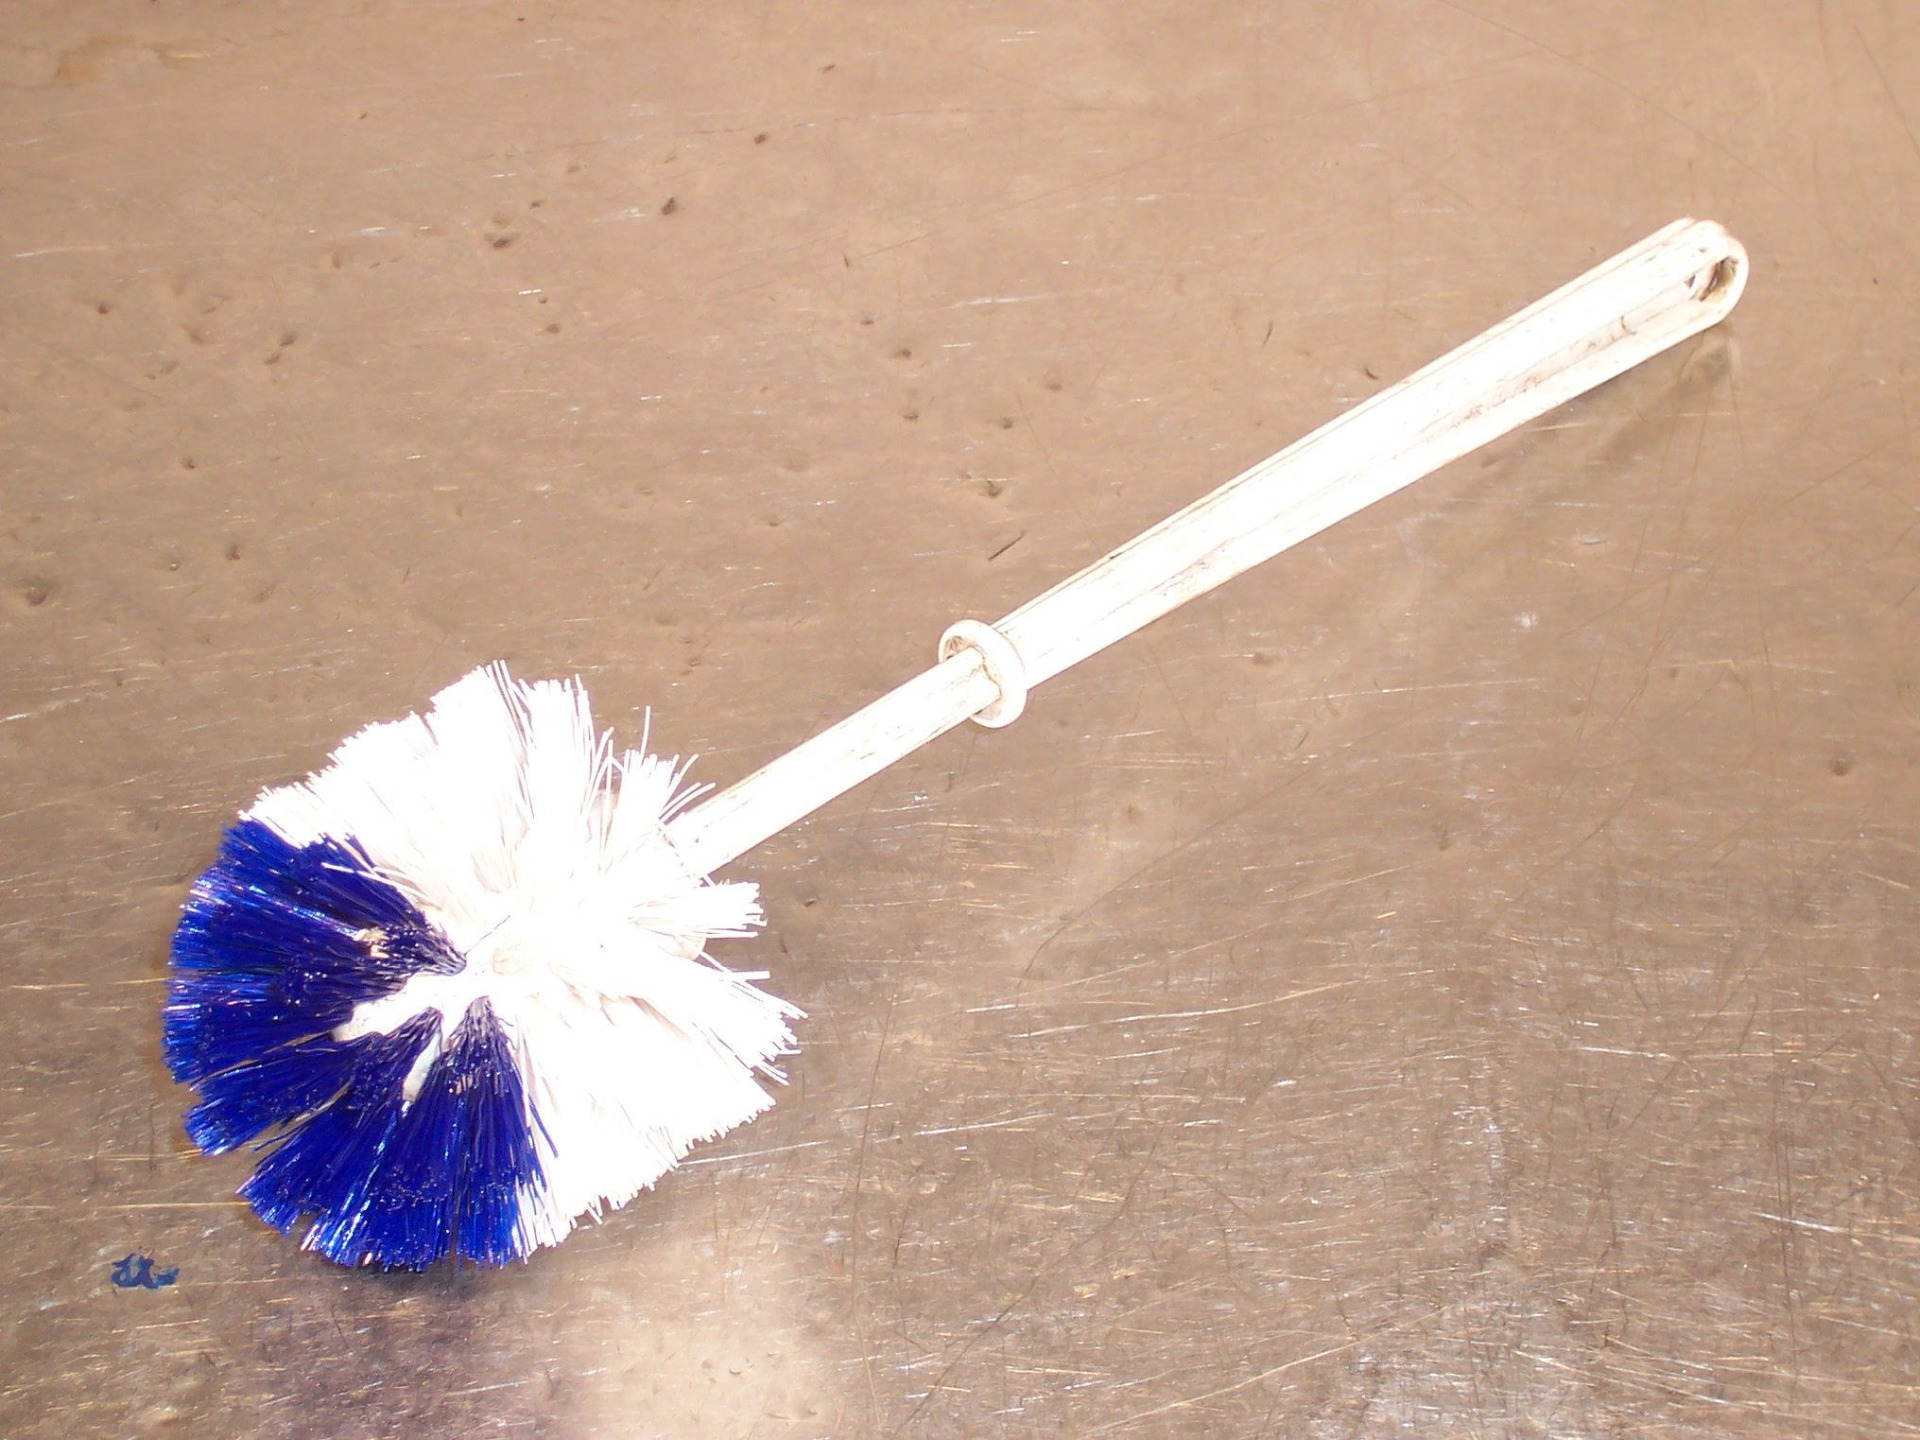
Now I know there's going to be much mirth and tittering over this – but it is not what you think! Or it is – but not FOR what you think/imagine! Yes, it's a toilet brush, but has a somewhat more important role to play where we are concerned.
If there is one area that is pretty difficult to clean well when carrying out an engine re-build, it's the bores. They simply are not big enough – even the largest of re-bores at 74mm on the 1275 blocks – to get your hand inside to give them a good scrub. Well – there may be a few dainty-handed maidens out there that can, but not many fellas I'll wager. The lowly toilet brush is absolutely the tool for the job in this instance – good stiff bristles arranged 360 degrees around the central rod and, perhaps most surprisingly, just the best sizes for all A-series blocks. Could have been made for the job.

One of the worst jobs on a Mini is removing and re-fitting the clutch seal – also known as the primary gear oil seal – in-situ.
For a start you have to remove the flywheel, a game in its self as first you have to wrestle off the clutch/flywheel cover ('wok') having negotiated undoing the engine mounting bolts and then the pesky bolts at the bottom and back of the cover holding it to the transfer gear housing, then actually get the flywheel off. Having toiled with that, the last thing you want to do fit a new seal incorrectly to have to repeat this process all over again. Therefore a clutch seal tool is well worth the investment!
Shown here is my kit, used and treasured for something like 25 years, may be more. The sleeve in the centre allows you to fit a new seal without damaging the inner lip seal on the teeth of the primary gear. The tool on the left is the part that presses the seal squarely in to place with no/minimal damage to the seal outer edge where it fits in the casing. These are the only two parts still readily available today. The tool on the right pulls the primary gear out through the housing, removing the seal in the process. Shame these are no longer made as removing the seal with screwdrivers is a bit tedious. At just over £20 including the dreaded, a bargain!
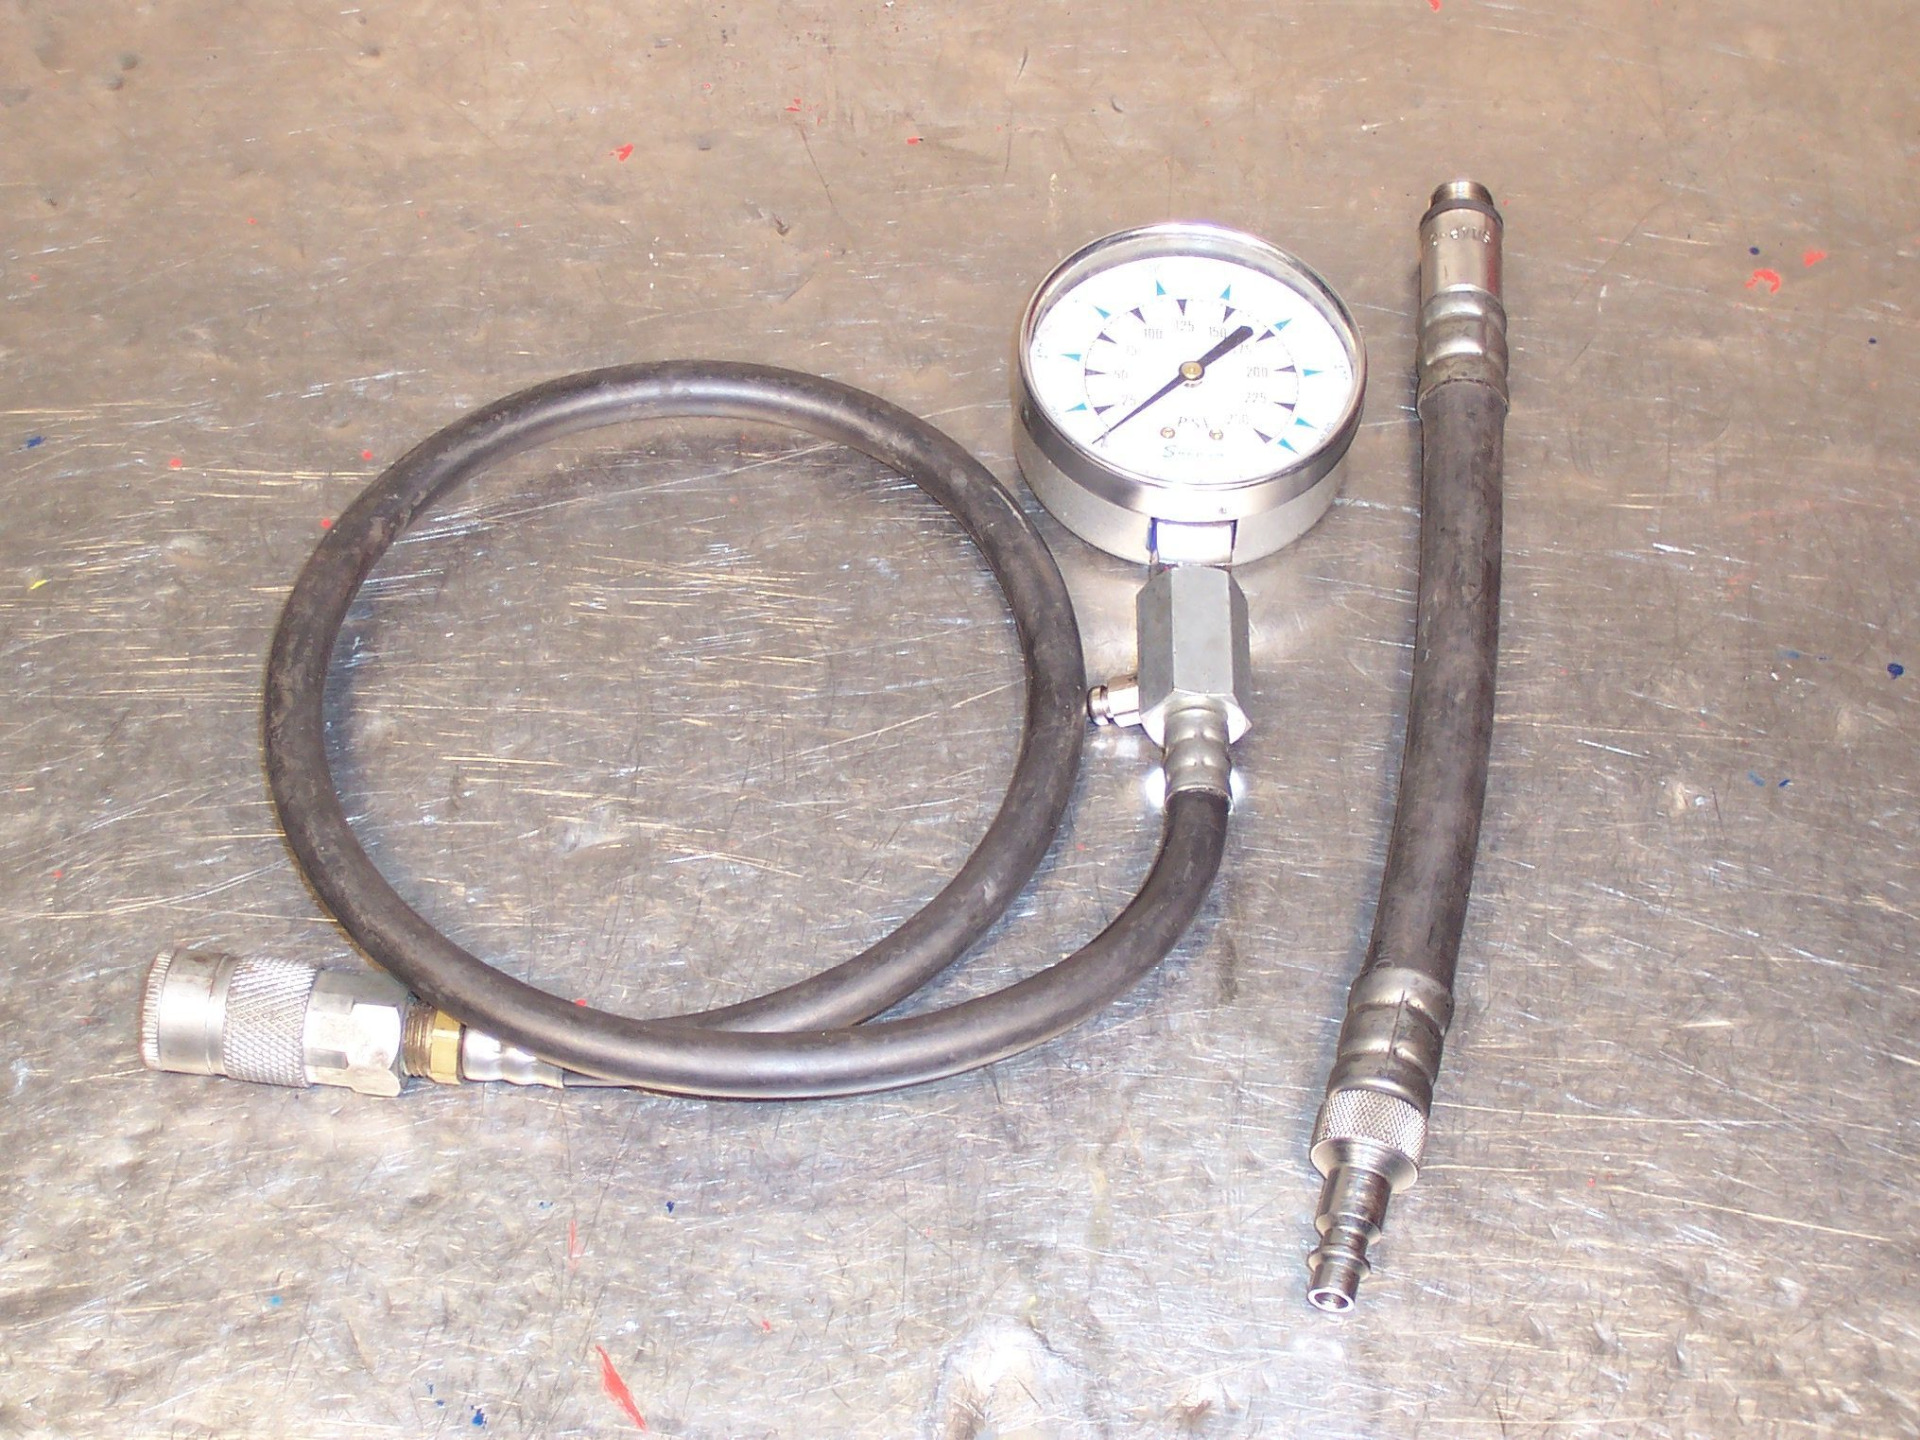
Very rarely commented on or included in service manuals, I believe this an essential tool to have to hand and should be used at every service your carry out on your Mini.
Doing a compression test takes literally minutes and is conducted by getting the engine up to working temperature (a short drive round will sort that), removing the spark plugs, screwing the tester in to one of the spark plugs threads then cranking the engine over on the starter a few revolutions and recording the reading. Repeat the gauge fitting and test for each cylinder.
The test basically assess the performance of the piston ring seal and valve seat seal. Any big deviation in the reading will denote something amiss with the engine by flagging up the problem that can then be further analysed and help avoid tears when should the motor expire out on the road by. And these gauges are available very cheaply these days.
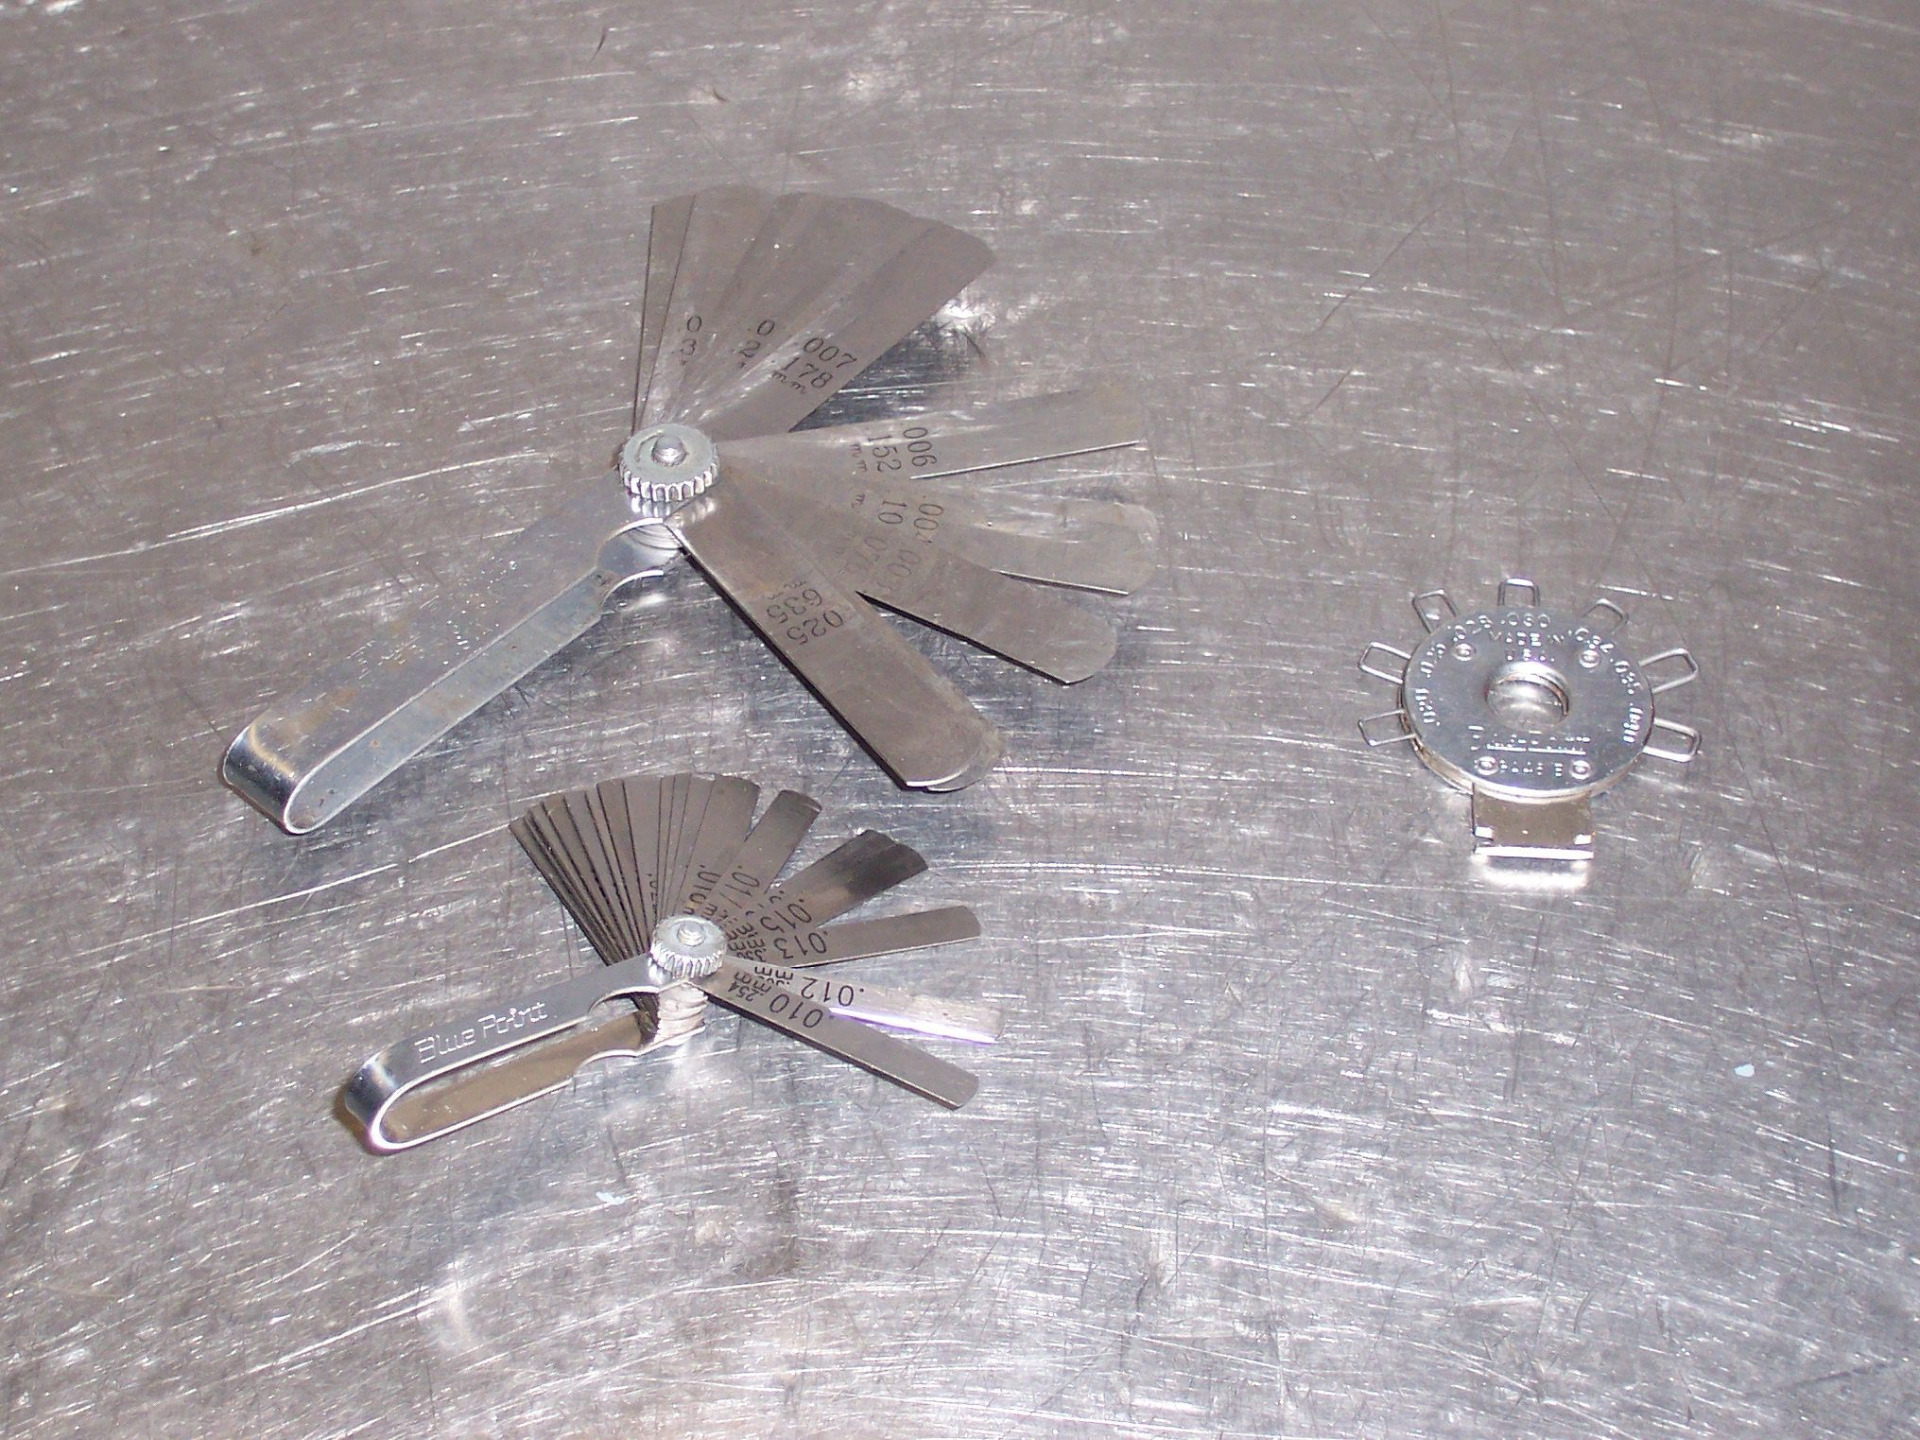
A set of decent feeler blade/gauges is a must for the DIY-er. Without them it is impossible to accurately set valve clearances, points gap and spark plug gaps.
And when you're talking thousandths of an inch, getting these gaps set correctly is critical. Using them also gives you a feel and appreciation for the accuracy to which components are made. Make sure you buy exact feeler blades, not the 'go-no-go' type that have tapered blades. A setting is a setting so it has to be right.
The round item with wire ears on the right is a proper spark plug gapper from Snap-On Tools.
As well as having the necessary wire gauges to assess the gaps it has lugs that make for easy adjustment of the electrode rather than the screw driver option to open it up, or tapping it on something hard to close it down.
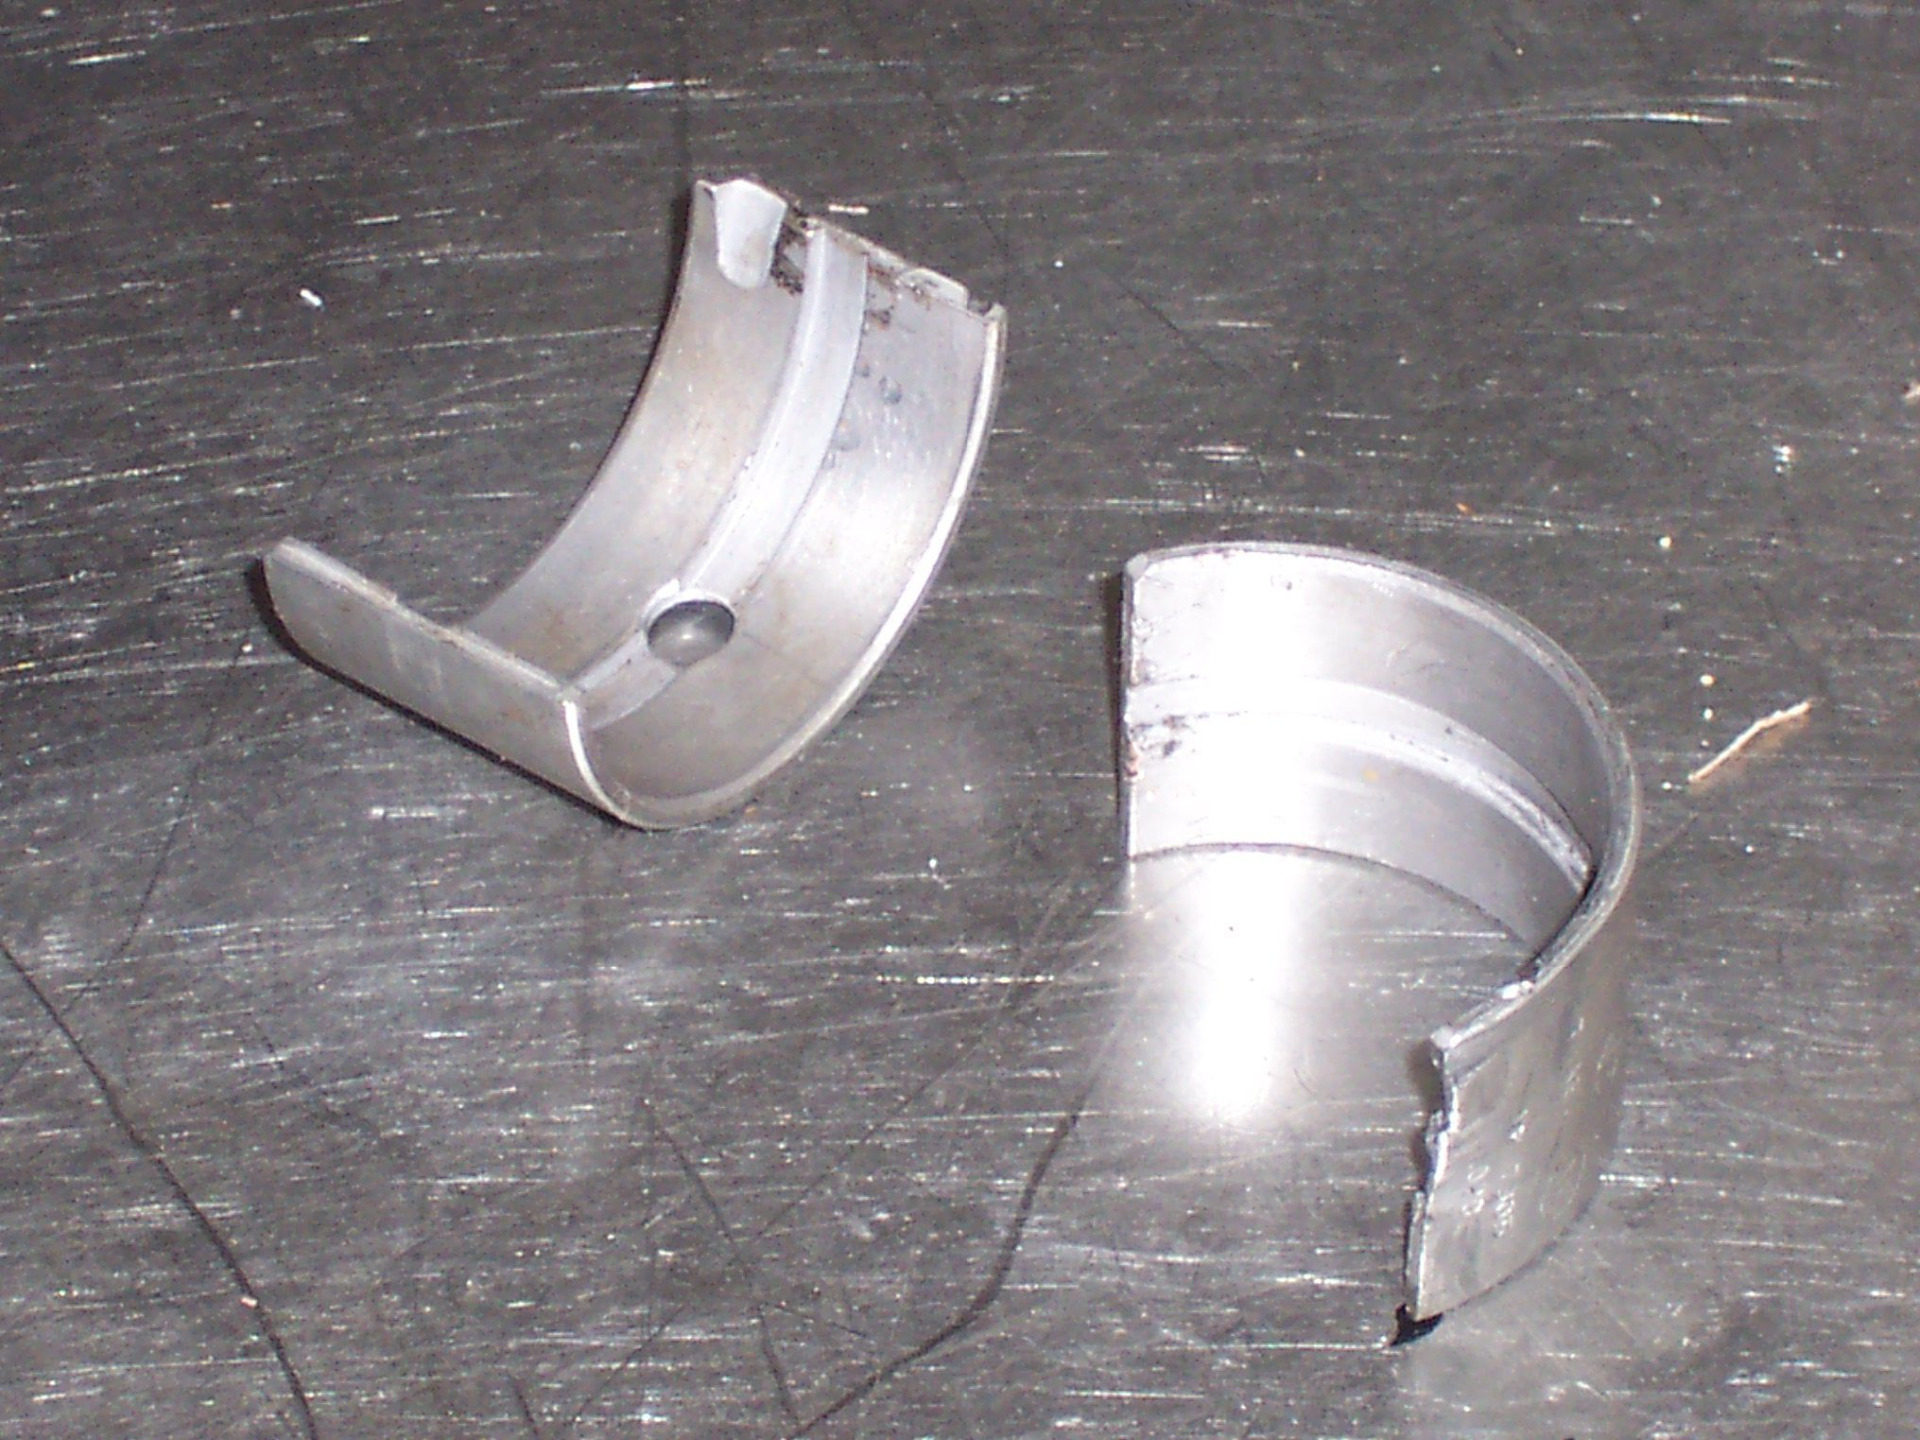
Anybody that owns a Mini for some time and carries out as much work on their car as possible will need one of these – main bearing shells.
They are absolutely spot on for locking the flywheel up when needing to undo the flywheel bolt, remove the flywheel using a puller, undo the crank pulley bolt and even the cam drive gear retaining nut when servicing the timing chain/gears with the engine in situ. Many try to stop the flywheel turning by jamming a big screwdriver between the teeth and the casing; this, however, can cause a great deal of pain and swearing when the screwdriver slips out.
The bearing shell double-locks into the teeth. Just engage one end in the teeth of the ring gear against the casing and the other engages in the teeth further up. As you start to apply pressure to whatever you are using to undo one of the big bolts the bearing is pulled in tight, so no hands/fingers in the vacinity to get damaged! If you do not have any after an engine re-build, scrounge some from a local engine re-conditioners or such. Almost any will do from any engine.
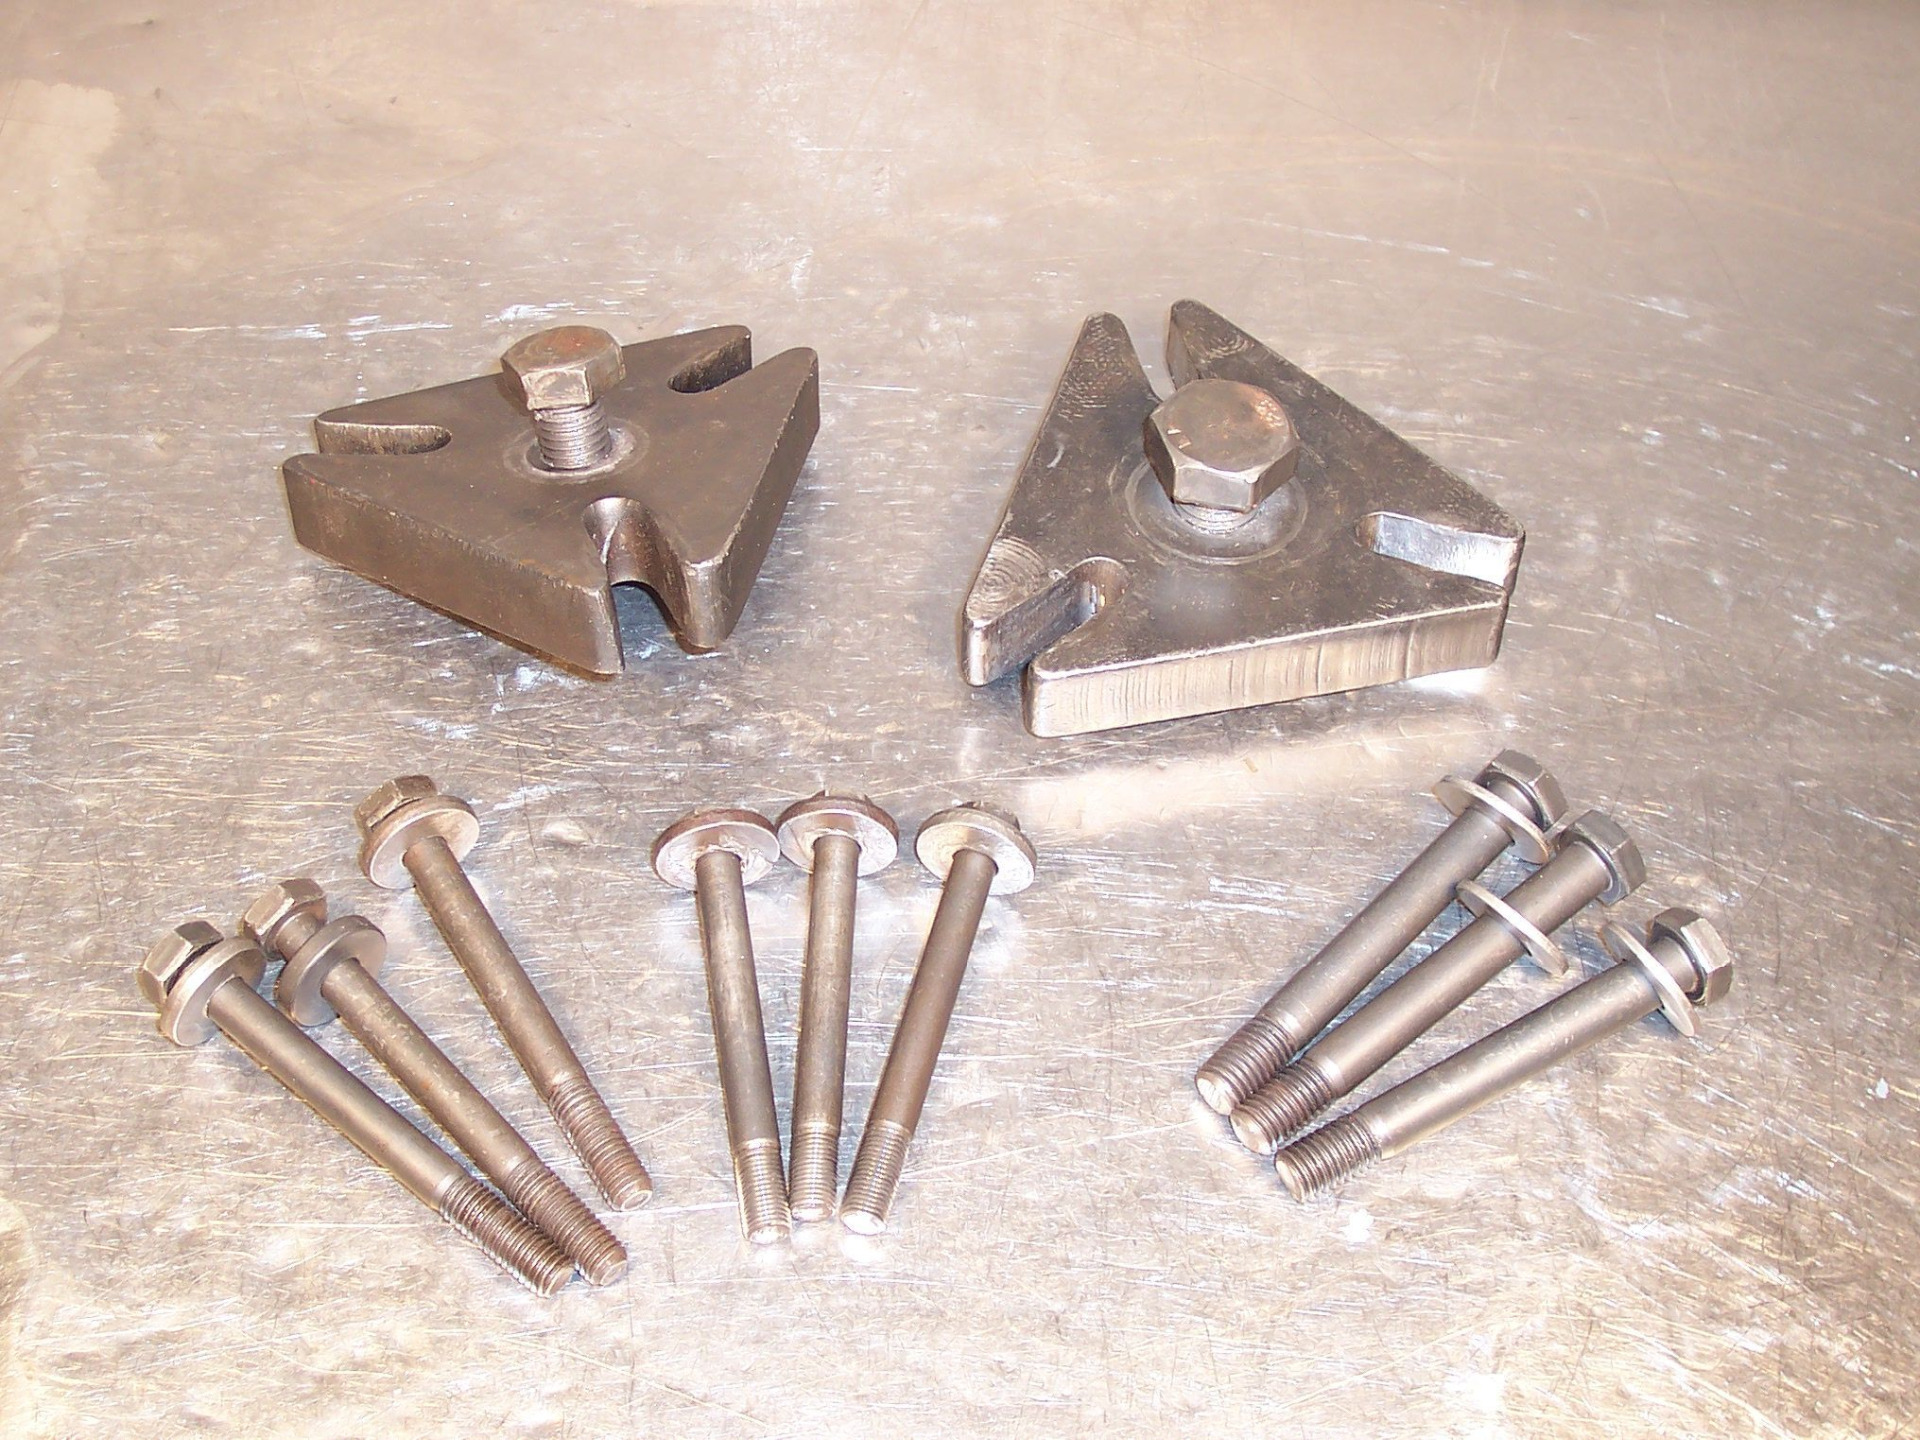
Mini ownership, especially for the DIY-er, as we have seen over the past year that we've been doing this means a certain number of dedicated and special tools are a must. And one tool very peculiar to the Mini is the flywheel puller.
The Mini is one of very few cars that has the flywheel fitted to the crank my means of a taper and keyed slot. The keyed slot being on the end of the shaft instead of up it's flank. The flywheel is held on by sheer surface engagement on the tapered cone of the crankshaft nose, the matching taper in the flywheel centre and the force applied by a high torque setting (in excess of 115 lb ft) to the retaining bolt on top of the key washer.
This mechanism for retaining the flywheel means it is practically impossible to remove without a special tool – the flywheel puller.
Shown here is one design of the beast – and the best there has been 'off the shelf' and at a sensible price. There are other various styles and manufacturers but the DIY-types share the same sort of layout – a triangular chunk of metal with long bolts that holds this to the flywheel by means of tapped holes in the flywheel and a big bolt through the centre that pushes against a stop button (not shown here) that locates in the centre of the crank where the retaining bolt fits. Doing the big bolt in the middle up pushes against the crank, the triangular plate and three bolts pulling away at the flywheel. The sheer thickness of the triangular plate in the picture should give you some idea of the force required to separate the two!
The one on the left is my 'standard' puller – this is as you'd buy it with two sets of bolts. The pre-A+, non-Verto type flywheels have a 3/8-inch UNF thread. A+ and Verto flywheel assemblies have a 10mm thread. It is essential to get this correct as a crossed thread in a flywheel is very difficult to deal with – especially wit h the engine in the car. The one on the right is my 'heavy duty' version. You can see I have modified it and fitted a much bigger centre bolt and larger diameter long bolts – this is for race engines and stubborn road units. The thread holes in the flywheel need tapping to 12mm for this one. Find the thickest/strongest puller you can before purchasing as some are really quite feeble -especially the sculpted cast ones that are more clover leaf shaped.
I owe all you Mini owners out there an apology. In the initial fervour to trying to list all the tools I counted as being 'essential' to the Mini Owner, I completely over looked the most basic and fundamental of all tools – a decent collection of Imperial size sockets and spanners!
For that I apologies profusely. I should have mentioned this straight off to save much swearing that using metric sized tools causes. Despite what many will tell you – there are no direct Imperial/metric size swaps. The closest is probably 3/4-inch/19mm as these are barely 0.002-inch different – the metric size being the bigger.
All the other common sizes used on a Mini are a good deal different to metric 'equivalents'.
The penalty for using metric tools on Imperial fixings is the likelihood of rounding the nut/bolt hex head edges off even on brand new fixings. The situation is compounded by over-tightened and/or rusted in fixings. So I strongly advise investing in a decent collection of Imperial sized tools.
They can be had at very good prices these days. Preferably get 3/8-inch drive sockets with relevant extensions, knuckle bars and ratchets. They are much more pleasant to use than the bulky 'tractor' sized 1/2-inch stuff and can be used in tighter spaces. Main sizes are from 7/16-inch to 1-inch. I dealt with the larger size sockets required back in issue 122. There are odd 3/8-inch AF nuts/bolts as well as 5/16-inch AF and 11/32-inch AF but these are not imperative for general DIY work.
I'd like a pound for every time I've seen somebody straining every fibre of their body trying to undo a nut with a ratchet. This is not wise.
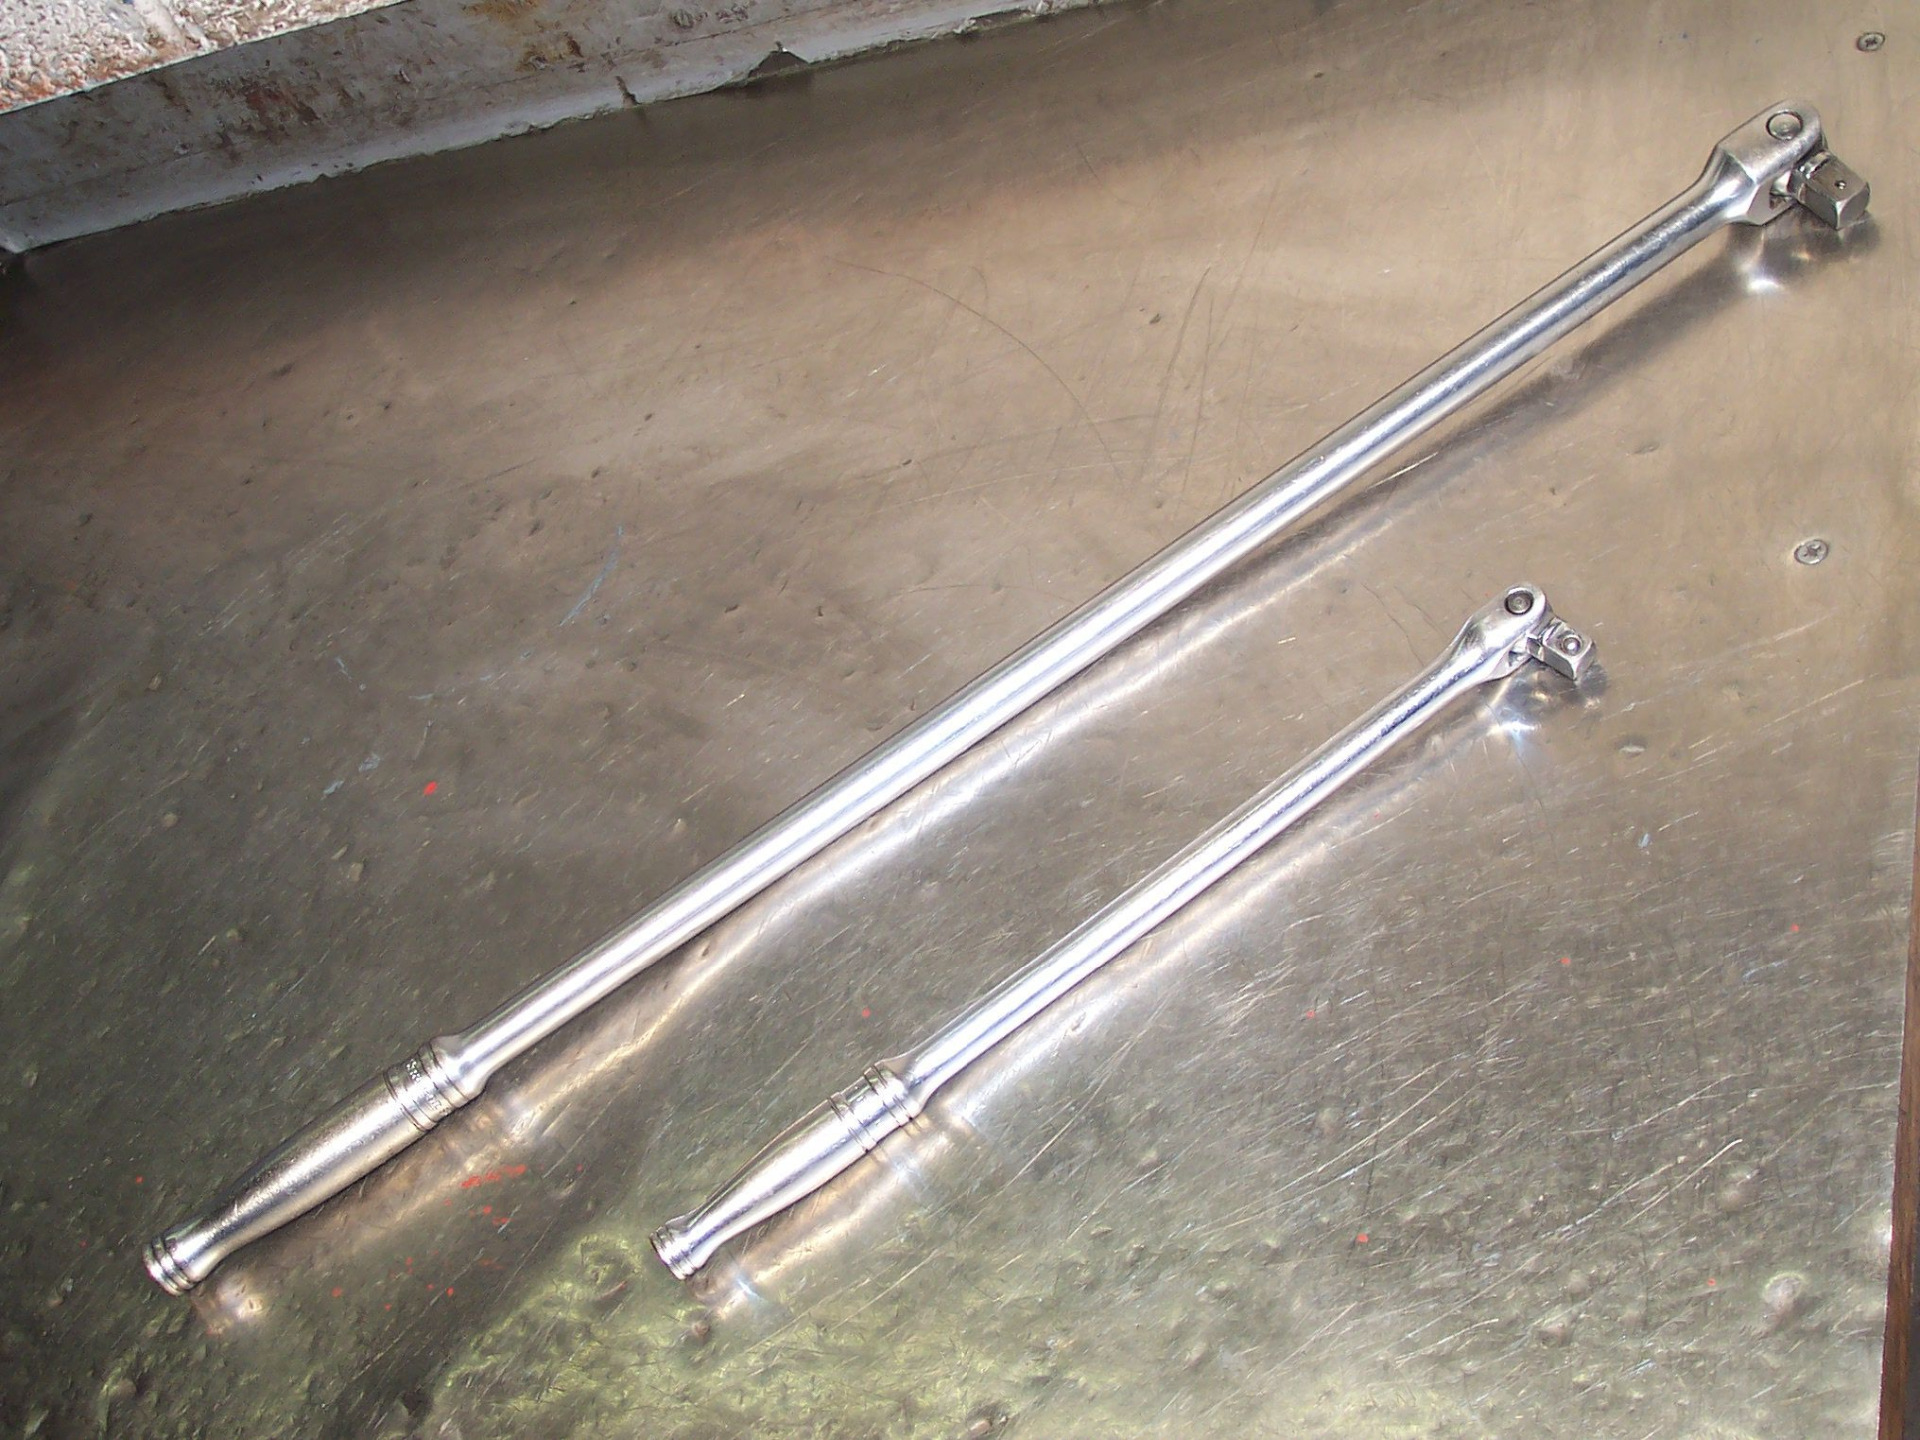
The ratchet mechanism may break or slip – the result is bruised, possibly bloody and maybe even broken fingers or knuckles. It is essential that you use the correct tool for the application. Nuts/bolts done up to reasonably high torque settings, or ones that have rusted in with age will likely require more torque to undo them than a ratchet is designed to deal with. The answer is simple – use a knuckle bar (also known as strong arm bar or breaker bar).
They are designed to handle a heap more torque input than a ratchet and are less likely to slip causing you personal injury and by-standers singed ears from all the swearing! Using longer bars also makes undoing all fasteners much easier – so those not endowed with arms like Arnie can undo even the most resilient of fasteners. A simple law of leverage.
You really only need two knuckle bars to deal with just about every application you'll find on a Mini – an 18-inch long one (left in pic) with 1/2-inch square drive to deal with big stuff like CV joint/drive flange nuts, flywheel bolts, gearbox first motion and final drive pinion nuts, damper retaining bolt, cam drive gear retaining nut and so on and a 12-inch long one with a square drive to suit whatever sockets you have – typically 3/8-inch or 1/2-inch square – to deal with anything else.
Make sure you buy stands of a similar design – with some form of bracing between the legs to prevent them from spreading/collapsing at an inopportune moment, the lower down the bracing the better. And of course rated at at least 1 ton each to ensure a safe working weight. Height adjustment needs to be strong as well – the Snap-on ones use a ratchet type with heavy duty forged yokes, the others pins through the yoke/stand. The originals went walkies along time ago so I substituted them with short head studs. More than up to the job.
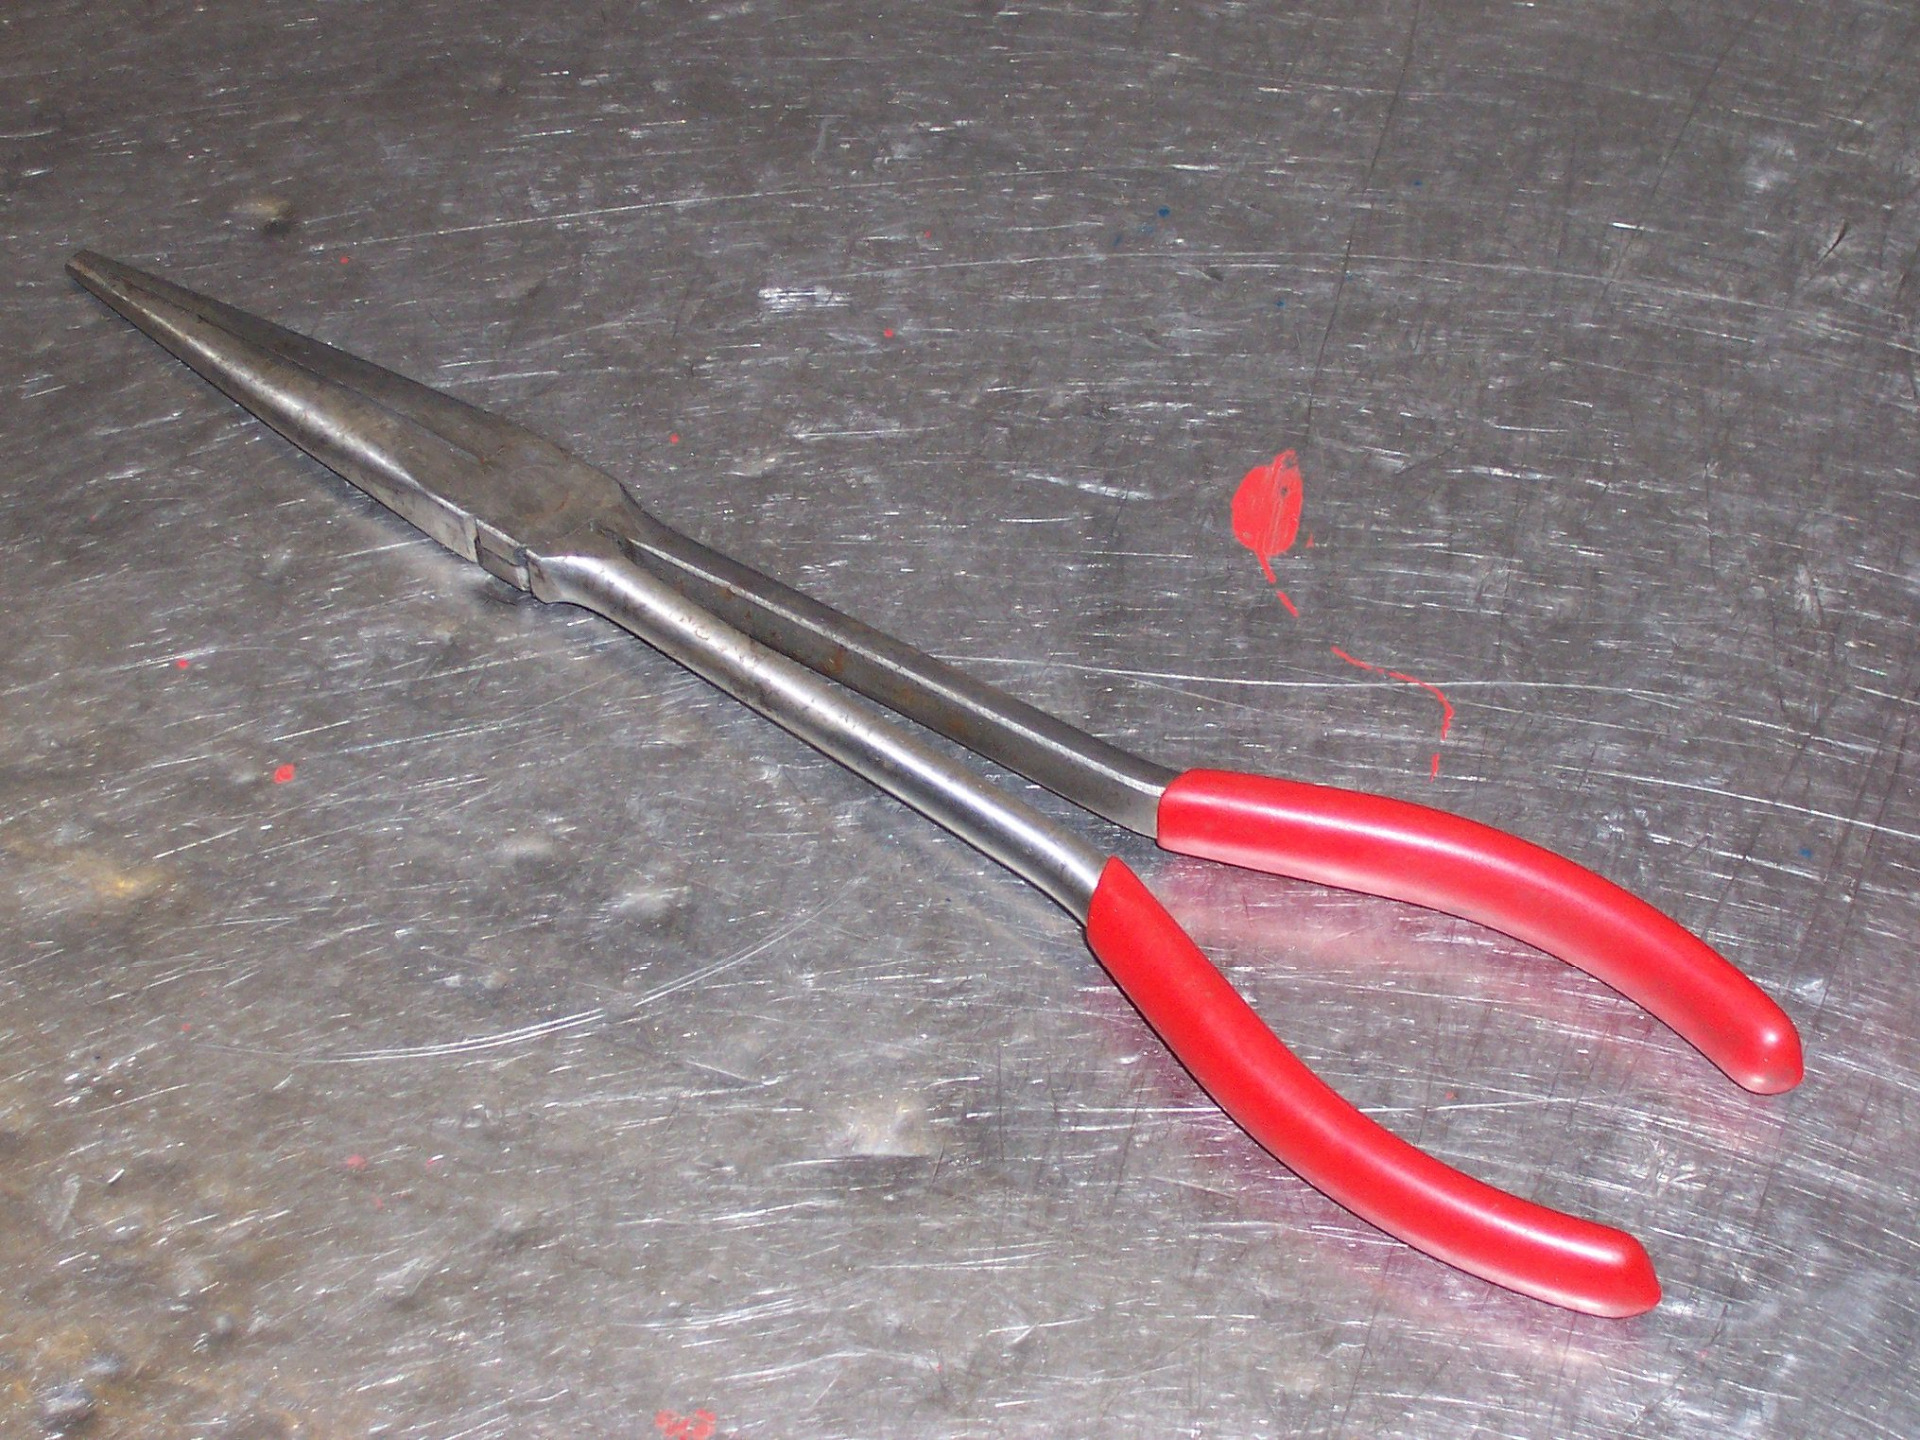
These 11-inch long, extra-long nosed pliers are essential to make two jobs in particular on the Mini so much easier – removing the split pins and clevis pins from Mini brake/clutch pedals to their respective master cylinder saddle brackets and for fitting the engine mounting to subframe bolts.
Eliminates all the swearing and bruised/cut knuckles. Honest. Although these are from Snap-On Tools, They can be sourced cheaper from the likes of Sealey Tools. I've seen them on market stall stands and the like too.

If there is one thing that leads to more 'blue air' when tinkering with your Mini, it's that damnable nut, bolt, screw or washer that makes a bid for freedom the moment to relax your grip on it.
Or merely fumble it on fitting or removal – and leaps straight into the most difficult to get at place it can find where no amount of shaking, rattling or rocking will get it to drop out. Most notably are parts that fall down between the front subframe and bulkhead, and in to doors, companion bins and dashes. No, to re-capture these errant parts what you need is a good selection of magnetic pick-up tools, samples of which are shown here from my collection.
Topmost is my monster magnet, this thing extends from from just over sixteen inches long to around twenty-seven inches and can pick up two pounds in weight – that's a bag of sugar! The one in the centre is not extendable, it does have a neat swivelly head that can be used to get into awkward places. The one in the foreground telescopes like an aerial from a little over five inches to just over two foot long and has a very narrow diameter magnet for getting into narrow spaces.
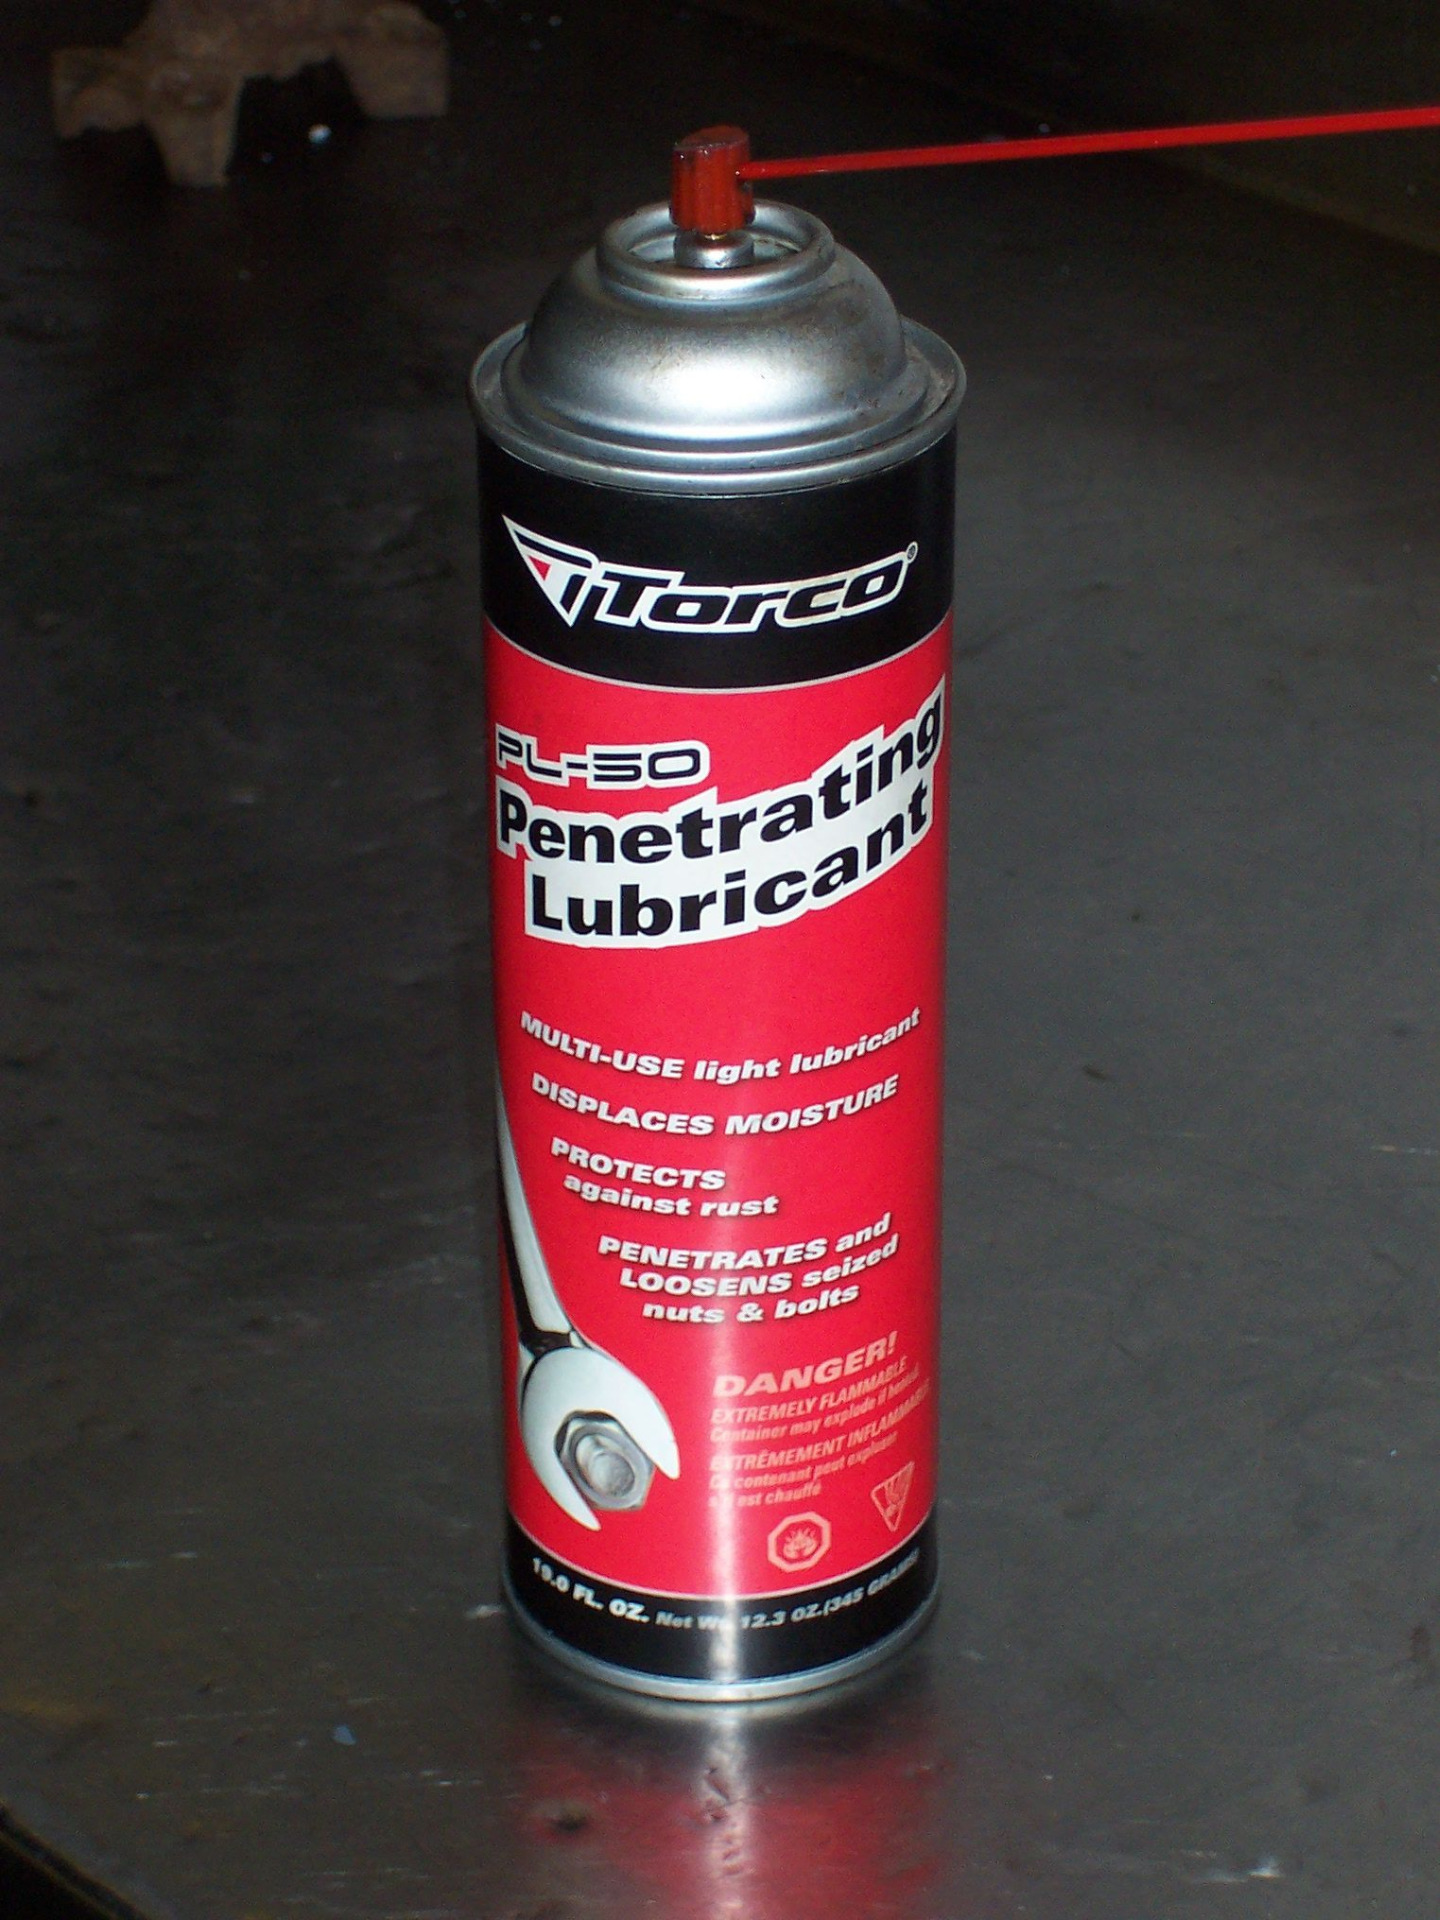
This has to rate as one of THE most important tools to have in your tool box or at least to hand – good quality penetrating fluid. It's most outstanding feature is helping with seized/rusted fixings.
A good soaking of such stuff before attempting to undo badly rusted fasteners will transform a job from a massive swearing match followed by much aggro when the faster shears off to a breeze, a walk in the park.
It is also useful to carry in the boot/companion bins for those odd rain-sodden journeys just in case the ignition gets swamped – a quick squirt of this stuff displaces any moisture in the dizzy/dizzy cap and you're on your way again.
It can also be used on fresh metal to protect against rusting. There are many types on the market – the renowned WD40, Duck Oil, Plusgas and so on – but this stuff is the best I've used by quite a margin, Torco PL50 (www.nimbusmotorsport.com).
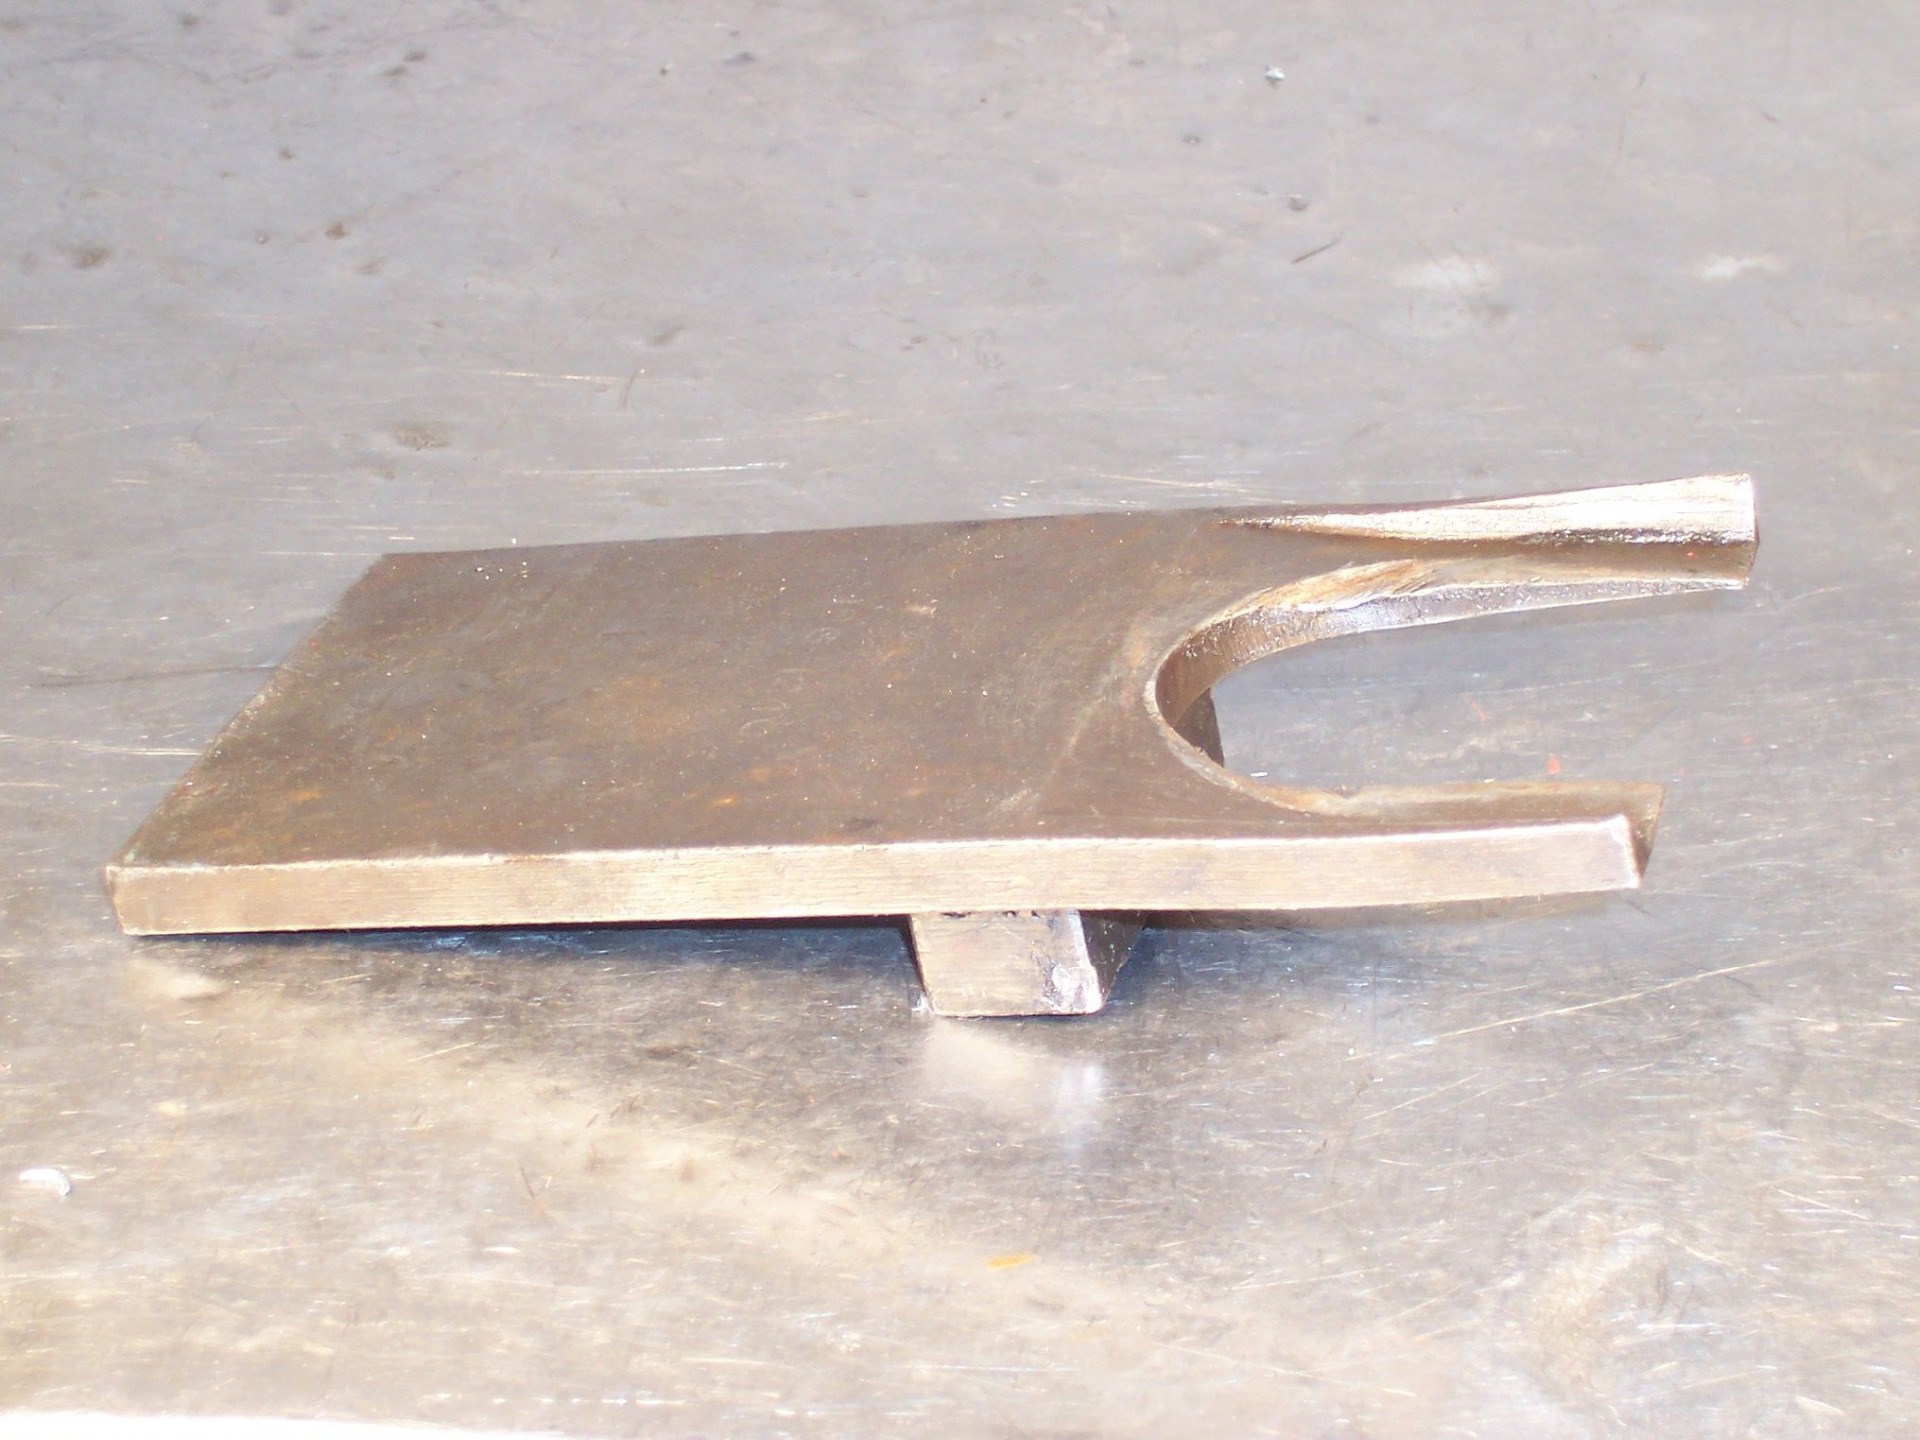
Since 1973/1974, all Minis have been fitted with in-board CV joints, more commonly called 'pot joints'. They are extremely tough and resilient to wear/breakage, but can be a bit of a pain to deal with when disconnecting them from the gearbox.
They are retained by an internal circlip fitted to the gearbox out-put shaft that pops out and engages a groove cut in to the internal splines of the pot joint. Whilst it is feasible to extract them from the gearbox/disconnect them from the output shafts using big screwdrivers and/or levers of some sort – it is far easier to use a tool manufactured for the job in hand.
Here you can see that exact tool – looking for all the world like a shoe/boot remover. It's somewhat battered appearance is testament to the number of times I have employed it in its designated role. The original BL specialist tool part number for this is 18G1240 and is still available through one of the larger Mini spares parts specialists. Considering the amount of aggro trying to separate the pot joint from the gearbox using tyre levers/screwdrivers can be experienced whilst flat on your back with barely 18 inches to work in with the car on axle stands, they are well worth the investment. Usage is easy – simply fit the fork up behind the pot joint with the heal towards the gearbox and whack with a hammer.
If there is one thing that really makes you vexed when undoing fasteners, it's damaging the drive type of the fastener. This is all too easy and very, very common when budget type tools are used.
The most prolific issue is with screws. Budget 'cross head' type screw drivers are generally not only the wrong tip shape but also inferior material that wears/damages easily itself; this wreaks havoc when used on most 'cross-head' type fixings in a Mini. It is therefore essential to have the correct type of cross-head design screwdrivers to avoid all the pain and aggravation caused by rounding out the driver in the screw heads.
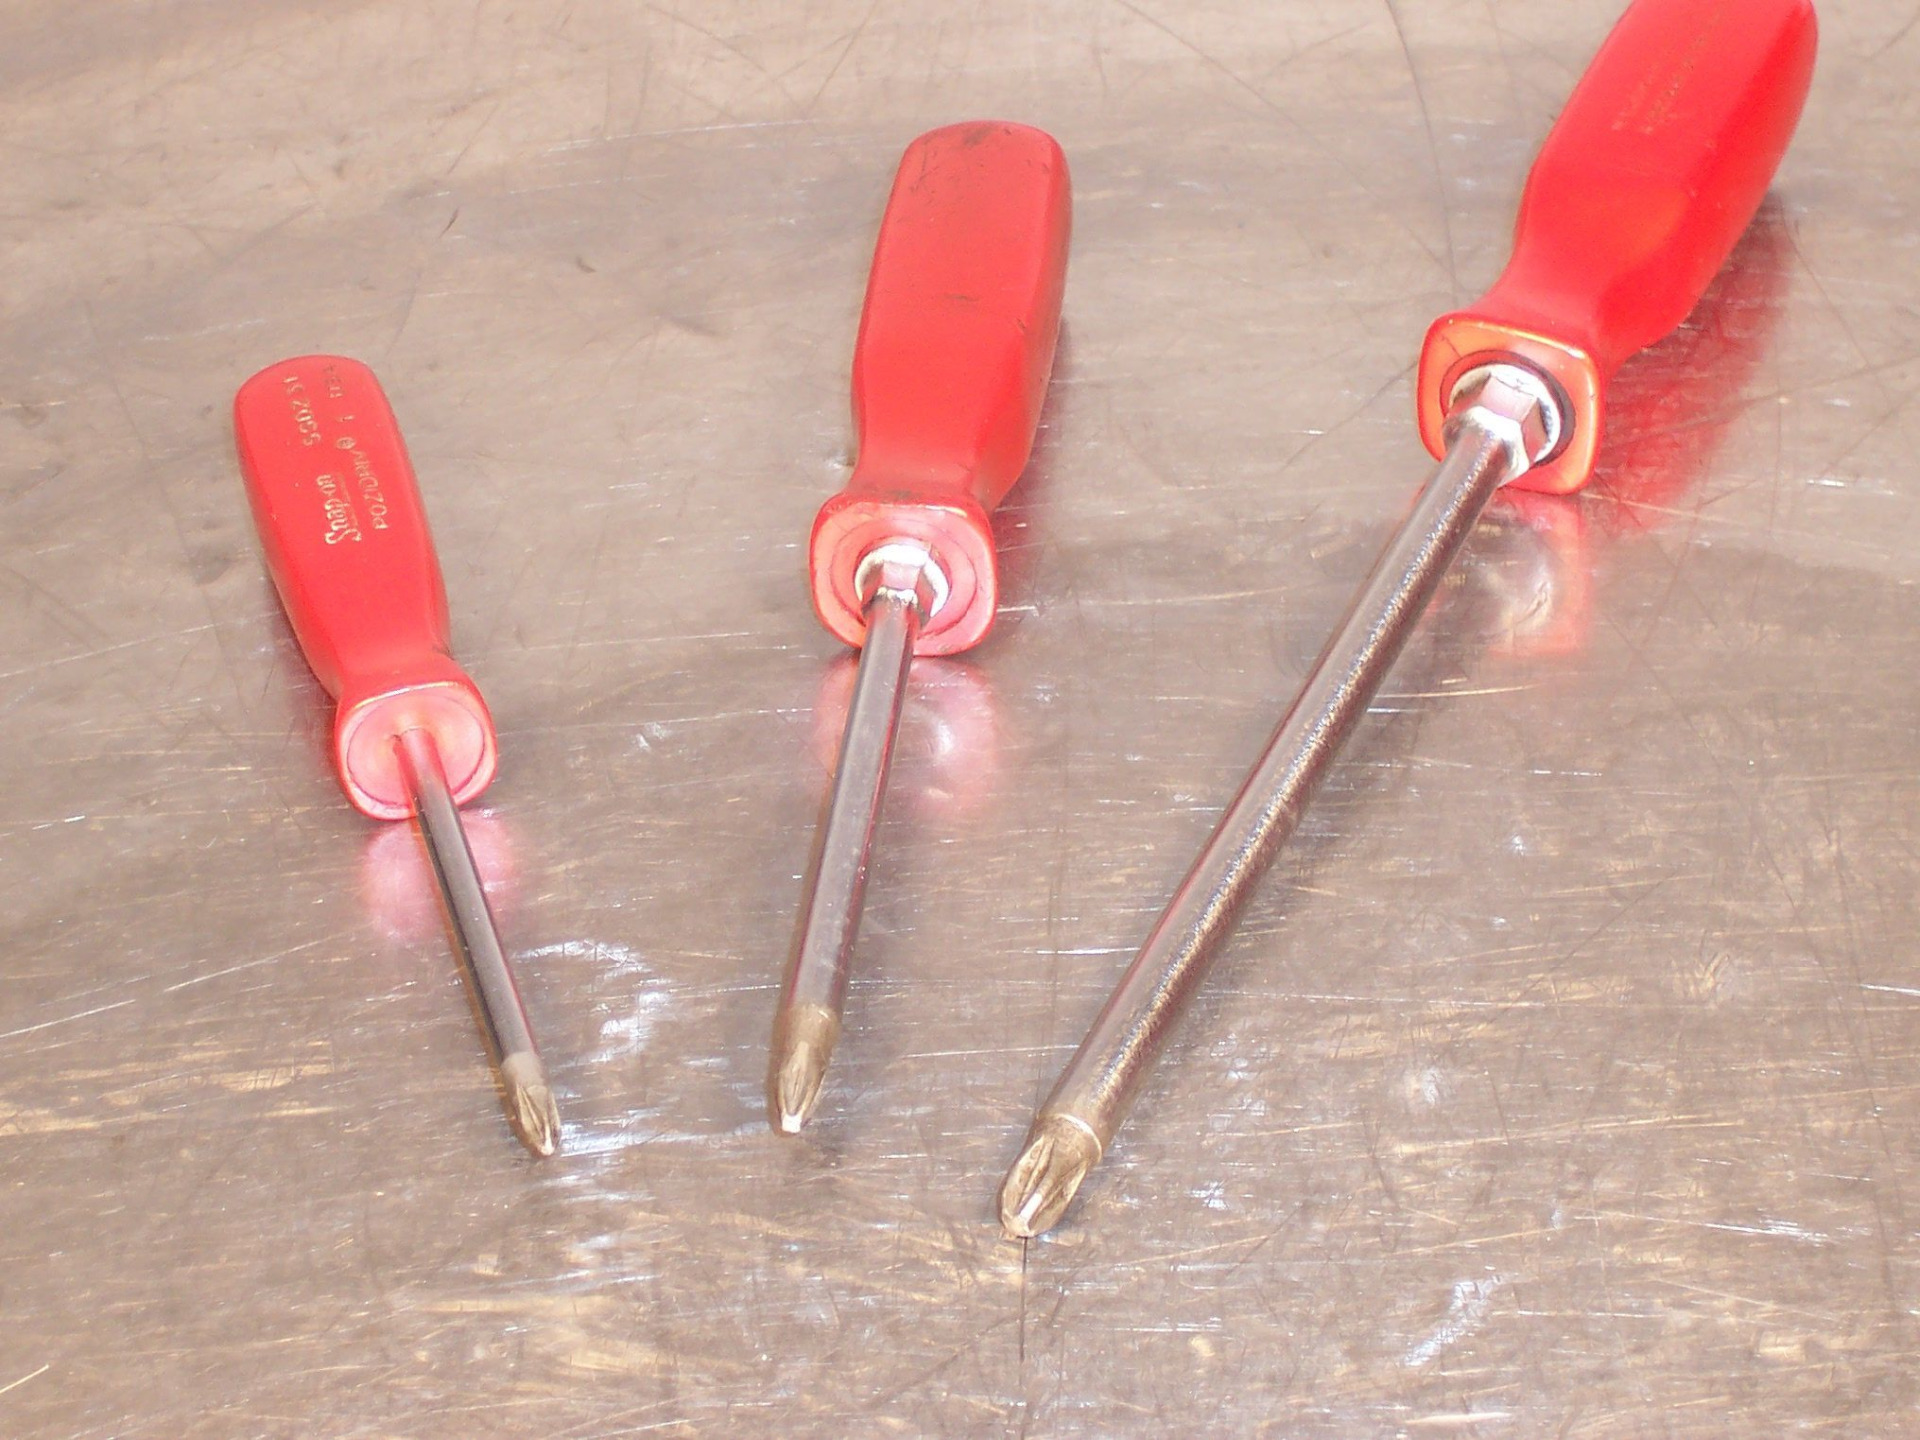
Just about every screw I have encountered used on the Mini is the Pozidriv type patented design.
Using what folk commonly call the 'Philips' type or budget 'cross head' type screwdrivers will result in the aforementioned aggro. Make sure you buy the Pozidriv type distinguishable by the corner 'crosses' indicated in diagram 1 here and visible in the picture. Diagram 2 shows the Phillips version, diagram 3 the 'standard' or 'budget' straight cross head type.
There are three sizes used – aptly dubbed no.1, 2 and 3 with 1 being the smallest. The reason for the screw head damage is that they have distinctly different tip profiles – the wrong one is a very bad fit.
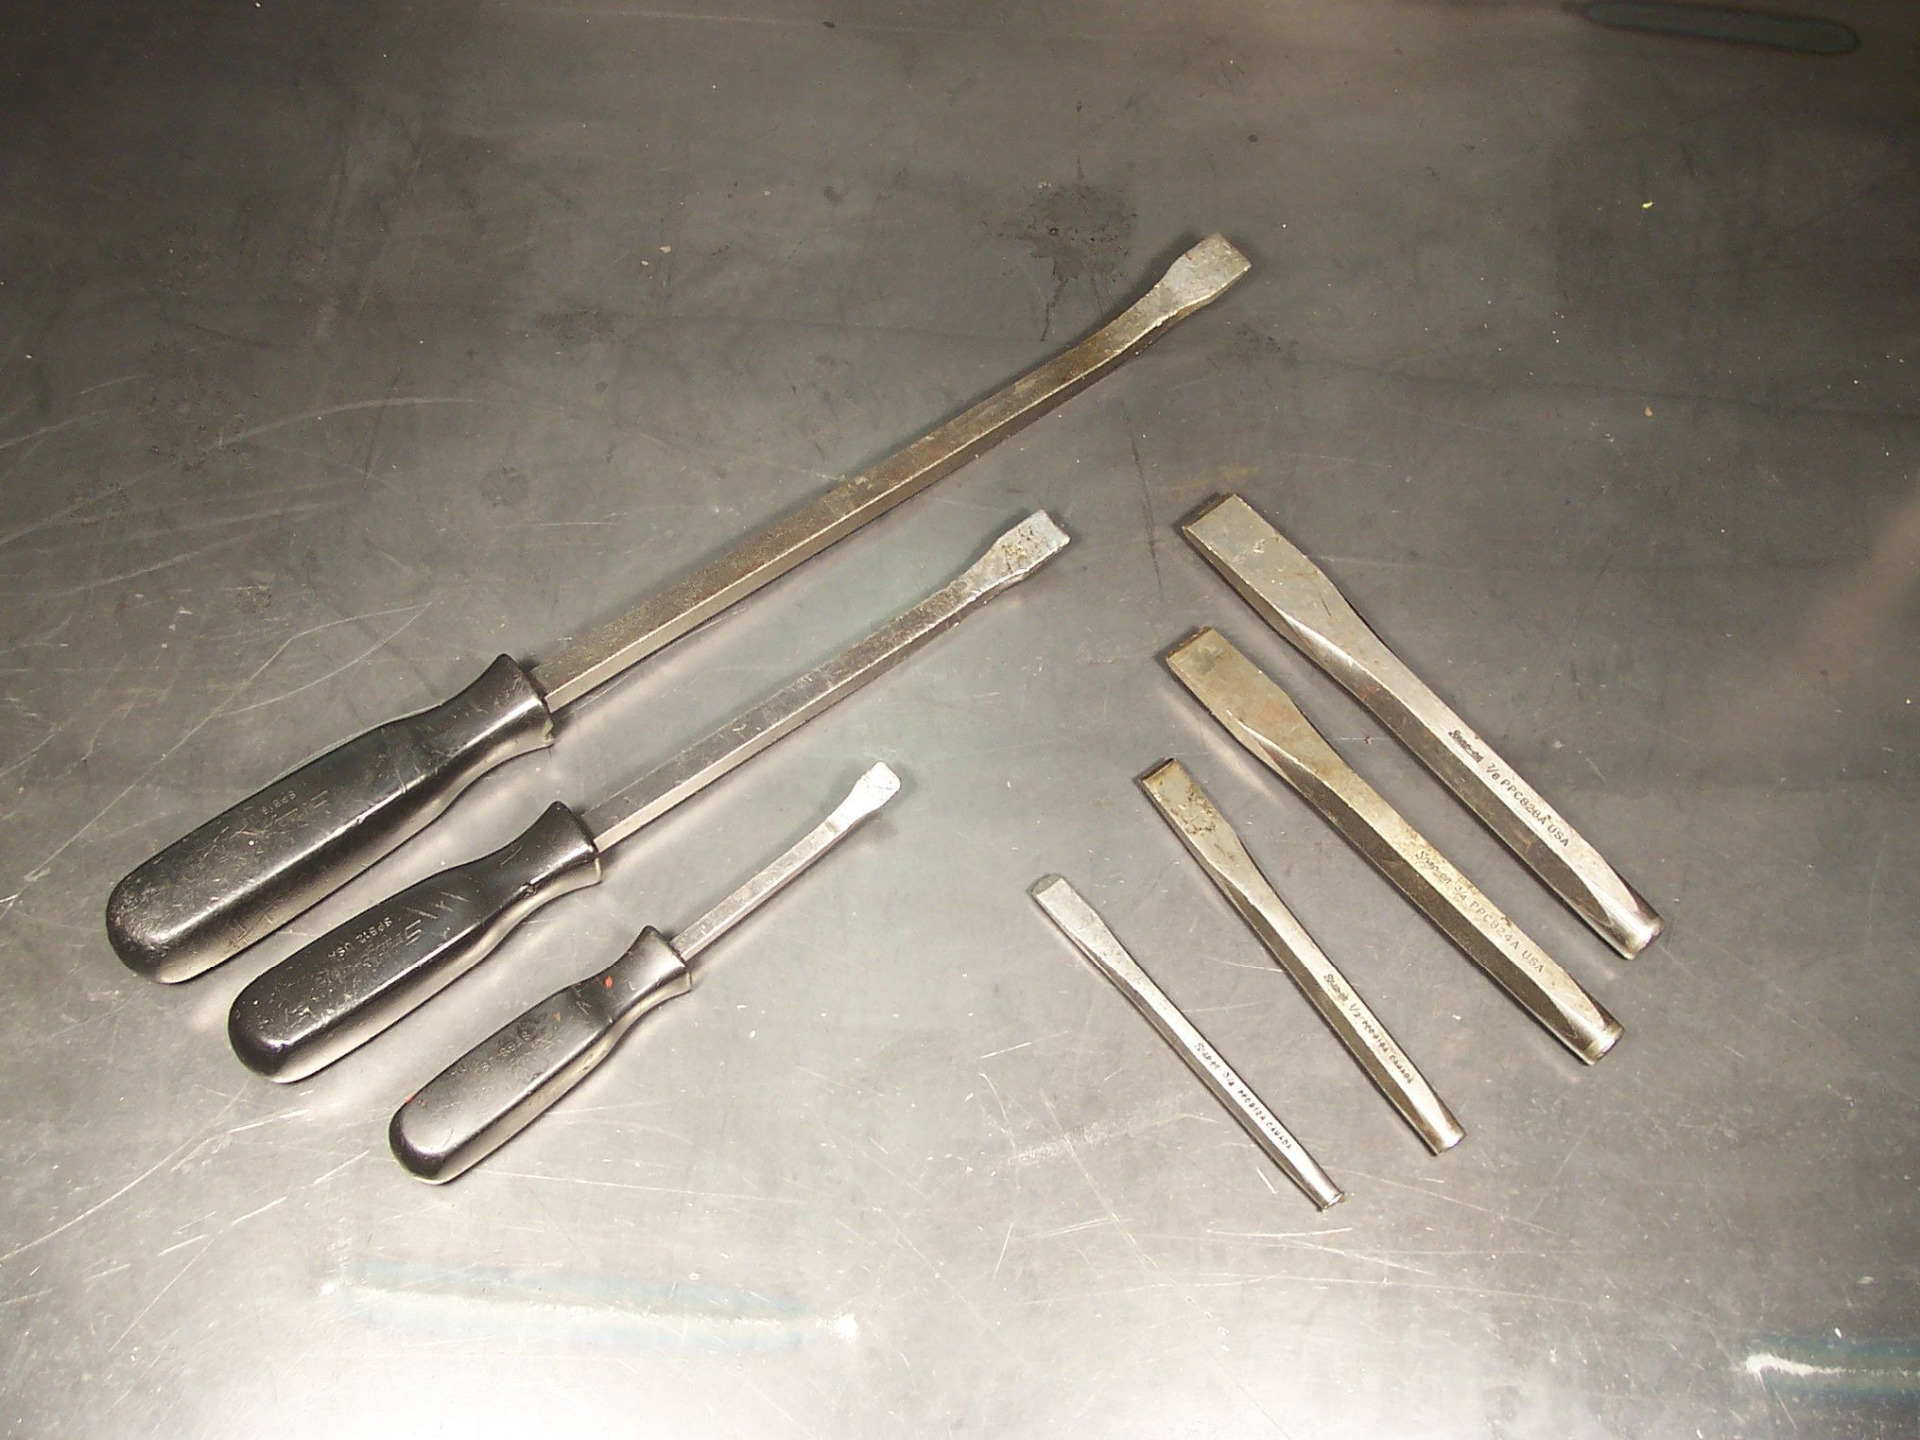
I have seen many folk sneer at the warning embossed into the handles of Snap-On Tools screwdrivers – it reads 'Not to be used as pry bar or chisel'.
I have also seen the physical injuries and damage caused by those folks, presumably that used to sneer at Snap-Ons warning, that have not heeded this advice. You wouldn't want to see the ragged and savage lacerations a broken screwdriver end or handle can make when thrust down/through an arm or hand/finger.
So – take heed. Remember the golden rule of tool use – always use the correct tool for the job.
Pictured here are various length pry bars and assorted sized chisels. The pry bars are specifically designed to bare the side loads encountered when levering away on something. Screwdrivers tend to be brittle so snap easily. They also have a slightly angled end to aid levering angle. Likewise with chisels – intensely resilient on the blade tip but brittle in side loads.
Designed to be very strong when used in compression as when whacked with a hammer. Screw driver handles tend to shatter and the tip break/chip. And yes – I have seen those screwdrivers that have the blade shaft running through the handle so they can be hit with a hammer. Not at all a sensible thing to do. Both these tool types are widely available for small beer, so add them to your tool collection.
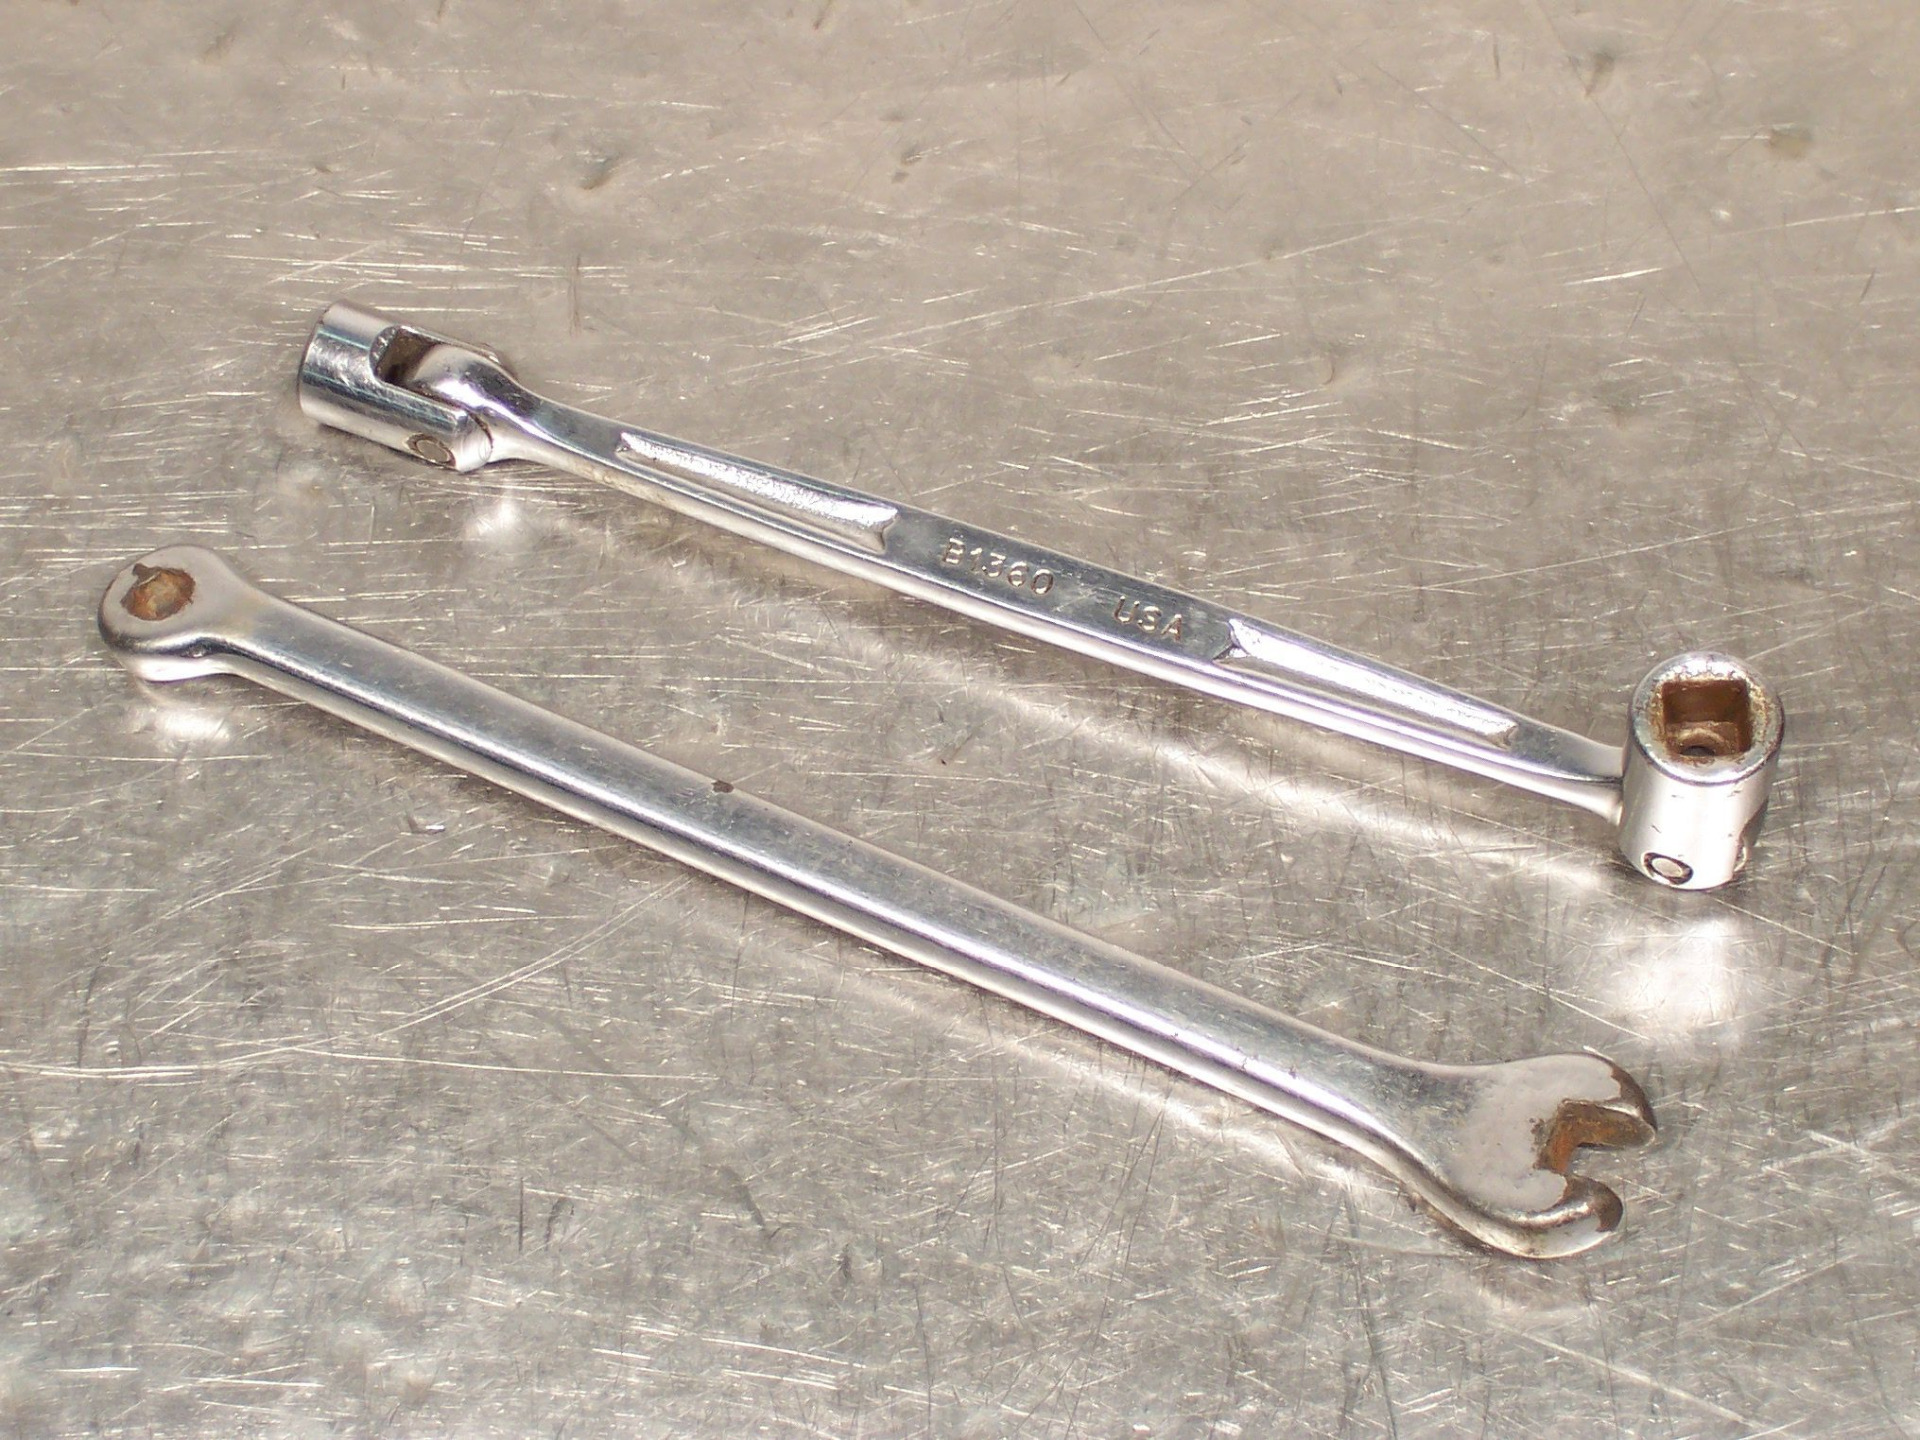
To keep your brake efficiency in tip-top condition, regular checking/adjustment of the rear brakes is paramount. This is because as the rear brake shoes and drum wear the wheel cylinders have to travel further to get the shoes to engage on the drum – and that means increased pedal travel.
Nine times out of ten, a 'long' brake pedal (meaning the pedal travels a long way before engaging the brakes) is caused by badly adjusted rear brakes. The adjustment is made via a threaded bobbin with a square peg that protrudes out from behind the rear brake back plate.
Whilst it is a standard spanner size (5/16-in.AF) using a spanner made for the job makes it much easier and less prone to rounding the adjuster peg off and the accompanying 'blue air' and frustration.
The best option is the spanner pictured uppermost made by Span-On (part number B1360). Whilst it is not the cheapest option it gives the best level of grip on the peg and is what I use and highly recommend because this is something that will (or should!) see a lot of use. The spanner pictured at the bottom is one of those offered as an alternative; its slightly battered state illustrates its less efficient design to the Snap-On one. There is a third I have seen/used that is pretty much like the lower item but has an enclosed square hole so would be somewhat better than the open ended one shown.
Mini ownership means dealing with it's original and quirky design; much of which went in to the suspension system.
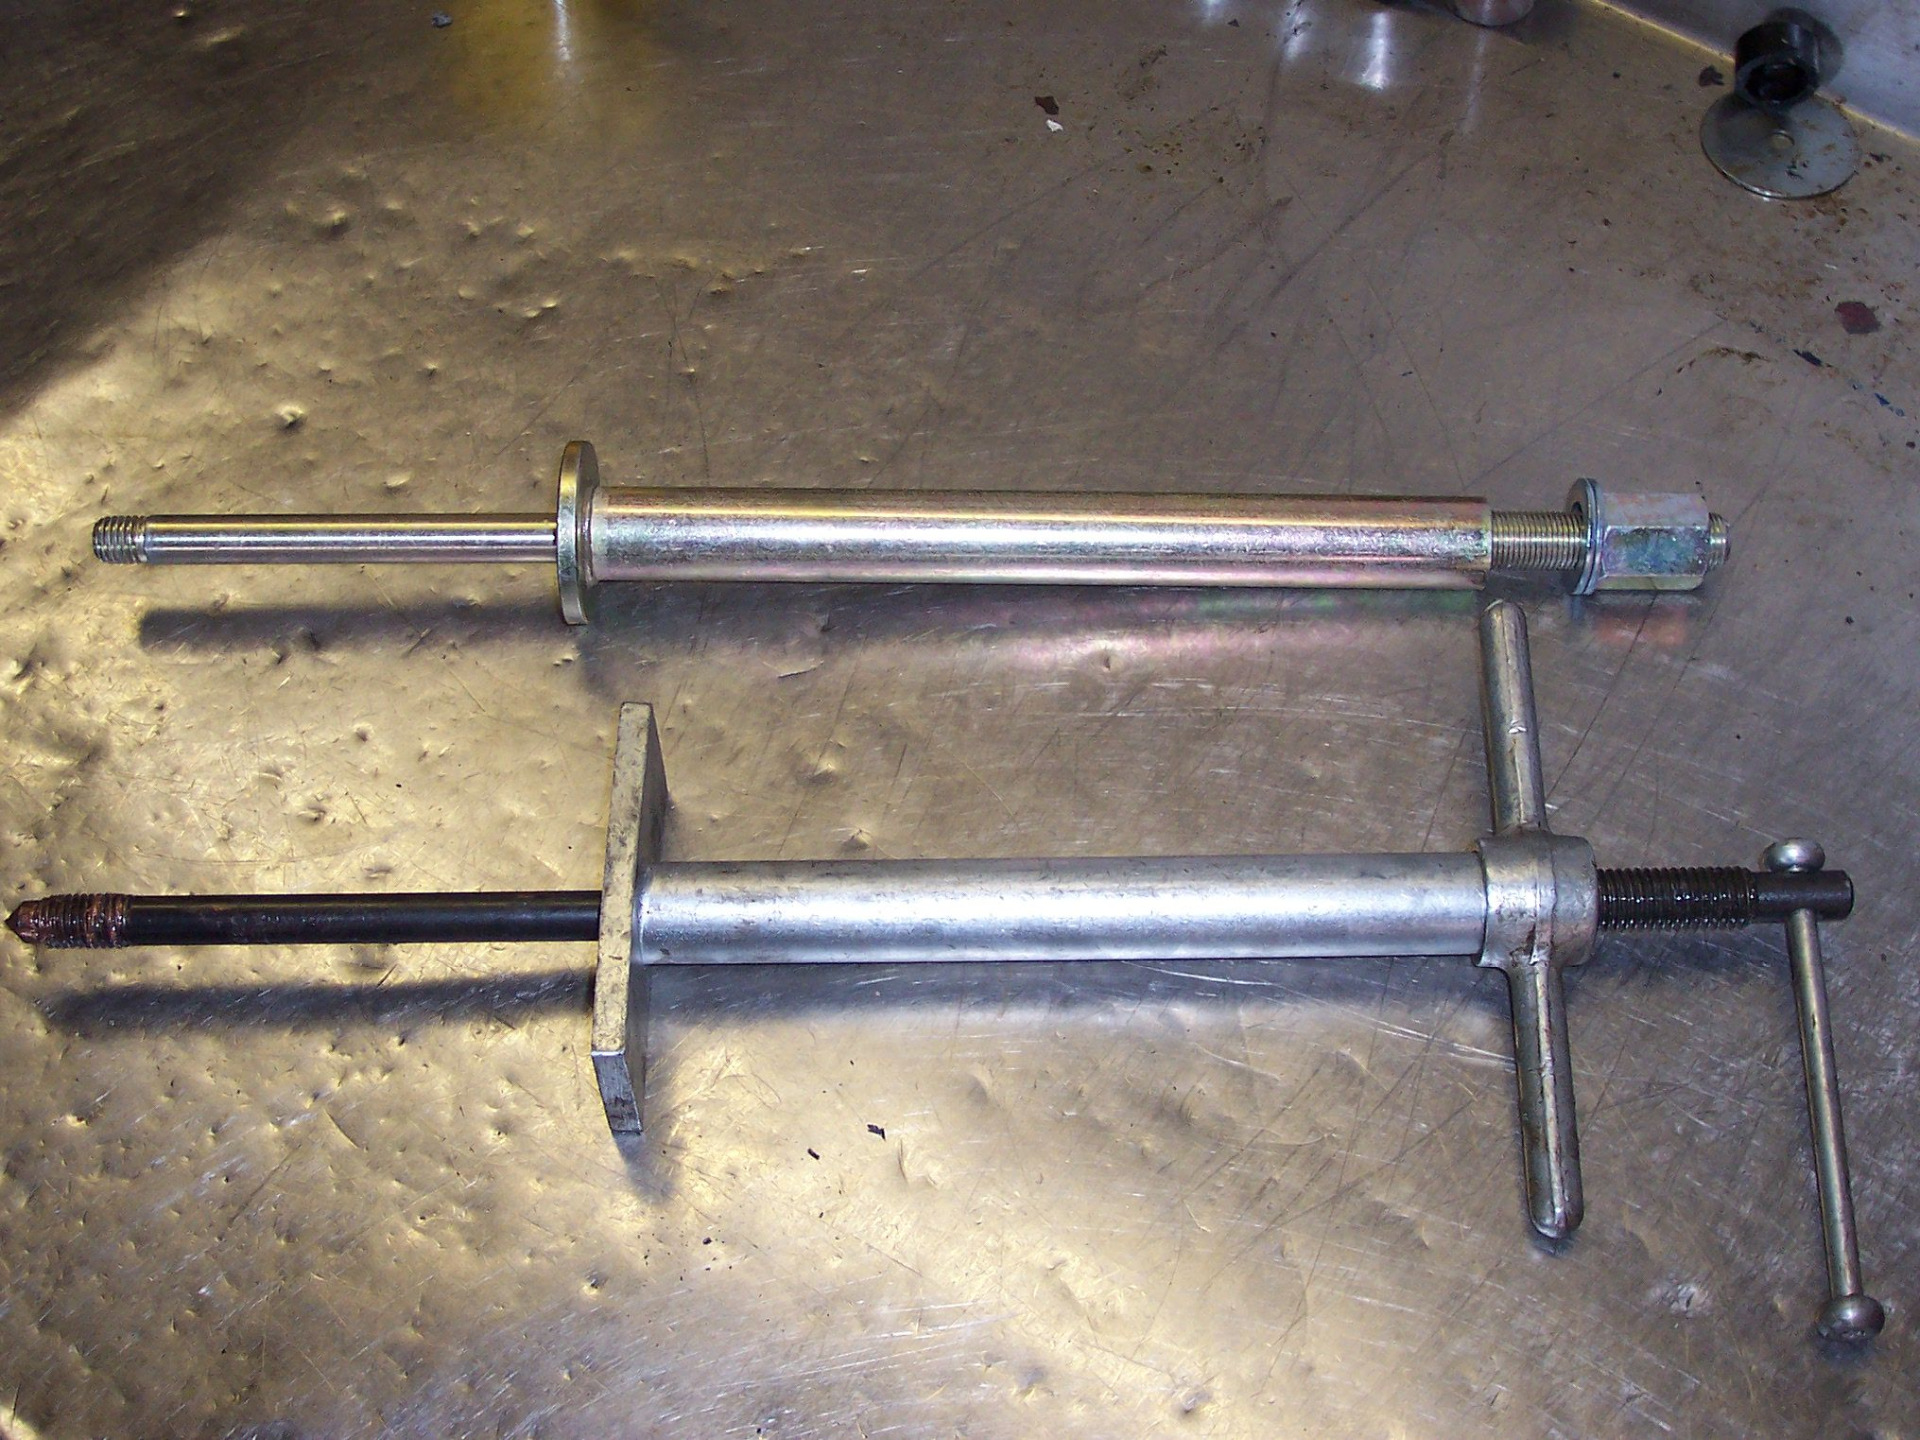
The rubber springs are fearsomely powerful bits of kit, exerting enormous pressures on the parts it comes in contact with – namely the aluminium cast trumpet/strut and the knuckle/knuckle cup that locates it in the suspension top arm and the top arm its self. Servicing any of these items will require the rubber spring to be compressed so that the parts can be disconnected, inspected and serviced/replaced as required. So you'll be needing one of the tools pictured here – the cone compressor.
Top of picture is the latest 'budget' design, bottom is the original spec Sykes Pickavant design. The rubber springs have a threaded insert in the middle of the lower cup part of the spring. These centre rod of these tools screws into this thread, the other end of the rod is threaded for a collar/nut that can be screwed up to push against the external sleeve, thus compressing the rubber spring. The budget option tool only caters for the later, post 1976 rubber springs that have a metric thread in them. The Sykes Pickavant item caters for both early UNF thread and later metric thread by having a changeable insert for the centre rod.
Neither, however, are expensive so makes a very worthwhile investment for such a crucial tool.
Some while back I ran through the various sockets you will need to work on your Mini, planning on covering the relevant accessories that make using sockets possible. Somehow that slipped past so fast I didn't notice it! To make amends, we'll consider socket drivers first.
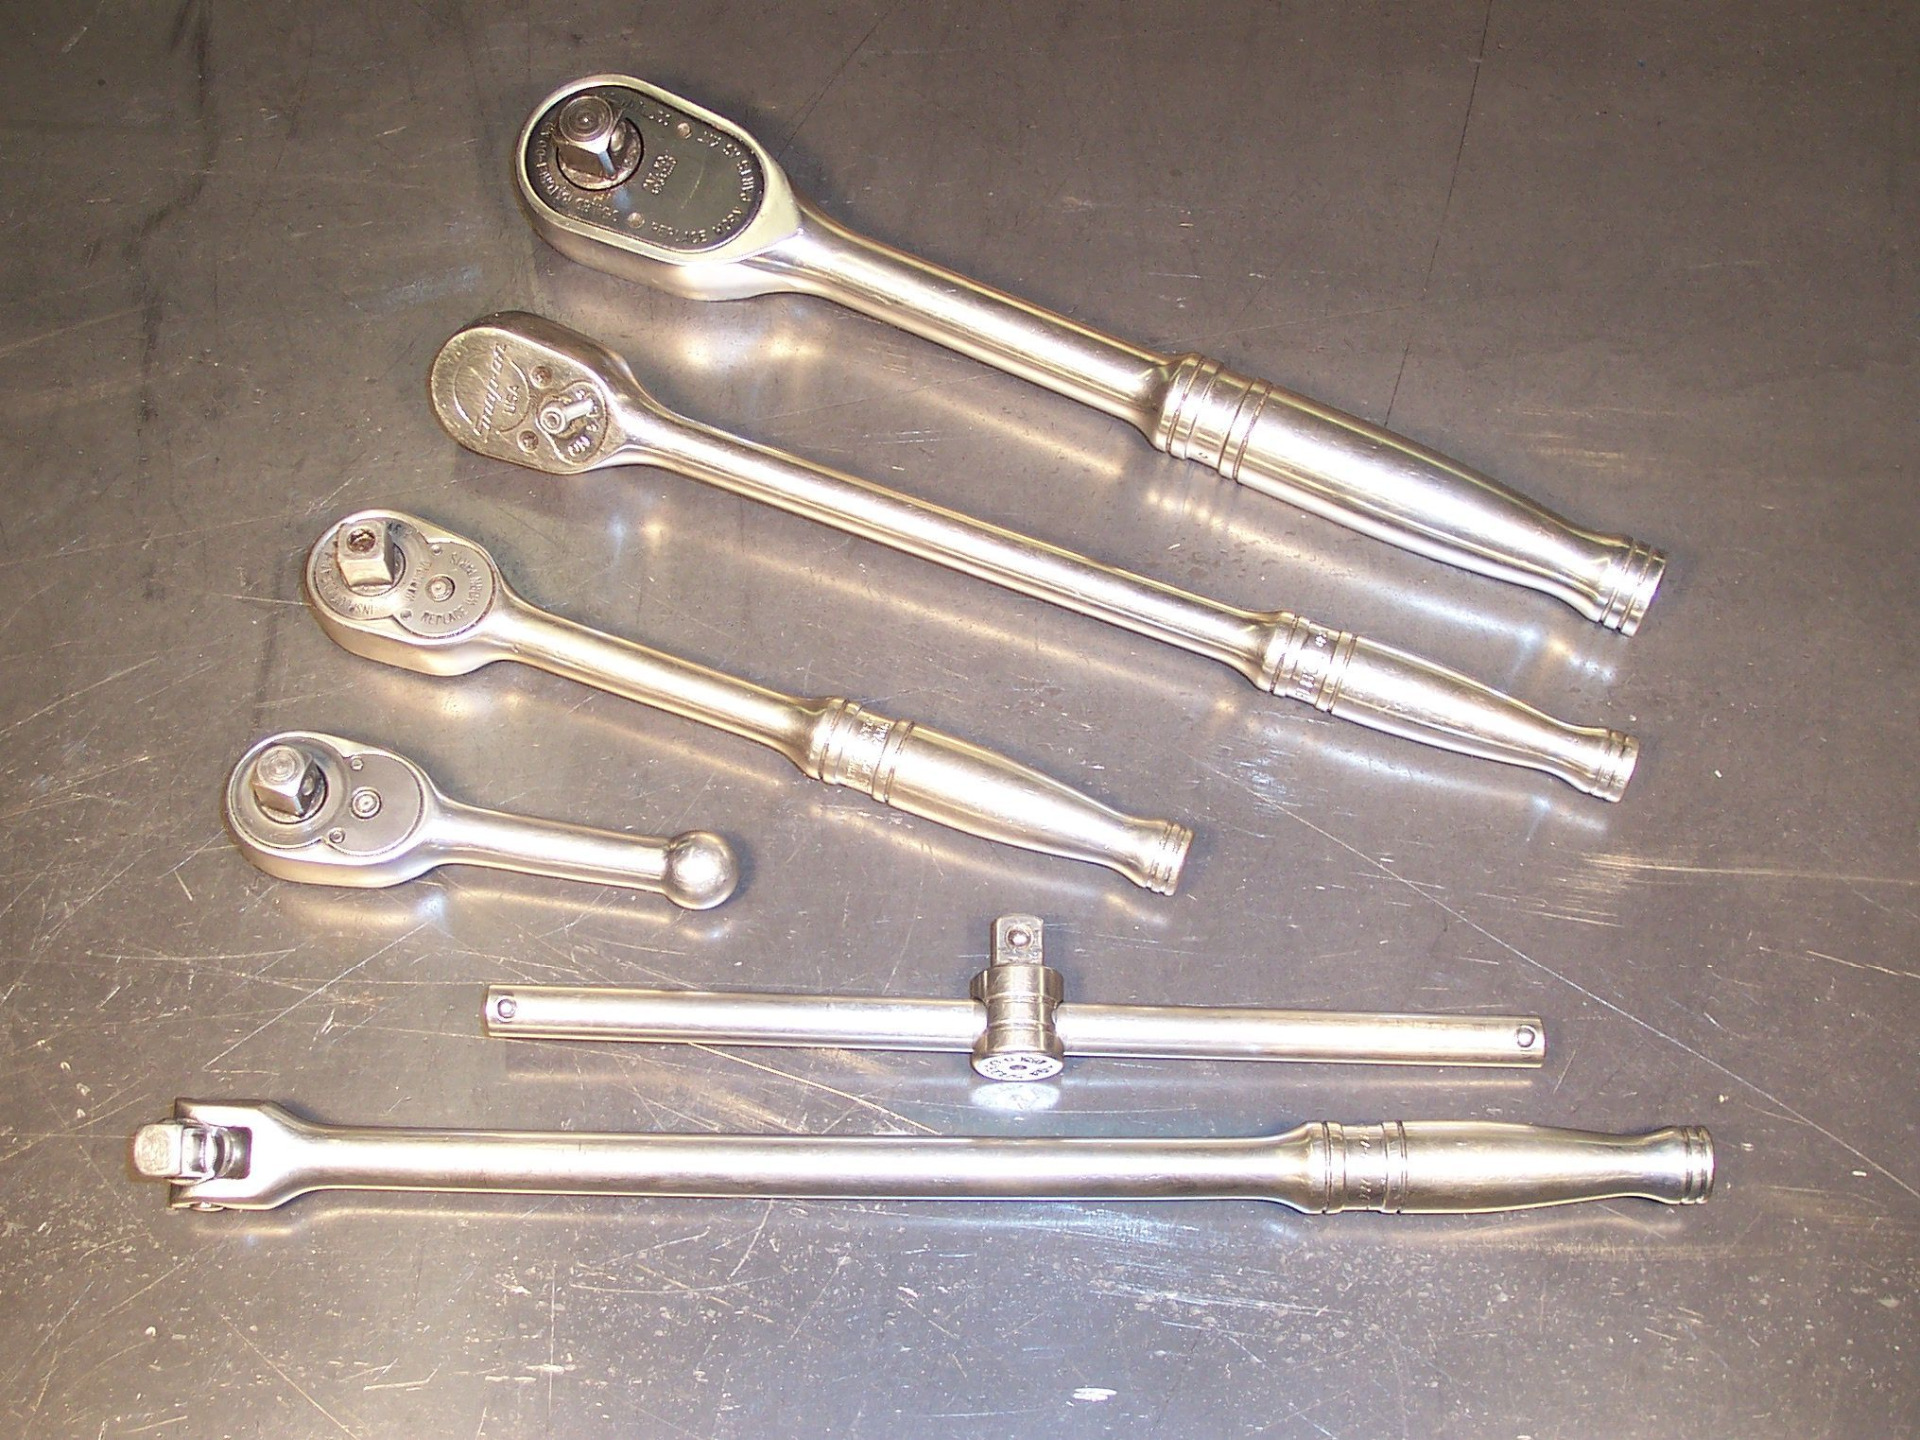
There is a plethora of socket drivers offered up for your delectation these days by a multitude of manufacturers. Some are relatively costly and made for professional use such as Snap-On Tools (as pictured above), others are cheap and cheerful for the some-time DIY weekend mechanic.
My advice on what to buy is, as always, afford the best you can. Snap-On have a slogan that goes 'quality isn't expensive, it's priceless'. And they are correct.
Having used their stuff for well over 30 years now I can say they have a point. There is nothing worse than a tool breaking/failing in use with the probable result of personal injury, a damaged fastener/fixing, and a job that can not be finished when needed. And ratchet socket drivers fall very fairly and squarely in to that category. Very cheap ratchet drivers are not made from high quality materials so are more likely to fail in use, and usually at an inopportune moment. It is essential to understand that ratchet drivers should not be used to undo very tight fixings.
It is this that causes the ratchet mechanism to fail in use – simple over-loading. For very tight fasteners use a knuckle bar (bottom of picture) to undo the fixing initially, the ratchet can be used after. For speed where threads are not badly corroded I use a 'T' bar as pictured just above the knuckle bar as ratchets only work when there is sufficient resistance in the fixings/fasteners to allow the ratchet mechanism to work.
One obvious note, make sure you buy drivers that suit the socket types you have – 1/4-inch, 3/8-inch, 1/2-inch and so on. This refers the the square hole in the back of the socket and peg on the ratchet. Generally 3/8-inch drive stuff is the best size to work with. 1/2-inch drive is very cumbersome for all but the biggest fixings/fasteners and 1/4-inch drive way too small for most things other than small fixings/fasteners.
There are various ways of fitting or removing studs from cylinder head, engine, gearbox, etc. Of the nastiest there's the use of adjustable jaw/swan neck pliers and Mole or Vice grips. Any of these will tear or mark the stud shaft length.
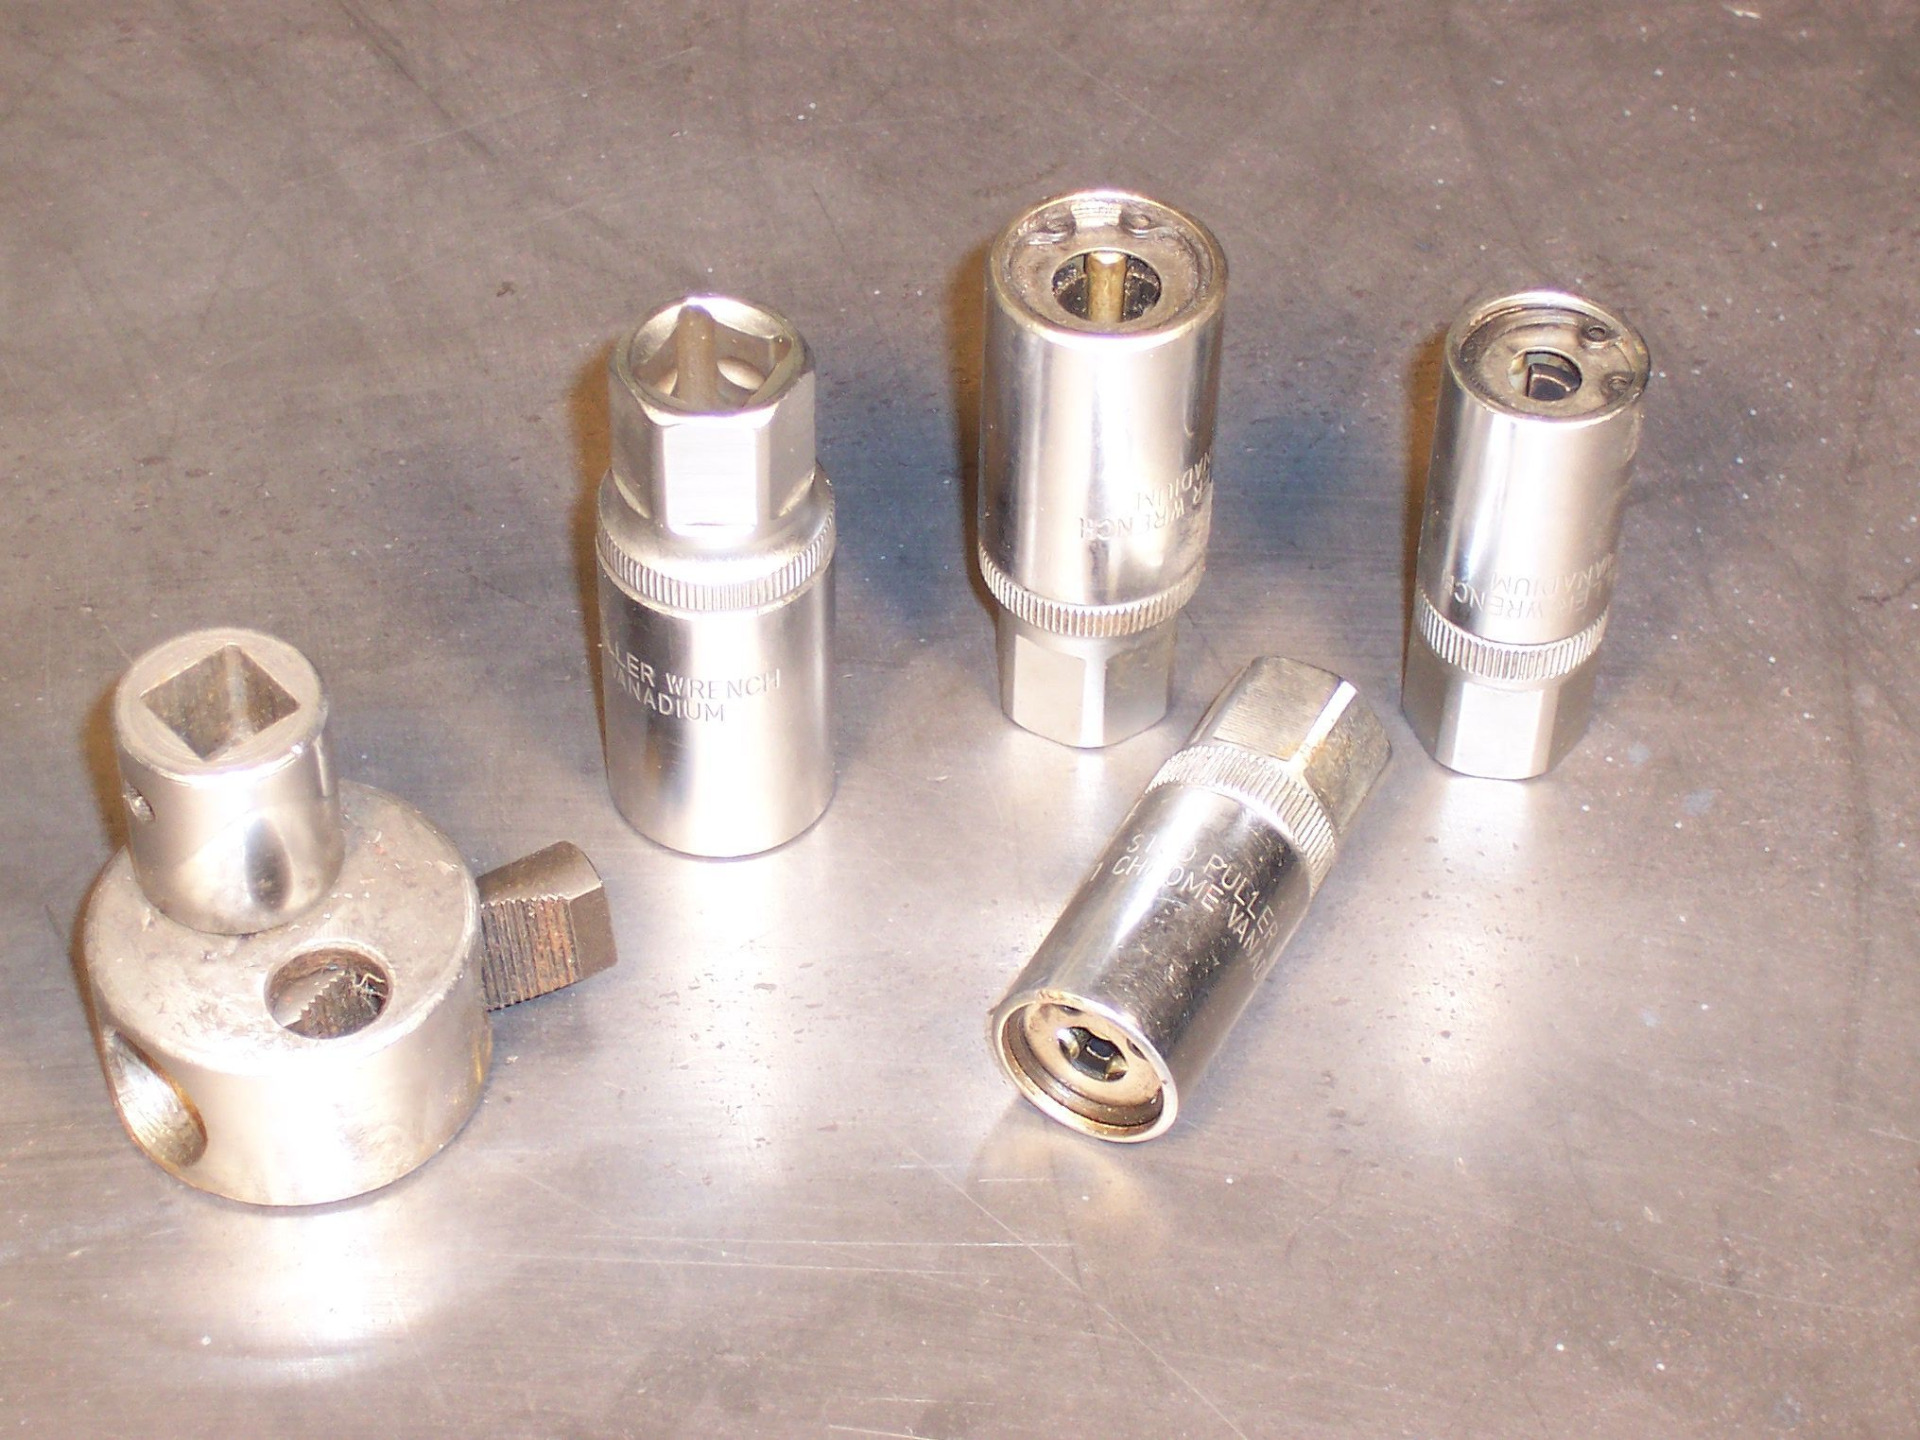
Of probably the least worst is using two nuts done up tight against each other. This works better for fitting studs than removing them, either way it tends to damage the threaded section. For those that will be working on and maintaining their own Minis, I would very strongly advise in the investment of a proper stud extractors.
Shown here far left is what was generally available as a cheap solution to stud fitment and removal. The draw back is the amount of room required to use the tool – pretty bulky in its peripheral area – but still a better option than the aforementioned.
The other stud removers in the picture are definitely the way to go, especially as they are now available very cheaply from the likes of Machine Mart (barely £20 for 4 sizes). Despite there mainly being only metric sizes available, the cam and pawl design used in these sockets, about the size of a spark plug socket, means this is not the issue it is with spanners.
A typical set comes with 6, 8, 10 and 12mm sizes, the first three being worth the kit on their own as they will cover a vast majority of the 1/4, 5/16 and 3/8 inch studs used in the A-series engine. Usefully they can be driven by a ratchet, extension rod or even ratcheting or plain ring spanners.
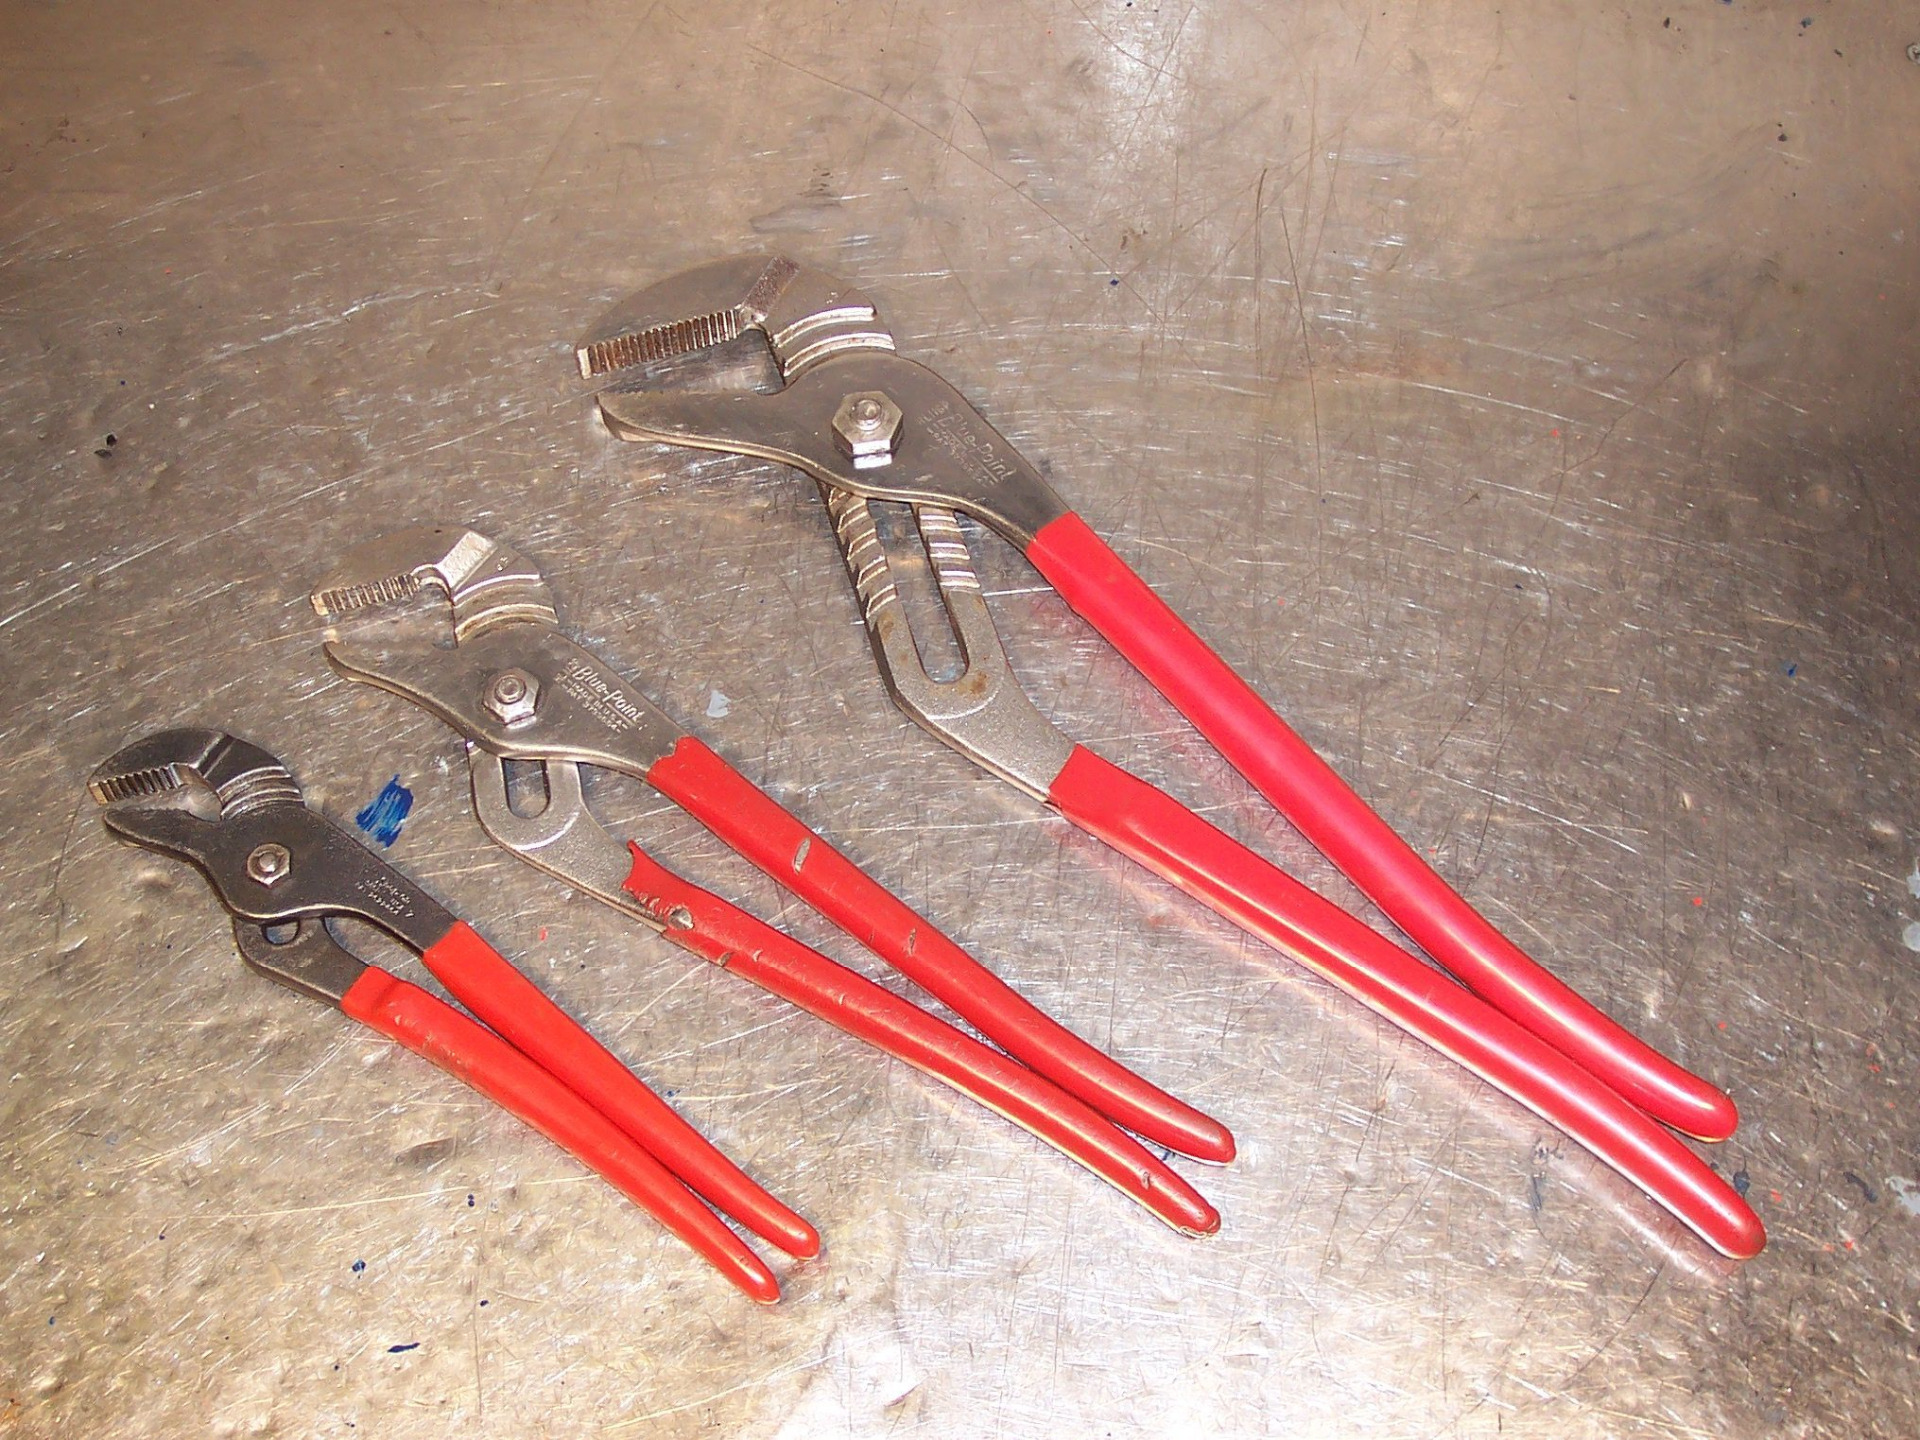
Having specific shaped fastenings that can be tightened or released with a specific shaped tool for the job – i.e. nuts/bolts and spanners – what about the weird, difficult and curved bits and pieces where either a very specific tool only available to specialist workshops or where perhaps no tool is really available?
The general answer are these – what is commonly called either 'water pump pliers' or 'swan neck pliers'. One half of the handle/grip rotates through an arc to disengage large serrations on the inside of each half, can be slid up or down the other handle/grip to alter the jaw capacity then rotated back to re-engage the large serrations.
Sharp angled serrations in the jaws give serious purchase on whatever it is you are attempting to grip. Dead useful on round-shaped objects, or even nuts that have become rounded from incorrect spanner use.
Also very useful when trying to hold one object whilst attempting to undo a fixing on that object with another tool (spanner, screwdriver and the like) where a bench vice is neither present nor easily accommodated where the parts happen to be. One such component on the Mini is the rear subframe, forward mounting trunnion to subframe pin which has a large round head with two small holes in it's face and is retained by a Nyloc nut on the inside.
Unless you have the specific tool with the two pins in that engage the holes in the fixings face, it's impossible to get hold of without grips such as these. Available in various sizes, it's a good idea to have a couple of sizes as despite being seemingly adjustable from nothing to the jaws maximum capacity, the larger the jaw capacity, the larger the tool becomes.
If you believed everything you heard from everybody about the Mini being generally unreliable and a mess – in certain instances they are correct. But then any vehicle driven as hard and relentlessly without regular servicing and TLC will suffer the same problems.
One such problem that has been the curse of the Mini though is it's wiring. Many of it's cables and terminals are relentlessly exposed to the elements – take the front lights in general, that nasty bunch of connectors right behind the centre of the grille tucked up under the bonnet slam panel.
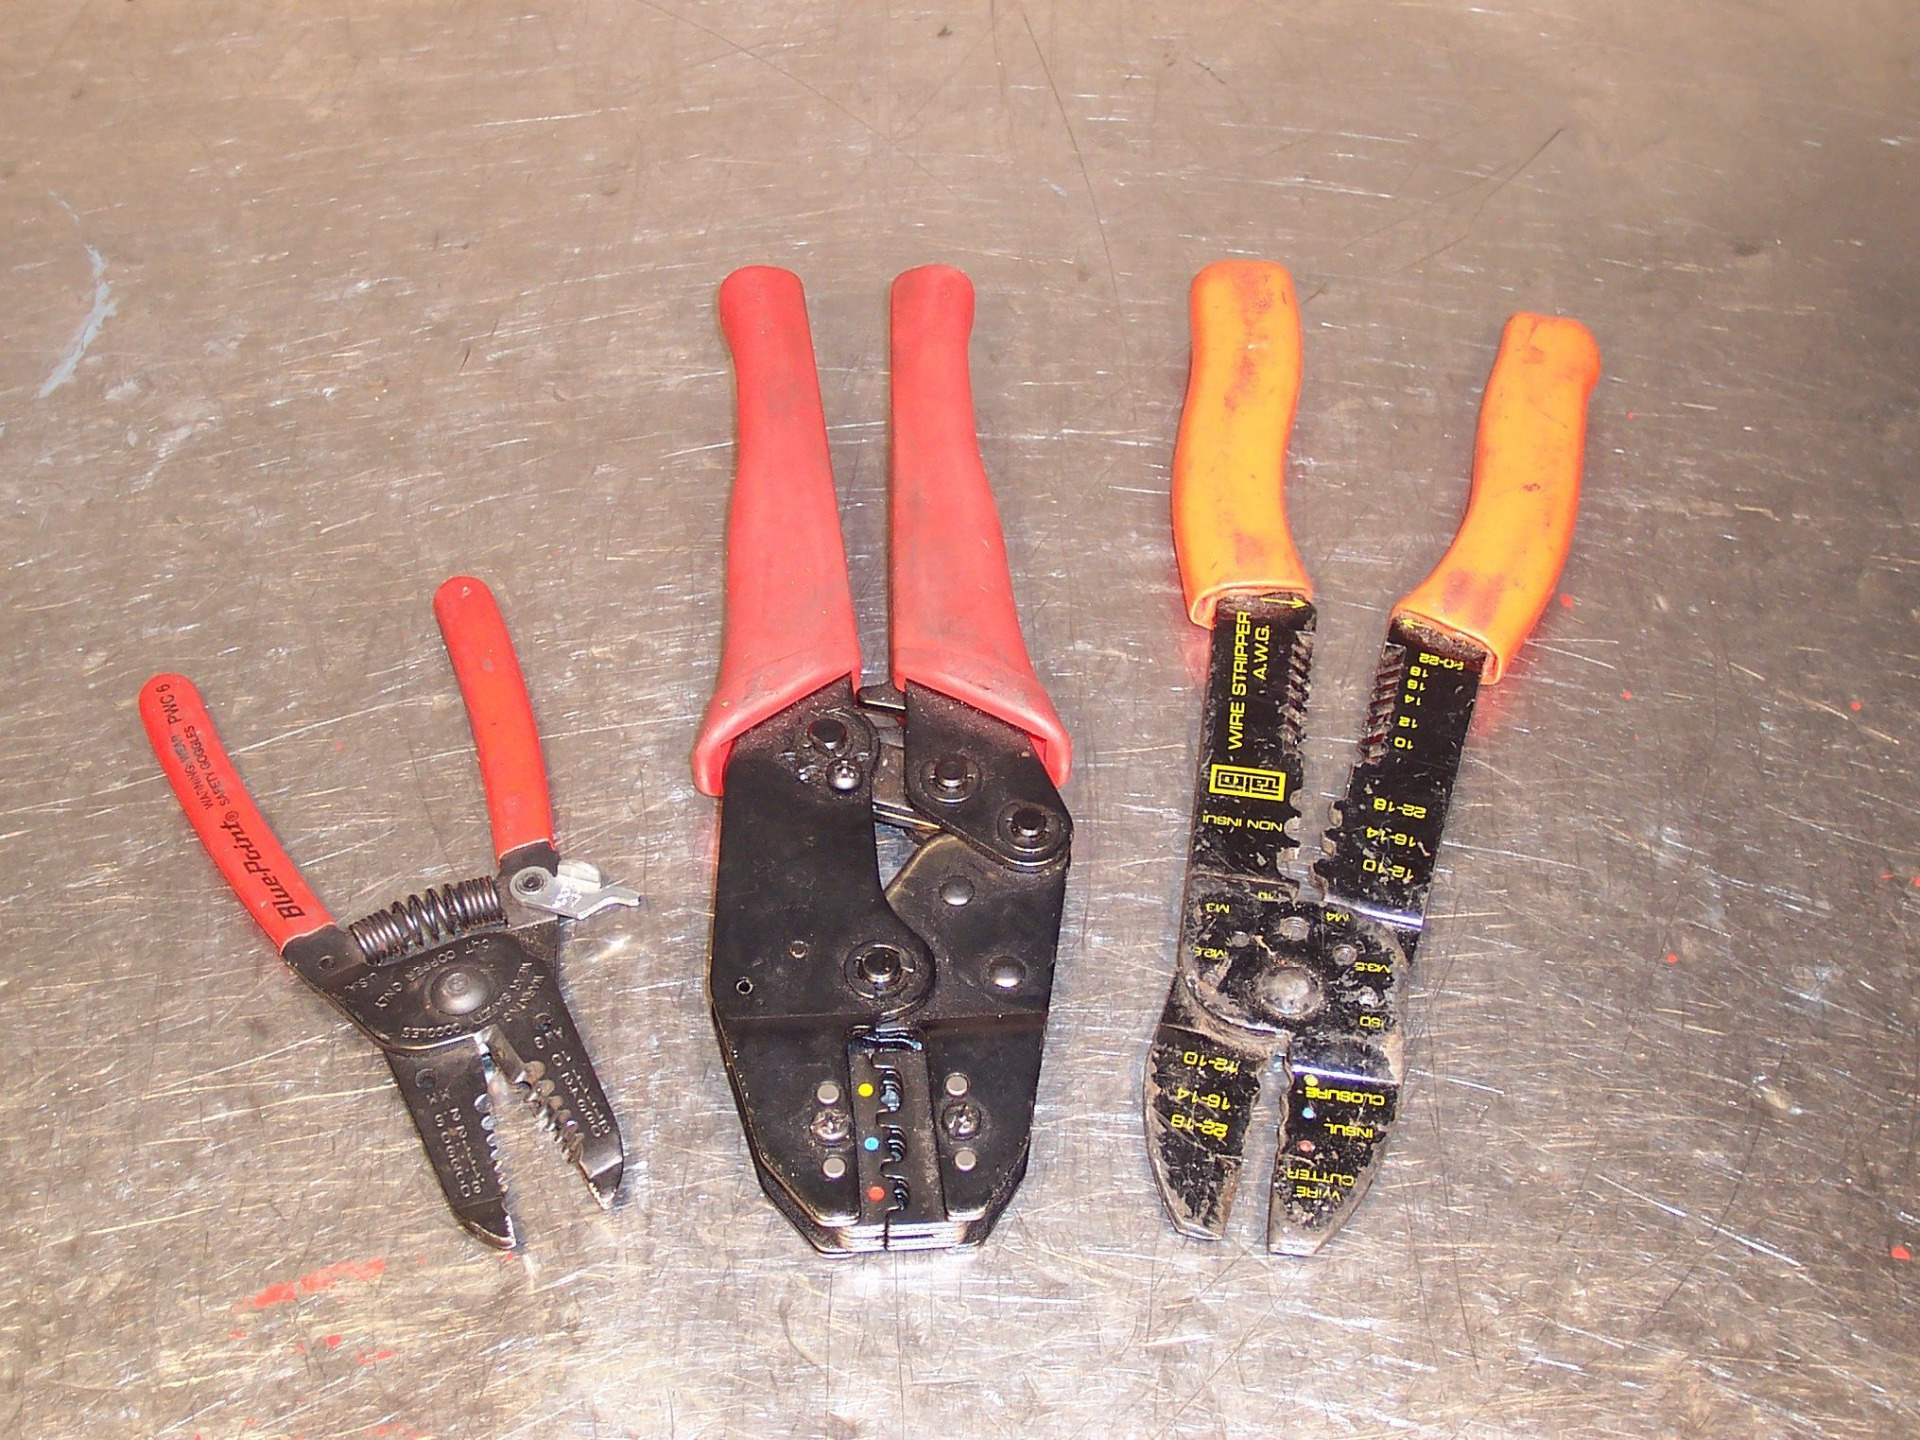
To service and repair/replace these connectors and terminals correctly, decent quality terminal pliers and cable strippers are a must. There are several types and style on the market – but here the adage of 'buy the best you can afford' really rings true. The cheaper variants are pretty nasty and do not make a good job. Shown above are various samples.
The combined crimpers and strippers on the right are probably the most common, some have the terminal crimping facility on the nose section and cable insulator strippers as here, other versions have it arranged vice-versa. The main problem here is doing repairs to cables/terminals still in the loom/on the car – one or the other functions will prove down right frustratingly awkward at some point.
My preferred tools are shown centre and left, designated single purpose tools. Centre is the terminal crimper; this type crimps both cable area and insulator area at the same time and a far better crimp than the universal type one on the right. Left is the cable insulator stripper with the stripping slots at the nose of the tool for easier access to cables still in the car/loom.
Almost any job you tackle of a mechanical nature on your Mini will usually involve re-tightening some fixings to a pre-determined level set by the manufacturers of either original spec parts or those supplied by after-market parts producers.
One regularly ignored such fixing is the wheel nut; many simply levering for all their worth on the nuts in the belief the tighter the better. Not at all so. The nut is only being applied to a relatively small diameter stud of 3/8-inch – consequently over-tightening will lead to failure at some point considering the torque requirement for this fixing is a meagre 42 lb ft.
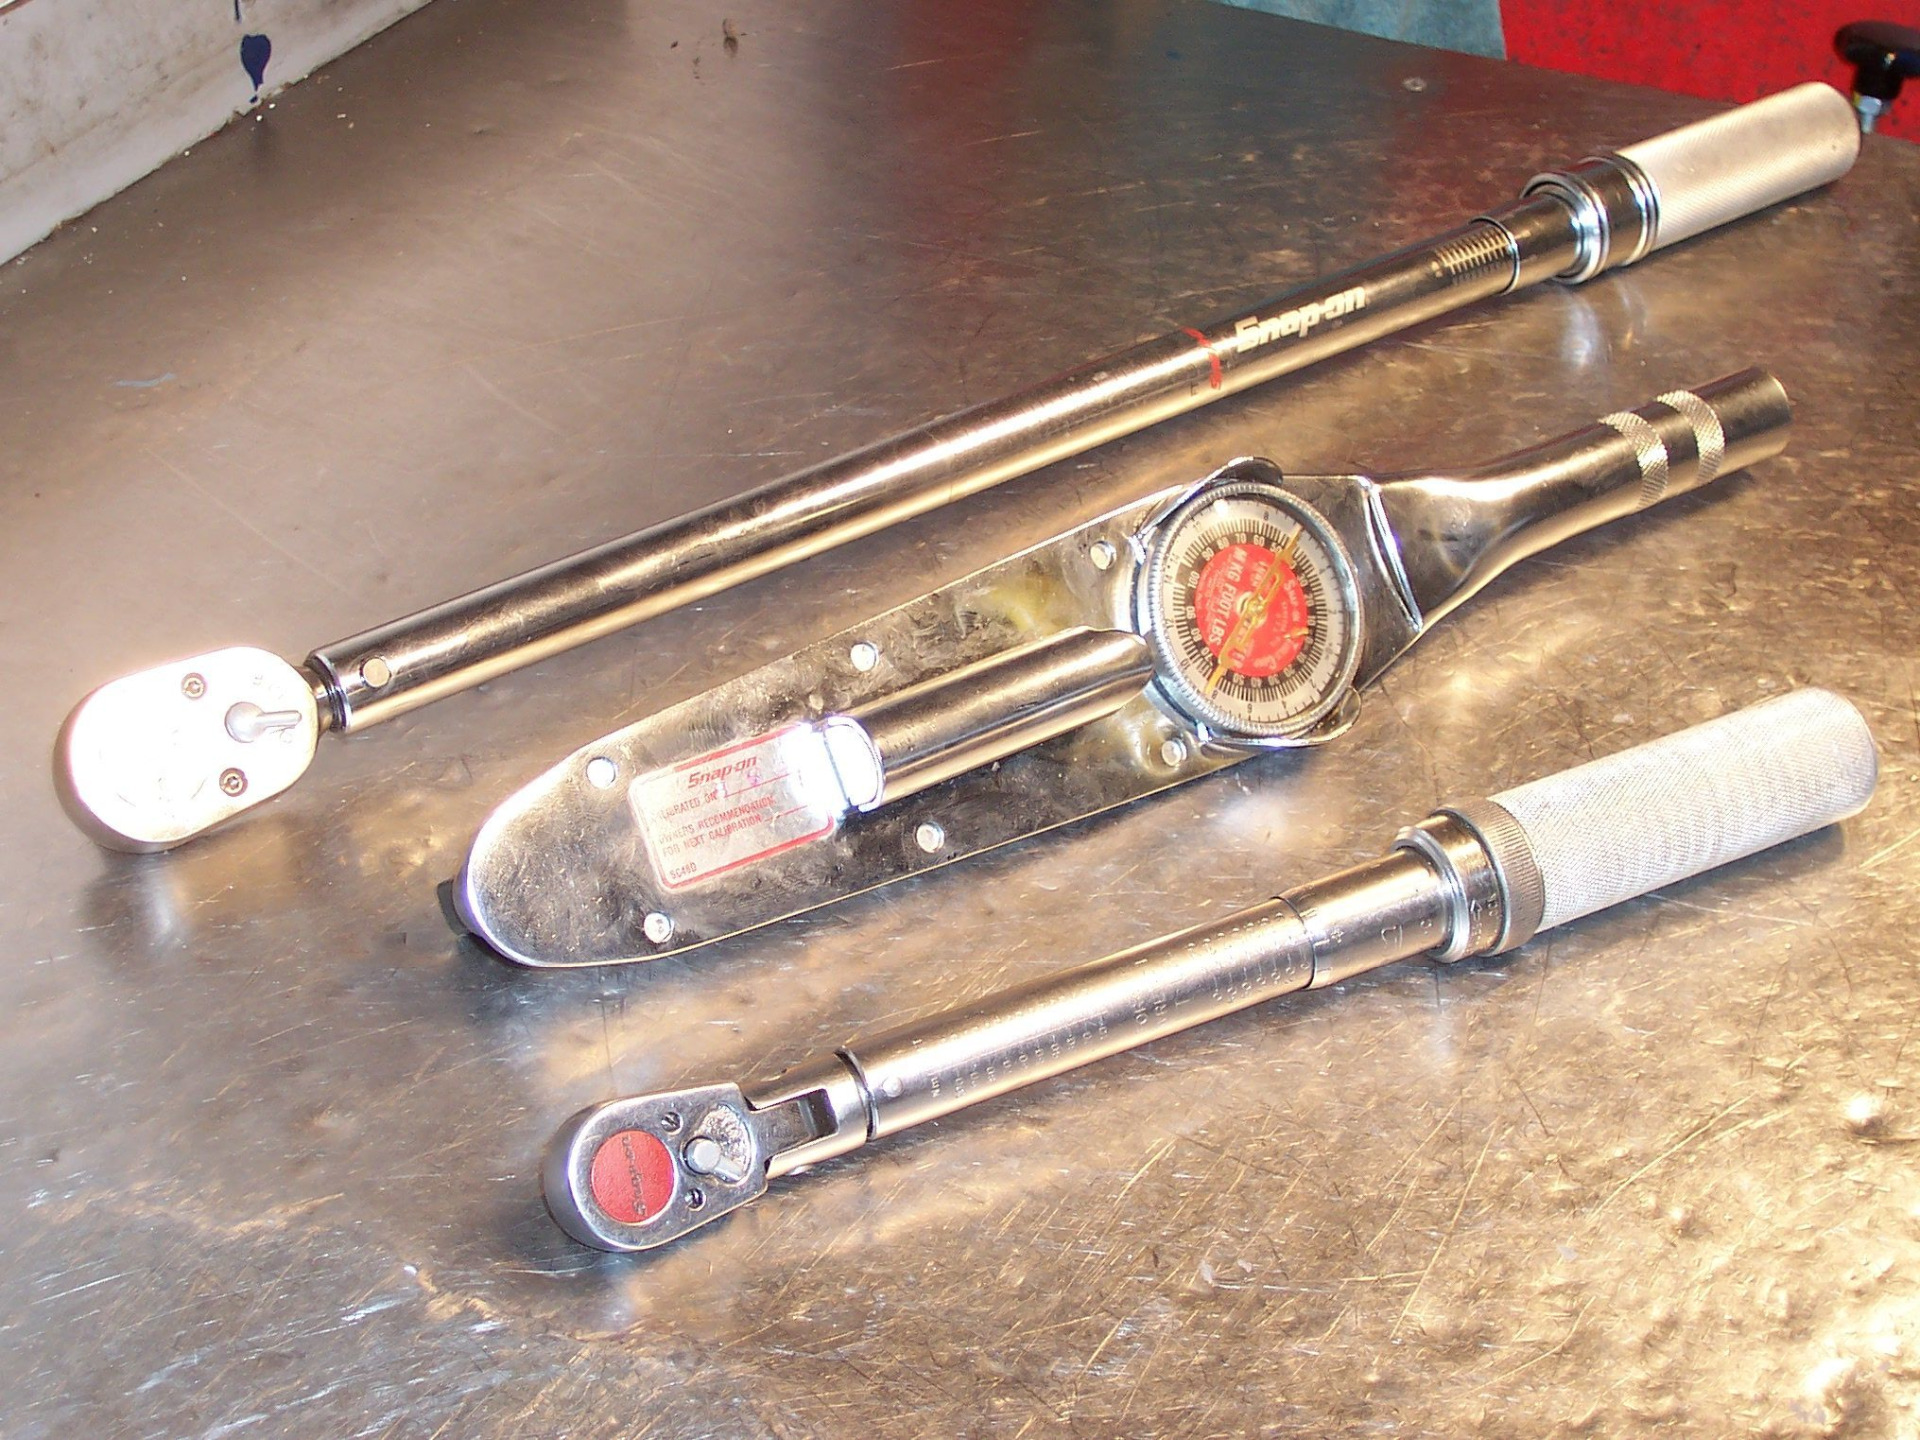
To be able to set these fixings to the require tension/tightness you will need a torque wrench. As with many tools these days, even the cheaper ones are reasonably accurate and probably good enough for most DIY-ers that carry out the various maintenance jobs on their cars. However, it is unlikely that you'll get a torque wrench that will cover the whole spectrum of settings you'll find in the Mini manual – from something like 8lb ft to 200lb ft.
And even if you did I would strongly advise you shy away from buying such an item as it will not be accurate enough over the whole range. So I advocate getting two torque wrenches – one to do the small stuff (5 to 70 or less lb ft) and one to do the big stuff (40 or 50 to 200 lb ft). Our own Paul Smith covered a selection in Mini Mag October 2006, issue 126.
Shown here are my weapons of choice. All Snap-On, and not at all cheap – but I believe in buying the best I can afford for the job in hand, and I use them a lot. Top is the beastie for the big stuff, Bottom is the low setting one and the middle one is where I want absolute accuracy. This is an 'aircraft' specification one that uses a torque arm with dial and light instead of the more familiar 'click' type ratchet versions, guaranteed to 2% accuracy rather than the 4% of the other two shown.
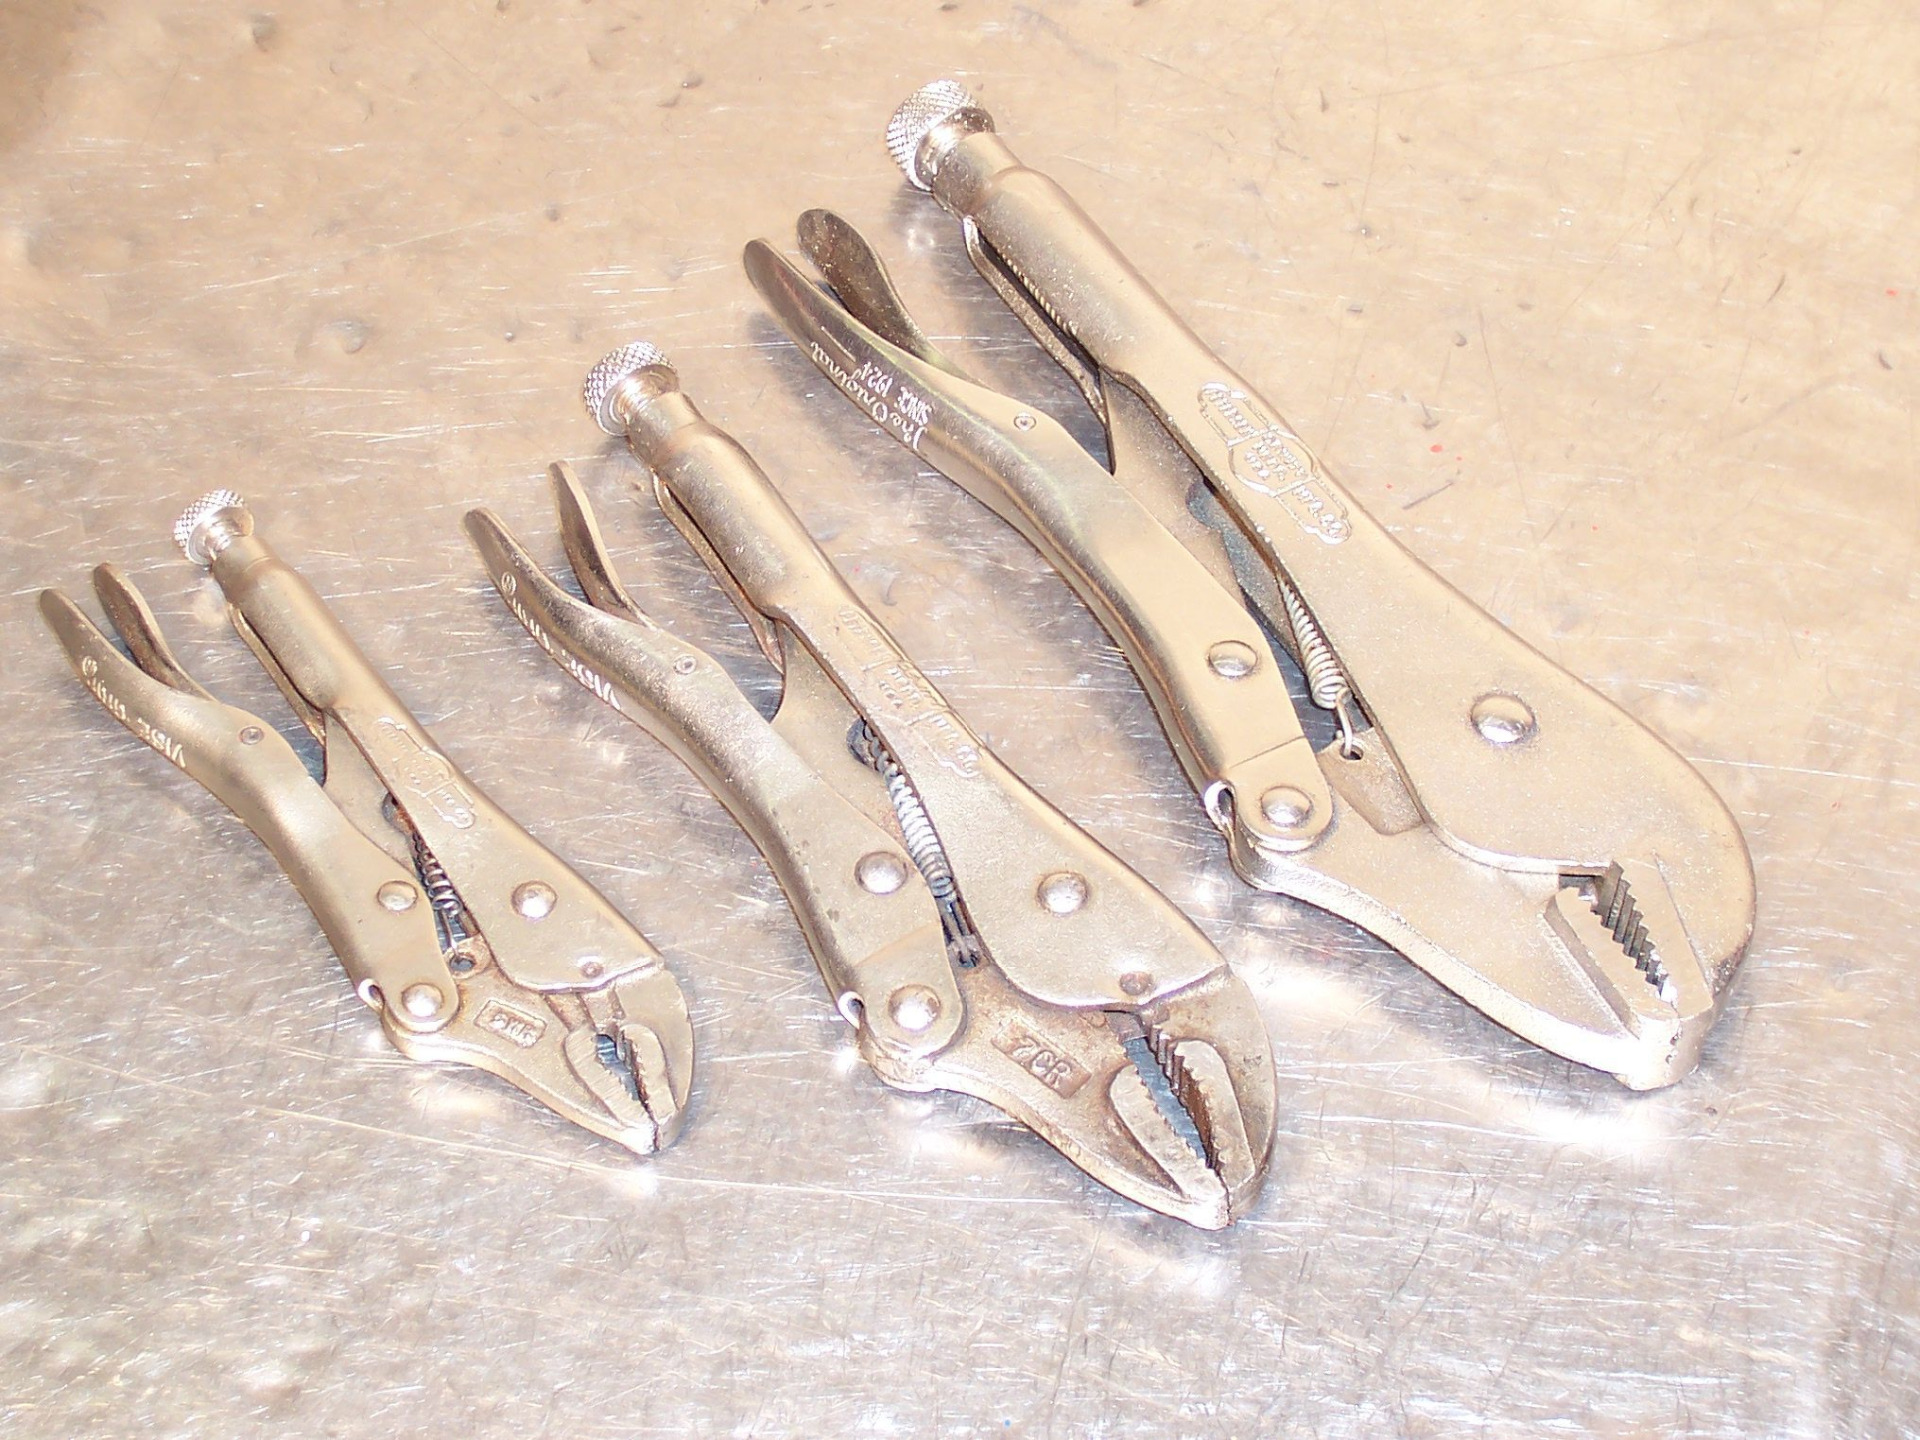
Ancient cars tend to become rusting horrors – and the Mini is no exception. Used in everyday life in every weather – rain or shine – and subject to wet tarmac and gooey mud, fixtures and fittings can become seriously corroded on.
Having mashed flesh into metal when the fastener head rounds off, or that pin simply won't give way to normal methods or releasing... it's time to break out the Vise grips, also known as Mole grips – both specific manufacturers trade names but also called locking jaw pliers.
With adjustable width locking serrated toothed jaws that can be squeezed as tightly as your fore-arm and hand muscles will allow to the offending item they make an invaluable addition to any tool box. They are readily available from most tool supplies companies singularly or in sets and these days at very reasonable prices.