


Pressure plate - Pre-Verto types
Apart from very first one that should be avoided at all costs (cast in part no.2A3509), there is an astonishing five other types generally available. For high-tech ones see 'Flywheels & Pressure plates - technical advances'.
22A598 - Number cast in. Standard-grade cast iron
22G270 - Number cast in. High-grade cast SG iron as fitted to Coopers and
Cooper Ss
Quinton Hazel - Triangular in shape, but only standard-grade cast iron.
C-AHT230 - Mini Spares high-grade SG cast iron, but cast pre-lightened.
Farndon Engineering - Machined from steel billet.
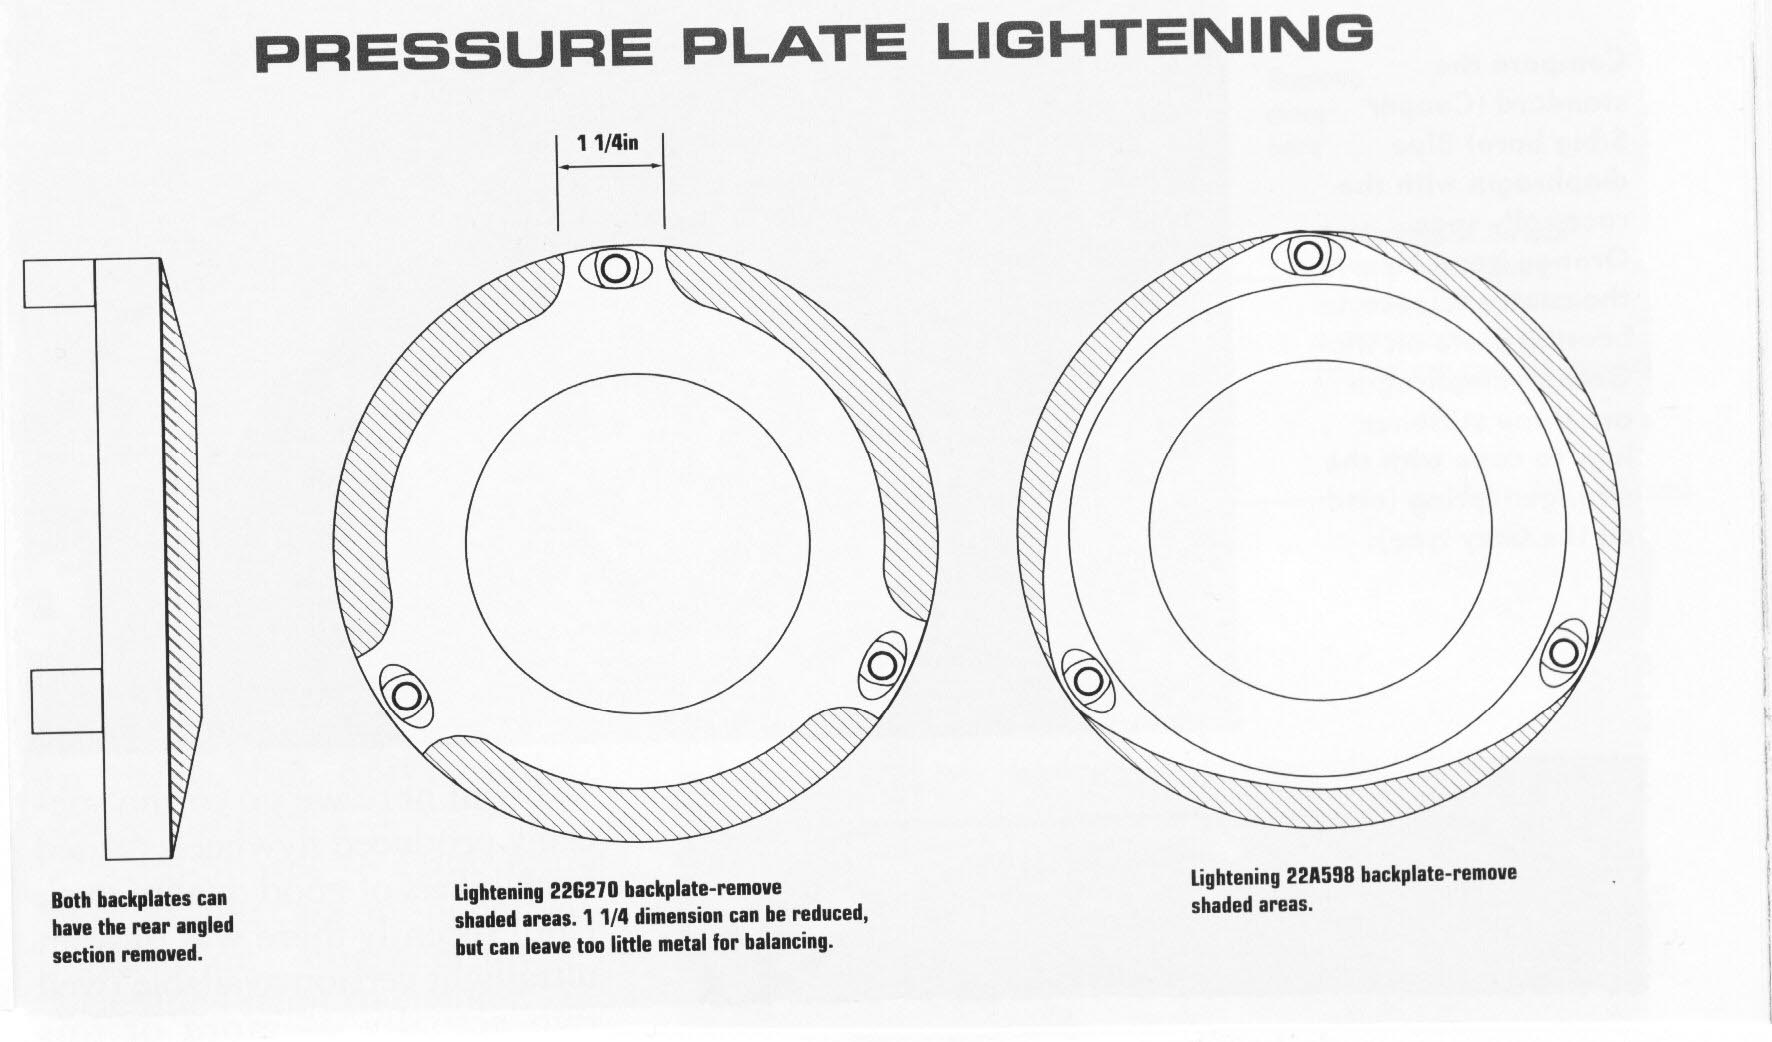
The first two can be lightened, see accompanying diagram. Limit removal of metal on the rear face to 0.120" to be safe, 0.150" if you're feeling brave/lucky. The third can be further lightened by carrying out the machining operation on the rear face as indicated in the diagram and as per previously stated dimensions. Do not remove any more material than indicated for any of these pressure plates as it will not only reduce their strength, but will also cause over-heating of the clutch. Too little material will not be able to absorb any excessive heat generated during spirited driving! Bear in mind what was said about lightened standard cast iron flywheels - the same applies here. Under no circumstances use lightened standard cast iron pressure plates in ANY competition disciplines.
The SG iron items are suitable for full race use despite lightening operations, although further lightening of the Mini Spares C-AHT230 pressure plate is unnecessary.
Pressure Plate Weight Comparison -
LB KG
Standard cast iron 5.74 2.61
Quinton Hazel triangular 4.66 2.12
Standard cast iron - lightened 4.84 2.2
Mini Spares C-AHT230 SG iron 3.56 1.62
Farndon Engineering steel 3.34 1.52
If the pressure plate clutch plate friction face needs re-surfacing, machine to clean, carefully recording the amount taken off. Once done, the recorded amount needs removing from the tops of the 'horns' that stick up to ensure proper clamping force is achieved. If using a pressure plate of unknown history, it is IMPERATIVE the clutch drive straps are set at the correct height. Many get this wrong and end up with a slipping clutch for some seemingly unfathomable reason. The following should also be carried out if the flywheel has been machined, or of unknown history also:
- Place the pressure plate 'horns' upper-most on something to hold it off of the work surface
- Place the clutch plate in position, with the protruding primary gear spline boss on the underside facing the work surface.
- Place the flywheel in position.
- If the drive straps are holding the flywheel up, or are under tension pressing on the pressure plate 'horns', more spacer-washers/shims are needed between the drive straps and flywheel.
- If there's a gap between the drive straps and pressure plate horns, the spacing between the straps and flywheel needs reducing.
- If no drive straps are fitted, using a straight edge or drive strap fitted to one of the horns, measure the existing gap between flywheel surface and underside of straight edge/strap, and make suitable spacers to this measurement.
The idea is set the straps so that when in 'as assembled' position, they are not under tension, nor are well clear of the pressure plate horns. They should be JUST touching. Under tension the clutch will slip due to decreased clamping pressure. Too far clear may cause disengagement problems.
Useful part numbers:
As indicated in text.